Home » Entrees » Recent Articles:

Warm Italian Crab Salad

December 21, 2012 Appetizer, Entrees, Menu No Comments

Now that we are just a few days away from celebrating the Feast of the 7 Fishes, which is one of the biggest and most important meals of the Italian and Italian-American culture, I am sure that most of you already have your menu planned. If you are looking for one more addition to your table, or another way to dress up one of your traditional dishes, this warm crab salad recipe is a tasty and versatile solution! With just a few basic ingredients and about 10 minutes of simmering on your stove-top, you can have this dish ready to be served in no time as an appetizer with crackers, mixed with a pasta in garlic and oil or even used as a stuffing in one of your other dishes.

From my kitchen to yours, I wish you a very Blessed and Merry Christmas.

Buona Natale!


WARM ITALIAN CRAB SALAD

1 red bell pepper, diced
1/4 cup chopped onion
1/4 cup chopped celery
2 tbsp. butter
2 tbsp. white wine
Juice of 1 lemon
8 oz. canned crabmeat*
1/3 cup seasoned breadcrumbs

*8 oz. of canned crab meat equals two 6 oz. cans (found with other canned fish) drained, or a half of a 1 lb can of pure packed crab meat (found in grocery store seafood section)

Heat butter in a pan until melted. Add onions and celery; heat until soft. Add crab meat, wine and lemon juice; stir. Add breadcrumbs, stir until warm. You can then serve it on top of pasta with garlic and oil or as an appetizer with crackers, as pictured below.

crab 1

crab2

Share

Broiled Rainbow Trout with Cannellini Beans and Pancetta

November 27, 2012 Entrees, Menu No Comments

After getting through yet another Thanksgiving weekend filled with way too much food and celebration (what other kind of holiday weekend is there, really?) I decided yesterday to switch gears completely and go with a healthy (ok, healthier) dinner. One of the meals that I enjoyed a few weeks back while on vacation in Disney World was broiled rainbow trout served over a mixture of white beans, arugula and bacon. It was definitely on my ‘to do’ list to recreate this dish, and yesterday was the perfect opportunity.

Instead of using bacon, which is always paired nicely with rainbow trout, I opted for one of my favorite Italian go-to accent ingredients…pancetta! I also wanted to substitute a more hearty green for the arugula, and went with a nice side of broccoli rabe. You can also use a more leafy green, such as sauteed swiss chard or escarole and incorporate it into the bean mixture. Because broccoli rabe is more of a chunky green, it works better as a side dish in this instance.

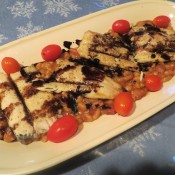
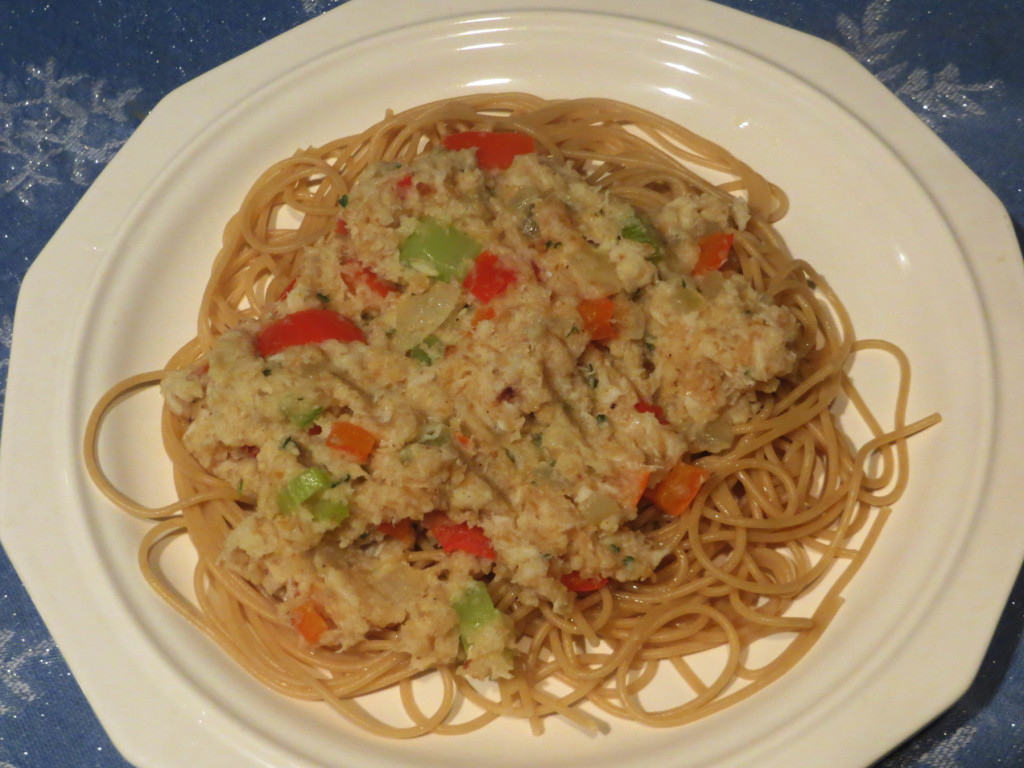
Assembling this dish was fairly easy: first sauteing the pancetta and beans in a skillet, then seasoning and broiling the trout. Plating this dish rustic style is the best way to serve it – simply place the broiled trout filets over the bean mixture, and drizzle with a balsamic reduction. The rustic presentation will make for a nice dish to serve this holiday season at a dinner party…or better yet, as part of your Feast of the 7 Fishes.

Broiled Rainbow Trout with Cannellini Beans and Pancetta

1 15 oz can cannellini beans
4 oz (or two 1/4″ thick slices) pancetta, sliced into small cubes
1/4 cup chopped onion
1 cup chicken or vegetable broth (your choice)
2 filets rainbow trout
olive oil
salt and pepper
1 cup balsamic vinegar

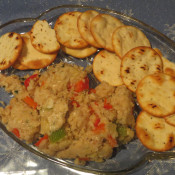
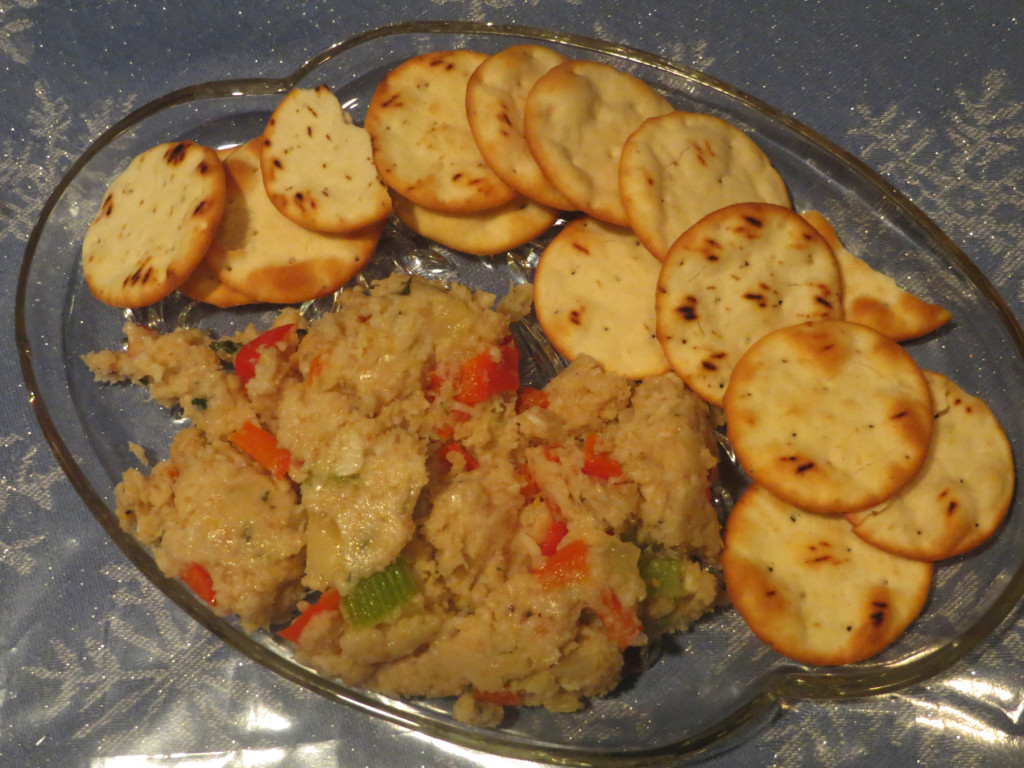
Step 1: Prepare the Beans
In a large skillet over medium heat, add 2 tbspns olive oil. Add the onion, stir and cook until translucent. Add the pancetta and stir together. Cook over medium heat for about 8-10 minutes, or until pancetta becomes slightly crisp. Add a bit of the broth as needed to keep the pancetta from sticking to the pan. Drain the beans, then add to the pancetta. Stir and cook for about 3-5 minutes until beans are warmed, again adding more broth as needed to keep from sticking to the pan. Remove from heat, cover to keep warm. You can also add sauteed greens to the mixture, such as swiss chard or escarole.

Step 2: Prepare the Rainbow Trout
Turn your broiler to 500˚, placing the cooking rack closest to the top. Lightly oil the filets on both the meat and skin side, season with salt and pepper. Cover a baking dish with aluminum foil and lightly oil. Place the filets on the dish, skin-side down. Broil for 4-5 minutes, or until the trout starts to flake. Check it often to make sure it does not burn. Carefully remove from broiler. The skin should peel off easily at this point (you can also remove the skin as you serve the fish).

Step 3: Plating the Meal
Using a large serving dish, spread out the bean mixture evenly. Place the filets on top of the beans. You can break the filets into smaller pieces for easier serving. Drizzle with a balsamic reduction*. Serve with a nice, crisp white wine.

*Balsamic Reduction
To reduce balsamic vinegar simply means to cook it in a skillet or pan until it starts to thicken. Because it reduces, you want to use about 4 times as much as you will need for drizzling. For this recipe, you will use 1 cup balsamic. Pour the balsamic into a skillet over medium-high heat. Bring to a boil, then lower the heat to a simmer until it starts to thicken up (about 3-5 minutes total). It will continue to thicken up after you remove the pan from the heat, so be sure to remove it from the heat while it’s still a just a bit thinner than you prefer. Drizzle over the fish.

And speaking of Disney….

I finally got to personally meet and spend some quality time with my favorite celebrity chef!


Share

Fall Spaghetti Squash

October 3, 2012 Entrees, Menu No Comments

Looking for a healthy and tasty seasonal side dish that’s quick and easy to prepare? Try a little spaghetti squash! Along with the other variety of squash that are popular this time of year (acorn, butternut and pumpkin), spaghetti squash are easy to find at farmers markets and in your grocer’s produce section. While I do enjoy the taste and various textures of all the squash mentioned above, the spaghetti squash, in my opinion, is easiest to prepare. The spaghetti squash, which is oblong in shape, shares the same hard exterior flesh as the other squash when raw. When cooked, however, the interior of the spaghetti squash falls from the flesh in strands or ribbons, similar to spaghetti.

There are a few different ways to prepare spaghetti squash, the most common being baked in the oven, sliced in half, cut-side face down in a baking tray filled with a bit of water. While I am not a big fan of using the microwave these days, the spaghetti squash is actually very easy to prepare in ‘nuker’. Whether you are preparing the squash at meal time or in advance, the cooking and prep time are just a few minutes. Once the squash is cooked, you can toss it with spaghetti sauce, a little salsa, or even just some butter and parmesan cheese. This, of course, being my favorite season of the year, I couldn’t resist sharing with you my autumnal take on this dish. Just follow the simple steps below, making sure to handle the squash VERY CAREFULLY once cooked. While microwaving the squash does save lots of time, the squash will be extremely hot when done and will need to be handled with a towel or an oven mitt.

FALL SPAGHETTI SQUASH

1 spaghetti squash
1 tbspn brown sugar
1 tbspn butter
1 tspn vanilla extract
Salt and Pepper to taste

Generously pierce the skin of the squash. Place in the microwave at high for 3 minutes. CAREFULLY remove the squash, let sit for a few minutes, until cool enough to handle. This will soften the flesh and will allow you to easily cut the squash in half length-wise and scoop out the seeds. Lightly moisten the inside of both halves of the squash with some water. Place both halves cut-side face up back into the microwave, and cook on high for 4 minutes. CAREFULLY remove the squash and again set aside for a few minutes until cool enough to handle. Using a fork, gently scrape the inside of the squash into a bowl. The inside will fall off of the flesh in strands similar to spaghetti. Add the brown sugar, butter, vanilla, salt and pepper. Stir and serve.

Note – you can adjust the amount of brown sugar, butter and vanilla to your liking. You can also add other fall favorite spices to this, such as nutmeg, cinnamon or allspice. You can also add pecan pieces for a little crunch.

Share

Stuffed Peppers and Eggs

September 24, 2012 Entrees, Menu 1 Comment

Some of my favorite go-to meals during the week, especially on the days when there’s not a lot of time to prepare a big meal, are the old-fashion standards. Potatoes and eggs, pasta and beans, a quick soup, and my personal favorite, a nice peppers and eggs sandwich. For this post, we’re going to get a little creative with the peppers and eggs. This recipe will save you prep time, as the peppers and eggs bake in the oven instead of on the stovetop. It also makes for a nice looking presentation if you’re serving it as a meal any time of the day for family and friends.

Bell peppers (green or red) work best for this. Instead of dicing your bell peppers, you are simply going to cut the pepper in half length-wise, from the top of the stem to the bottom of the pepper. No need to remove the stem, it helps with the presentation. Gut out all of the seeds, but be sure not to puncture the pepper. You don’t want any holes in the pepper (I’ll explain why in just a bit). Lightly wipe down the peppers, both inside and out, with a little olive oil. Place the peppers cut side up on a lightly greased baking dish.

Next, you’ll want to mix up your eggs. You’ll need two eggs per pepper. I use a basic mixture of egg, salt, pepper and some parmesan or feta for taste and texture, topped with a little bruschetta. You can add whatever ingredients you normally like to add to your eggs. Chopped mushrooms, bacon bits, ham, onion….go wild!

Carefully pour the egg mixture into the pepper halves, almost to the top of the pepper. This is why it is important that you do not puncture the peppers…you don’t want your batter to run out all over the baking dish. You can then top the peppers with shredded cheese, breadcrumbs, sliced tomatoes, salsa…again, whatever you prefer with your eggs.  Place the tray into a 350º pre-heated oven. Bake for approximately 30 minutes, or until the egg batter has set firmly in the peppers. Serve immediately.

*Note – if you add liquid to your egg mixture, say milk or water, or a liquify salsa mixture, you will need to add additional baking time for the egg batter to settle. Keep checking on the peppers and eggs, just to make sure that they don’t burn.

Share

Recent Comments

Archives

powered by
Socialbar