You know what happens when very passionate cooks duke it out in the kitchen? Those of us standing on the sidelines win!
Be prepared to win big in the latest war between the Mamma and the Cucina. These dueling cooks are about to go spoon to spoon in Gravy Wars! Yes, inspired by my book (pause for a little pat on the back), Una Mamma Italiana and Cucina Domenico are preparing to unveil their secret gravy (or sauce, if you will) recipes to the entire universe. They want you to vote on whose recipe is best. It’s a virtual taste-test. You will be asked to judge based on your interpretation of the info presented by our beloved bloggers of cookery.
This, my friends, is the crux behind “Gravy Wars | South Philly, Foods, Feuds & Attytudes!” You don’t need to be Italian, a professional chef, or a native of Philadelphia to be sucked into legitimate kitchen competition. All you need is a passion for food and a mild interest in preparing it, and before you know it, you too will become competitive and possessive in the kitchen.
It truly is a phenomenon to behold!
Oh, if only we could get the Mamma and the Cucina to dole out their signature sauces to the entire social media world at some place like the Superdome. Ah, maybe someday. Alas, we’ll have to settle for the online battle.
Be sure to get your friends, relatives, co-workers, Farmville competitors, and acquaintances of all types to weigh in on this match. Who knows? With enough hype, we may just get these two to Louisiana yet!
– Lorraine Ranalli
NOW, Let the Gravy Wars begin!!!!
THE MAMMA’S SUNDAY GRAVY
Let me begin by saying that Sunday gravy is a lot like a marriage – the more love you put into it, the better it gets. A good gravy recipe perfects itself over time, and my recipe is definitely age old. My great grandmother taught it to my father, who taught it to me, and NEVER with a recipe! So like Dom, I had to endure the sheer agony of writing down my measurements and step by step instructions. I kid you not, people, this took me a week. It’s hard stuff when you’re assuming that some gravy crazed paisan out there is reading this recipe and isn’t quite sure what a ‘pinch’ or a ‘shake’ of something is. (who am I kidding – neither do I). The fact is, there are not any words to describe the attention to detail that goes into my “Nonni’s” recipe for red gravy.
This is appropriately called gravy because of the fact that it is derived from the juices of MEAT. In our case, we’re talkin pork shoulder and meatballs. Check out the recipe, copy it, change it, whatever you please – just don’t miss out on the opportunity to start a Sunday gravy tradition in your family! Buon Appetito!
3 28 oz. cans whole peeled tomatoes (preferably San Marzano)
1 6 oz. can tomato paste
Extra virgin olive oil (enough to sear the pork and then to barely cover the onions)
3 TB butter
2 lb. pork shoulder
2 onions, chopped
8-10 cloves garlic, sliced
2 cans water
Salt and pepper to taste
1 TB sugar
2 TB Italian Seasoning
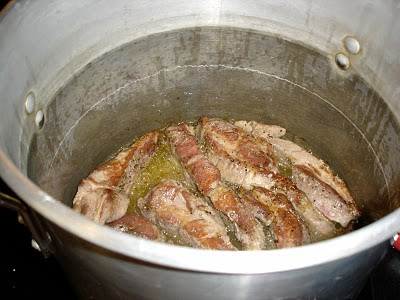
Season the pork shoulder with salt and pepper. Start with enough e.v.o.o. in a pan to sear the pork on both sides. Remove the meat and set aside. Throw in the onions (then the garlic about 5 minutes later) adding enough oil to just barely cover the onions. It looks like a lot but it is the emulsifier you need to get this sauce good and creamy once blended. Add the butter at this point to aid in simmering the veggies. *disclaimer: Lorraine Ranalli, Gravy War QUEEN, might be judging me right about now, but all I can say is WATCH OUT! because butter is quite possibly my second favorite thing to cook with (the first, of course, being my hubby)!
Mix in the tomato paste and cook for 5 minutes. Add the cans of tomatoes and the water. Mix together then blend with hand blender until smooth. Put the meat back in. (at this point, you would add your meatballs too, if you made them. I like to fry my meatballs and sear the pork in the same oil. Then I would set aside BOTH meats until after the sauce is blended. Then add the meats back to the sauce pot.)
Season the sauce with salt, pepper, Italian seasoning, and sugar. Simmer 2- 3 hours, or until the meat is cooked thoroughly. 1/3 hour before serving, double check your seasoning and make adjustments accordingly.

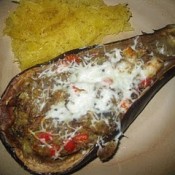
How to serve?
Over pasta and with a big chunk of Italian bread to soak up the gravy with. Is there any other way?
DOM’S SUNDAY GRAVY
I have made countless pots of gravy since I was literally a kid, but only in the past few years have I really zeroed in on a specific recipe. However, I have never followed a written recipe. It was always from memory, or whatever mood I was in that day. Although I found it a bit painstaking (as I believe this should be a free-form dish), I documented every measurement while making this version of my gravy.
First, let me address the whole gravy versus sauce issue. There are countless opinions on the subject. When I hear “sauce,” I think Marinara. Quick. Delicious, nonetheless…but quick.You heat your oil and garlic, add your tomatoes, onions, seasonings, maybe even some meat or even shrimp, and in 20-30 minutes you have a tasty meal. Gravy, on the other hand, is a bit more complex. My guess (and this is only a guess) is that the term comes from the flavors of the meats that are incorporated. The “other” gravies (beef, turkey, chicken and pork) are, of course, made from meat drippings. So when you add your meats to your red sauce and let it simmer for a few hours, the meat flavors the sauce to make it a red gravy. But the main difference to me is the time, patience and love that you put in to your gravy (I was gonna go with blood, sweat and tears, but that would be gross). You treat your pot of gravy as if it were a child. You raise it and nurture it, from it’s infant stage until it matures.
I always add meatballs to my gravy, usually with either sausage, boneless country spare ribs, or brasciole (thin steak stuffed with a breadcrumb mixture and rolled up). I also prefer to bake my meatballs and sausage, instead of the traditional frying. It’s just as tasty, healthier for you, and frees up some quality time.
Before we get into the actual recipe…you’ll notice that I suggest adding two baby carrots to the gravy. This is an old trick that I learned a few years back. The carrots add a natural sweetness to the gravy, while at the same time they soak up some of the acid from the tomatoes.
Enjoy!
2 28-oz cans crushed tomatoes
1 29-oz can tomato sauce (plus one can full of water)
1 6-oz can tomato paste with Italian herbs
olive oil
1/4 cup finely chopped onion
2 cloves garlic, minced
2 tblspn Italian Seasoning (marjorim, thyme, rosemary, savory, sage, oregano and basil)
1 tblspn sugar
Salt and pepper to taste
1 beef bouillon cube
2 baby carrots
1 cup red wine(whatever you have opened)
1 loaf crusty Italian bread

Drizzle bottom of sauce pot with olive oil to coat on medium-high heat. Add chopped onion; stir for 1 minute or until onion is translucent. Add minced garlic; stir for about one minute. Add the two cans of crushed tomatoes, one can of tomato sauce plus one can of water, and one can of tomato paste; stir. Add Italian seasoning and sugar; stir. Heat and occasionally stir until slowly bubbling. Add bouillon cube, baby carrots and splash of wine; stir. Add salt and pepper to taste. Lower heat, slightly cover and simmer for one hour. Add cooked meats; simmer partially covered for 2-3 hours, stirring occasionally. Sip and enjoy the remaining cup of wine as you dip some bread into the gravy while it’s cooking.

Serve over your choice of pasta and enjoy!
One last note…if you decide to try either of our Sunday Gravy recipes, we would be delighted. But if you decide to alter our recipes, and add your own flavors or ingredients, we would be overjoyed. Experiment, adjust the flavors to your likings, and most of all have fun. And be sure to share your version of the recipe with us.