Last week I introduced you to Camaje Bistro and Lounge, and to chef/owner Abigail Hitchcock, as I shared with you highlights of my day in the Camaje kitchen. Today I am going to share with you the fun stuff…the menu and the tips and tricks that were passed on to me! Before we go any further, let me explain to you why you will not find step-by-step recipes in this blog post. My day in the kitchen was kind of free-form. As Chef Abby was guiding me along, we didn’t focus on specific measurements to the tee. While some ingredients needed measurements, a good portion of the seasonings were eyeballed and adjusted to taste. This was actually very comfortable for me. I’m Italian – nobody in my family follows exact recipes! Chef Abby also told me right from the get-go to absorb what I could that day, even if it wasn’t what I was used to doing. If I were to decide to try it another way on my own time, all the better. I encourage each of you to do the same, not only with recipes on my blog, but with all recipes in general. With that said, let’s head back to the Camaje kitchen!
Our meal for the day was broken up into three courses: an appetizer, a main course and a dessert, along with a fine bottle of wine to complement the meal. All courses were selected by my wife when the reservations were booked, so fresh ingredients hand picked by Chef Abby from the farmer’s market were all on hand that day. I had a hand in preparing, plating and presenting every course, and we were given plenty of time to enjoy each course before I headed back into the kitchen for the following round.
1st Course: The Appetizer
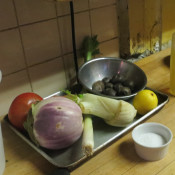
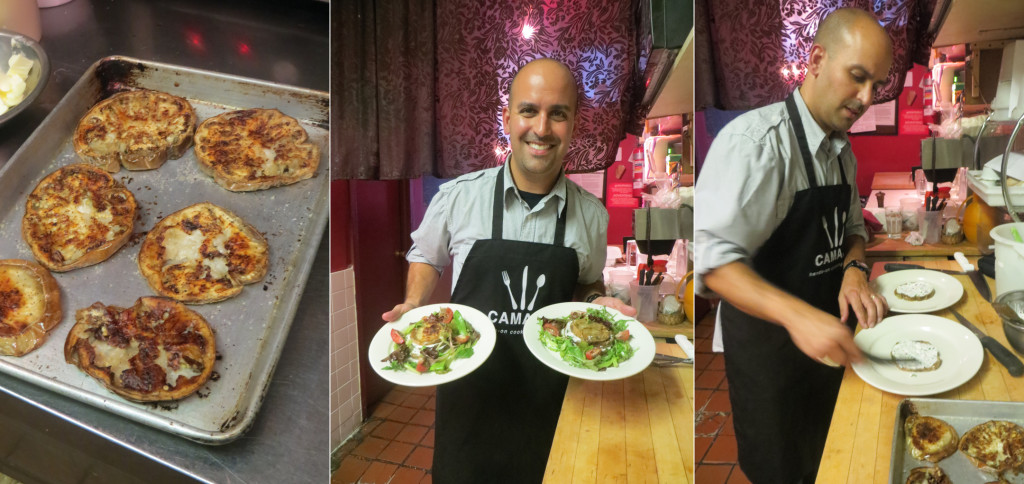
Our first course was Roasted Eggplant and Goat Cheese Napoleon. Chef Abby had me start the day’s duties by slicing up a beautiful Italian Eggplant (the short, bulbous variety that are a light purple and white tye-died color) into 6 even pieces, about 1/2″ thick.Right off the bat this was a bit different for me. We cook eggplant often, but I always prefer to remove the skin and slice the eggplants thin. Curious and excited to see where we were going with this this, I sliced away, then brushed each side with canola oil and seasoned with salt and pepper, then into the oven it went. The next step was to mix equal amounts of goat cheese and cream cheese, along with some finely chopped chives and some fresh thyme. A little heavy cream was whisked into the mixture to slightly thin it out. Once the eggplants were done roasting, and were golden brown on both sides, we assembled by alternating layers of eggplant and layers of the cheese, until each plate was three layers deep, served over a spring mix salad. My first dish out of a professional kitchen was a hit! The roasted eggplant and the creamy cheese filling melted in your mouth. Honestly, I could make an entire meal out of this dish alone. While I am still a fan of thin-sliced eggplant when preparing cutlets, the thicker and meatier slices were definitely the way to go with this dish!
2nd Course: The Entrée
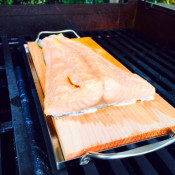
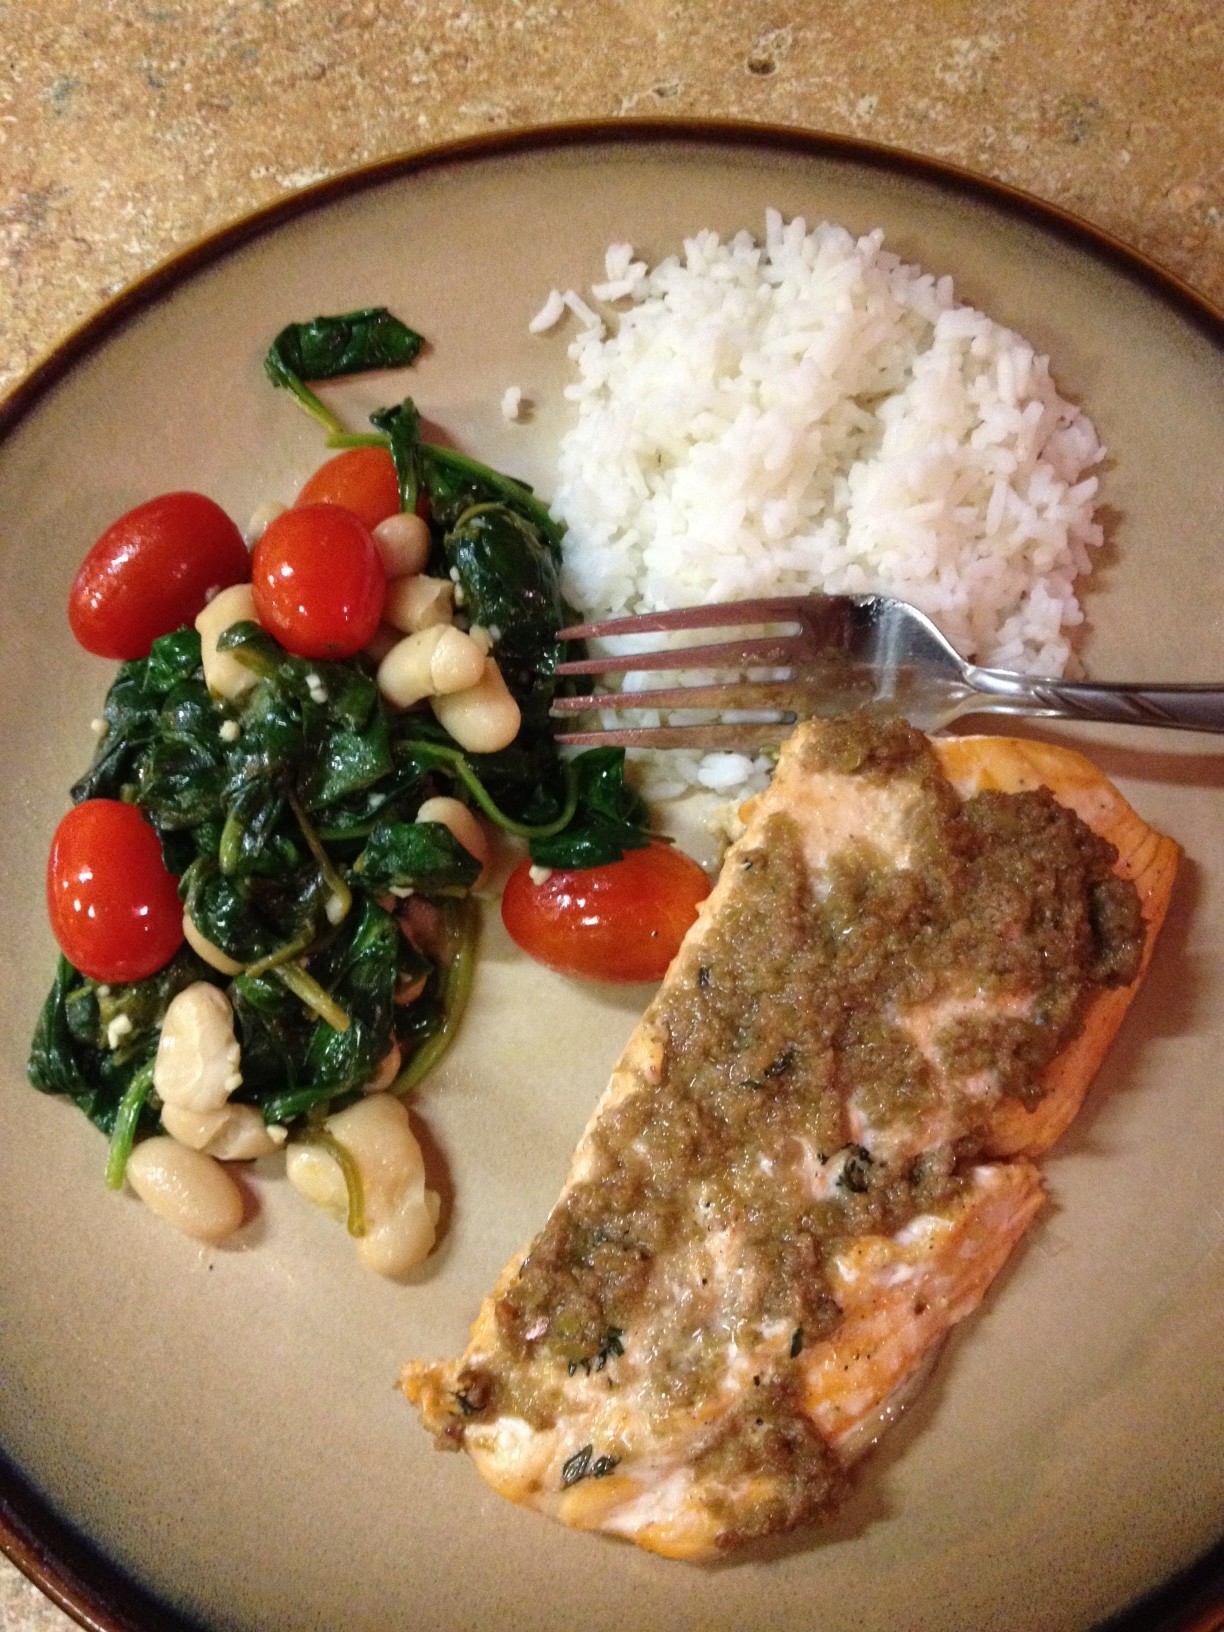
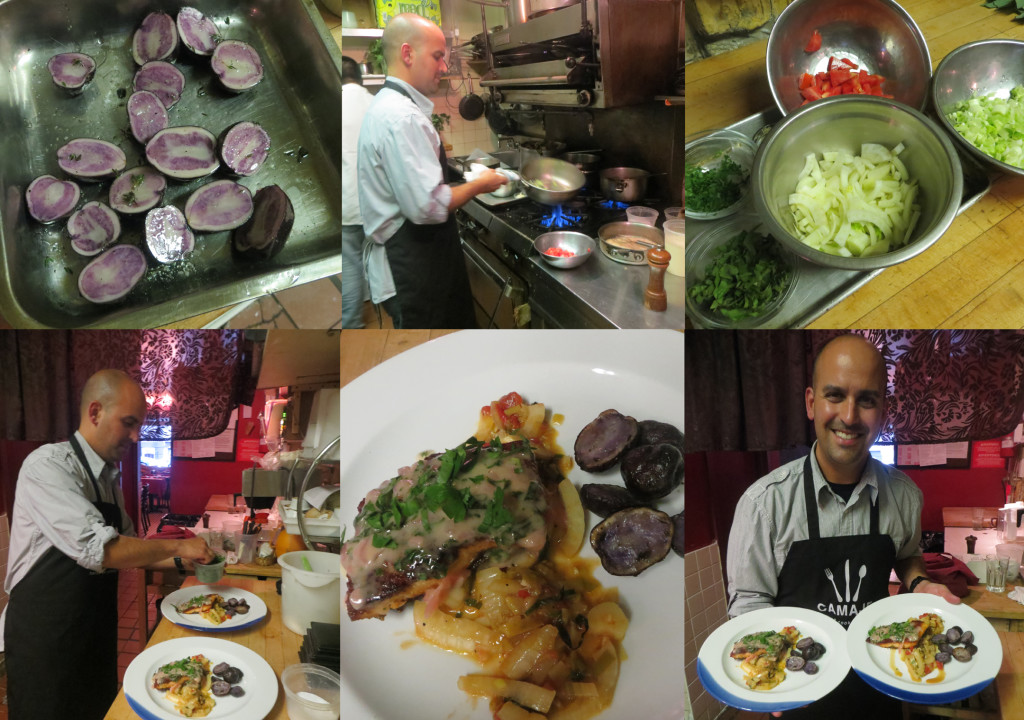
Our second course was Sautéed Wild Salmon with a Lemon & Herb Beurre Blanc and Market Vegetables. Because salmon doesn’t take long to prepare, we started with the vegetables. Chef Abby picked up some nice purple potatoes, which she had me slice in half, then drizzle with some oil, salt and pepper, then place in the oven for a nice roasting. If you never had purple potatoes, they are a fun addition to your plate if you are looking for presentation. The outer skin is a very dark purple color, and when you slice them open you find a fantastic purple swirl that holds up when cooked (kids also find them fun to eat!). We then sliced some fresh leaks, fennel, smashed garlic and tomato, seasoned with some salt and pepper and sautéed it in oil until the veggies were soft and their flavors were married together.
Next up was preparing the salmon. Chef Abby gave me the choice of grilled or sautéed. Since grilling is my usual choice for salmon, I went with sautéing so that I could take advantage of learning some new tricks. The prep was very easy, simply seasoning each side of the filets with salt and pepper, then placing them skin side up into a searing hot pan with some oil. Once the flesh side was cooked (about 5 minutes), we flipped the filets and put them skin side down. You’ll notice that the skin will start to curl once heated. After a few minutes, we flipped the filets to skin side up again, then placed the pan into the oven. The fish will continue to cook in the oven, without having the oils burn off. The outside ends up well done and slightly crisp, while the inside remains moist and full of flavor.
Last was the Beurre Blanc sauce. This is a quick and delicious sauce that is made up of a finely chopped shallot, fresh lemon juice, white wine, salt and pepper, fresh herbs (we went with the classic basil and parsley combination) and chunks of cold butter. You simply sauté the shallots in the wine and lemon juice until the liquid is almost evaporated. At this point you want to lower the heat and add the butter a few cubes at a time, whisking until blended. You want the butter to soften, but not cook in the pan. Melted butter is not the objective here. Season with salt, pepper and the fresh chopped herbs, and you end up with a heavenly, creamy and delicious sauce. Because of the delicate nature of this sauce, it can’t be made ahead of time. Once the sauce was done, we plated the salmon over the vegetables and topped with the sauce.
We eat salmon at home…a lot. Its our go-to fish. And I’ve prepared it a number of ways, my most famous being stuffed with pesto. This dish that I made with Chef Abby…off the charts! There is nothing like cooking with fresh ingredients, and this dish could not have proved that point any more. Chef Abby encouraged me to taste while seasoning throughout the entire cooking process, which no doubt made for better judgement and preparation. Two courses down, two thumbs up!
3rd Course: The Dessert
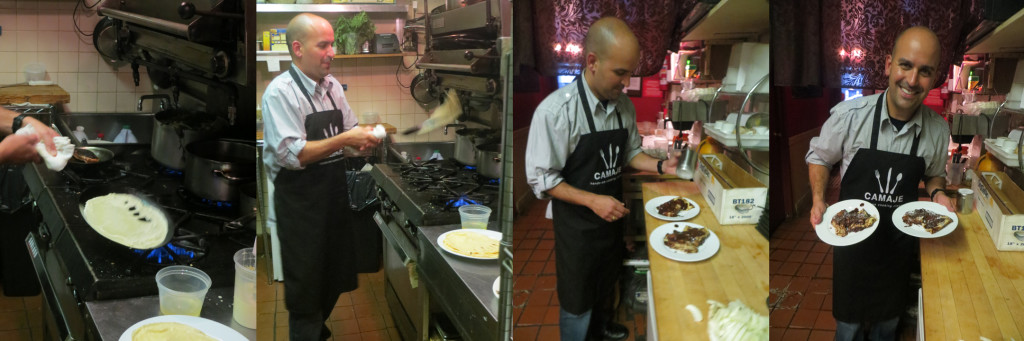
I’ll admit, this part of the meal is what I was waiting for all day. The choice that Daria selected for us was Caramelized Banana and Roasted Chocolate Crepes. Everything about this dish screams ‘winner’. I’ve made caramel sauce before, and anyone could slice bananas in their sleep. But making crepes? Lemme tell you…this was the biggest challenge of the day for me. A crepe, for those that do not know, is like a very thin pancake. You make a batter out of flour, eggs, milk, and sugar (if you are making sweet crepes). For savory crepe recipes, try leaving out the sugar and allowing the savory flavors to stand out. Unlike pancakes, you need to work fast. Very fast. Using a hot pan coated with oil or butter, you ladle the batter into the pan, and then you move the pan around to make an even, thin layer. After about 15 seconds, when the top starts to dry and the bottom becomes a golden brown, you shake the pan to loosen it and with a flick of the wrist, you give it a flip. You can use a spatula if needed…but Chef Abby made sure that we didn’t need no stinkin’ spatula. Chances are the first crepe you make will be a dud…as was mine! Luckily, the batter that we made was enough for a good 4-6 crepes. By the third crepe, I pretty much had it down. We then made a basic caramel sauce (heated butter and sugar), added in our bananas, and finished it off with some melted chocolate. We then gently folded the caramelized bananas into the crepes, plated them and topped with powdered sugar. Although a few of the crepes may have broken mid-flip, with just a few creative folds nobody would know the difference. If I said this dessert was off the charts, I would be lying. It was miles beyond the charts. No, I am not kidding, and yes it was THAT GOOD. Rich, decadent, gooey….HEAVEN.
Bonus: The Tips and Tricks!
As I said in part one of my Camaje recap, not only is Chef Abby a creative and knowledgeable chef, she also takes high interest in and has a thorough, educated understanding of the science of foods. Aside from guiding me through the A-MA-ZING meal mentioned above, Chef Abby was very gracious throughout the entire experience to share a few tips and tricks, such as:
• Avoiding teary eyes when slicing onions or shallots: most people, including myself, tend to shed a few tears when slicing onions. What causes this? The liquids that are extracted from the onion when rough-chopped (quickly rocking the knife over the onion, when mincing). This method, while quicker, is actually squashing the onion and is extracting the juice from the onion, which then helps produce tears in our eyes. Instead, try to delicately slice the onion, making sure to cut straight through instead of mincing. Also, be sure to keep the root end of the onion in-tact. This helps keep the onion together a bit more, and prevents it from falling apart while slicing. The onion may start to spread a bit, but can be kept under control with your fingers.
• Getting the smell of garlic off of your hands: when Chef Abby asked how I handle this, I confidently said “you use some lemon juice”. Nope. While the lemon juice does mask the garlic aroma, it doesn’t remove the scent. Next time, try rubbing your hands on your stainless steel sink, then rinse with water. Voila! No more garlic scent on your hands!
• How to chiffonade basil: while we were preparing the herbs for our sauce, Chef Abby asked if I knew how to chiffonade basil. When I told her that I wasn’t familiar with the term, she asked what I do to slice my basil. I said “well, I grab a few leaves, roll them tight like a cigar, then make thin slices that produce ribbon-like cuts”. Turns out I knew how to chiffonade basil all along!
• Select your oils accordingly: olive oil always seems to be the go-to oil when preparing meals, especially Italian meals. While rich and flavorful, olive oil has a low heat tolerance, thus will burn and smoke up when added to a high heat pan. Canola oil has a high heat tolerance, and is the better choice to use for high heat cooking.
• Cleaning leaks: when leaks are plucked from the ground, they tend to carry lots of dirt within their folds. To help remove the unwanted dirt, simply soak the leaks in cold water for a few minutes. The dirt will fall from the leaks and will pool up in the bottom of the bowl like wet sand.
• The wonders of Fleur de Sel: translated to “flower of salt”, it is a hand-harvested sea salt that falls under the variety of finishing salts. Used as a seasoning accent when plating rather than when cooking (just a small bit is needed), it adds a candy-coated texture when added to moist foods. We added a pinch to our sliced tomatoes in our salad. BOOM! Like magic, the tomatoes had a beautiful crunchy exterior. Again, just a bit goes a long way.
So there you have it, my friends. A recap of one of the most fun and fascinating days that I am sure to never forget, thanks to my wonderful wife, Daria, and my new friend, the gifted and talented Chef Abigail Hitchcock. I am sure that I am leaving out some details here, as there was so much to info that I absorbed. Hopefully my story and pictures have helped give you an idea of the wonderful experience that I had.
And if you are wondering, yes, Chef Abby did indeed pass along the recipes that were used to influence the day’s meal. I consider them a special gift and will treat them as such, therefore I chose not to post them word-for-word. But if you ask nicely, maybe I’ll invite you over and personally make one of the dishes for you. However, I make no promises on prerfectly-shaped crepes.
Camaje Bistro & Lounge is located at:
85 MacDougal Street, New York, NY 10012
Phone: 1 (212) 673-8184
E-mail: info@camaje.com
For more information on Camaje Bistro, click here.
To read more about Chef Abby, click here.
To view a preview video of Camaje’s Dark Dining event, click here.