Home » pizza » Recent Articles:

Flatbread Fridays

January 24, 2022 Entrees, Menu No Comments

Friday night pizza is a well known go-to dinner for many. Whether it’s home made pizza or ordered from your favorite neighborhood pizza shop, it is an easy and fun way to help celebrate the end of a long week. To help mix up this routine a bit, my daughters and I have started making flatbread pizzas once or twice a month. It’s a special day that we have named Flatbread Friday. 

Flatbread Friday is not so much about a recipe, but rather being fun and creative with whatever topping we decide to use for that day. To help keep it interesting, we often come up with themed Flatbread Fridays, often revolving around a specific ingredient. Some of our favorite themes have been Chicken Flatbreads (buffalo chicken, barbecued chicken, chicken with feta and spinach) and South Philly Flatbreads (cheesesteak, crab gravy with shaved parmesan, meatball parm, and pulled pork with broccoli rabe, provolone and roasted red peppers). We always make sure to include a traditional flatbread with mozzarella and sauce, and a white flatbread with extra garlic! Our favorite is the prosciutto and arugula flatbread. Nothing better than oven crisp prosciutto!

First comes the Flatbread

Instead of sharing a specific recipe, I thought it would be best to share some tips and tricks on how to make your own flatbread pizza. First, you need the actual flatbread. There are no specific rules or regulations for this. You can buy a variety of flatbread shells in the grocery store, usually in the bakery section. The shells could be rectangular or round, whichever you prefer. Even a Naan flatbread will work if you prefer. My personal choice is Brooklyn Bred Thin Pizza Crust. You can get two large shells or four small in a pack. Again, the key is to have fun. 

Pick your Toppings

The second tip is to go light on your toppings. Flatbreads are thinner than a traditional pizza crust, so there is a good chance of the flatbread folding or breaking if you go too heavy on the toppings. When adding a sauce, such as traditional pizza sauce, buffalo sauce or barbecue sauce, just a light coating will do the trick. The same goes for your toppings. Whether they are chicken, vegetables or meats, thin lightly chopped or shredded pieces work well. Try to avoid big chunks. 

Start the Oven

Preheat your oven to a nice, hot temperature. I prefer 425 degrees, which will cook your flatbreads in about 7-10 minutes. The best part of this is that you can make a variety, whether it is for a family of three or a party of twelve.  Get a variety going. Put out a bunch of toppings and let your family and friends make their own flatbread, Then slice them up and enjoy!

Flatbread Suggestions

Traditional – lightly brushed sauce, topped with shredded mozzarella and oregano

White – lightly brushed olive oil, topped with shredded mozzarella, grated parmesan cheese and garlic powder. You can also add pieces of prosciutto. Top with some arugula after the flatbread is cooked.

Pizzazz – thin slices of American or cooper sharp cheese, topped with hot banana pepper rings and thin sliced Roma tomatoes

Cheesesteak – cooked thinly shredded pieces of rib eye steak, mixed or topped with shredded provolone and caramelized onions

Porchetta – cooked thinly shredded pieces of Italian style pulled pork on top of sliced provolone. Topped with bits of broccoli rabe and roasted red peppers. 

Buffalo Chicken – cooked chopped pieces of chicken breast, either mixed with or placed on top of a thin layer of Buffalo sauce (home made or store bought), topped with bits of bleu cheese.

You can also check out this post in the Winter 2022 edition of RowHome Magazine!

Share

Cookin’ with the Gluten-Free Paisan: Ratatouille Pizza

September 6, 2018 Menu 1 Comment

I’m very happy to share with you my first collaborative recipe with my good friend, Mike DeStefano (aka The Gluten-Free Paisan). This is one of Mike’s favorite recipes that he and his wife often make….and with a combination of simmered fresh seasonal vegetables, tasty chicken breast and a mouth watering pizza crust, how could you go wrong?

Now, if you are at all familiar with the gluten-free diet, you may be wondering just how in the world could a pizza recipe that sounds so satisfying and flavorful as this be gluten-free? [The original recipe, which wasn’t gluten-free, was first published in Cooking Light]. The first, and most obvious substitute to make this recipe gluten-free would be the crust. Of course, you can use a traditional pizza crust (as I did) for this recipe. But if you are following a gluten-free diet, there are alternative pizza crust options available. You can find a number of gluten-free pizza crusts in the health food section of your grocery store. Common brands that you may find are Mama Mary’s, Smart Flour Foods, and Udi’s. Another popular pizza crust alternative is a cauliflower crust. These may also be available in the frozen food area of your grocery store’s health section. Of course, you can also find a number of recipes online for gluten-free pizza dough or cauliflower crusts, but it may take a little time to find a recipe that is easy to work with or has the taste and texture that you are hoping to achieve. So, if you are just starting to experiment with home made gluten-free doughs, the store bought version may be your best bet for now. But again, if you are not on a gluten-free diet or are not interested in a cauliflower pizza crust, then a traditional crust will do just fine.

Because Mike now follows both a gluten-free and Autoimmune Protocol (AIP) diet, he also made some necessary and tasty adjustments to the toppings so that both he and his wife could enjoy this delicious recipe without any concerns of dietary reaction or inflammation. Early on in his experimenting, Mike decided to leave off the tomatoes and eggplant (to avoid inflammation) and cheese (to cut back on dairy). There were plenty of other delicious flavors happening on this pizza, so the missing ingredients didn’t make the pizza any less enjoyable. Today, he has reintroduced tomatoes and eggplant back into his diet, which shows how patience and determination play into the AIP diet. Go Mike!

I had continued to make some further updates to the recipe, substituting certain toppings that may not be my personal favorite. We both thought it would be fun to not only compare notes both before and after, but to also share the results with the Cucina Domenico readers. Below you will find the original recipe, with ingredients marked with an asterisk (*) to indicate the adjustments that both Mike and I have made to suit our individual tastes.  Like all other recipes that have been shared on my food blog, we both encourage you to take this recipe and feel free to adjust it to your own liking.

(Although we didn’t get to actually work together in the same kitchen this time around, we did go back and forth sharing thoughts and ideas both before and after making this dish. I can only imagine the culinary magic that both Mike and I will make and share with you when we both get together in the kitchen, hopefully soon.)


RATATOUILLE PIZZA
Originally published in Cooking Light

1 teaspoon olive oil
1 red bell pepper, cut into 1/4-inch strips
1/2 small red onion, thinly sliced
1/4 teaspoon dried Italian seasoning
1/4 teaspoon salt
3 tablespoons finely chopped fresh flat-leaf parsley
Cooking spray

*1 Japanese eggplant, halved lengthwise and cut into 1/4-inch thick slices
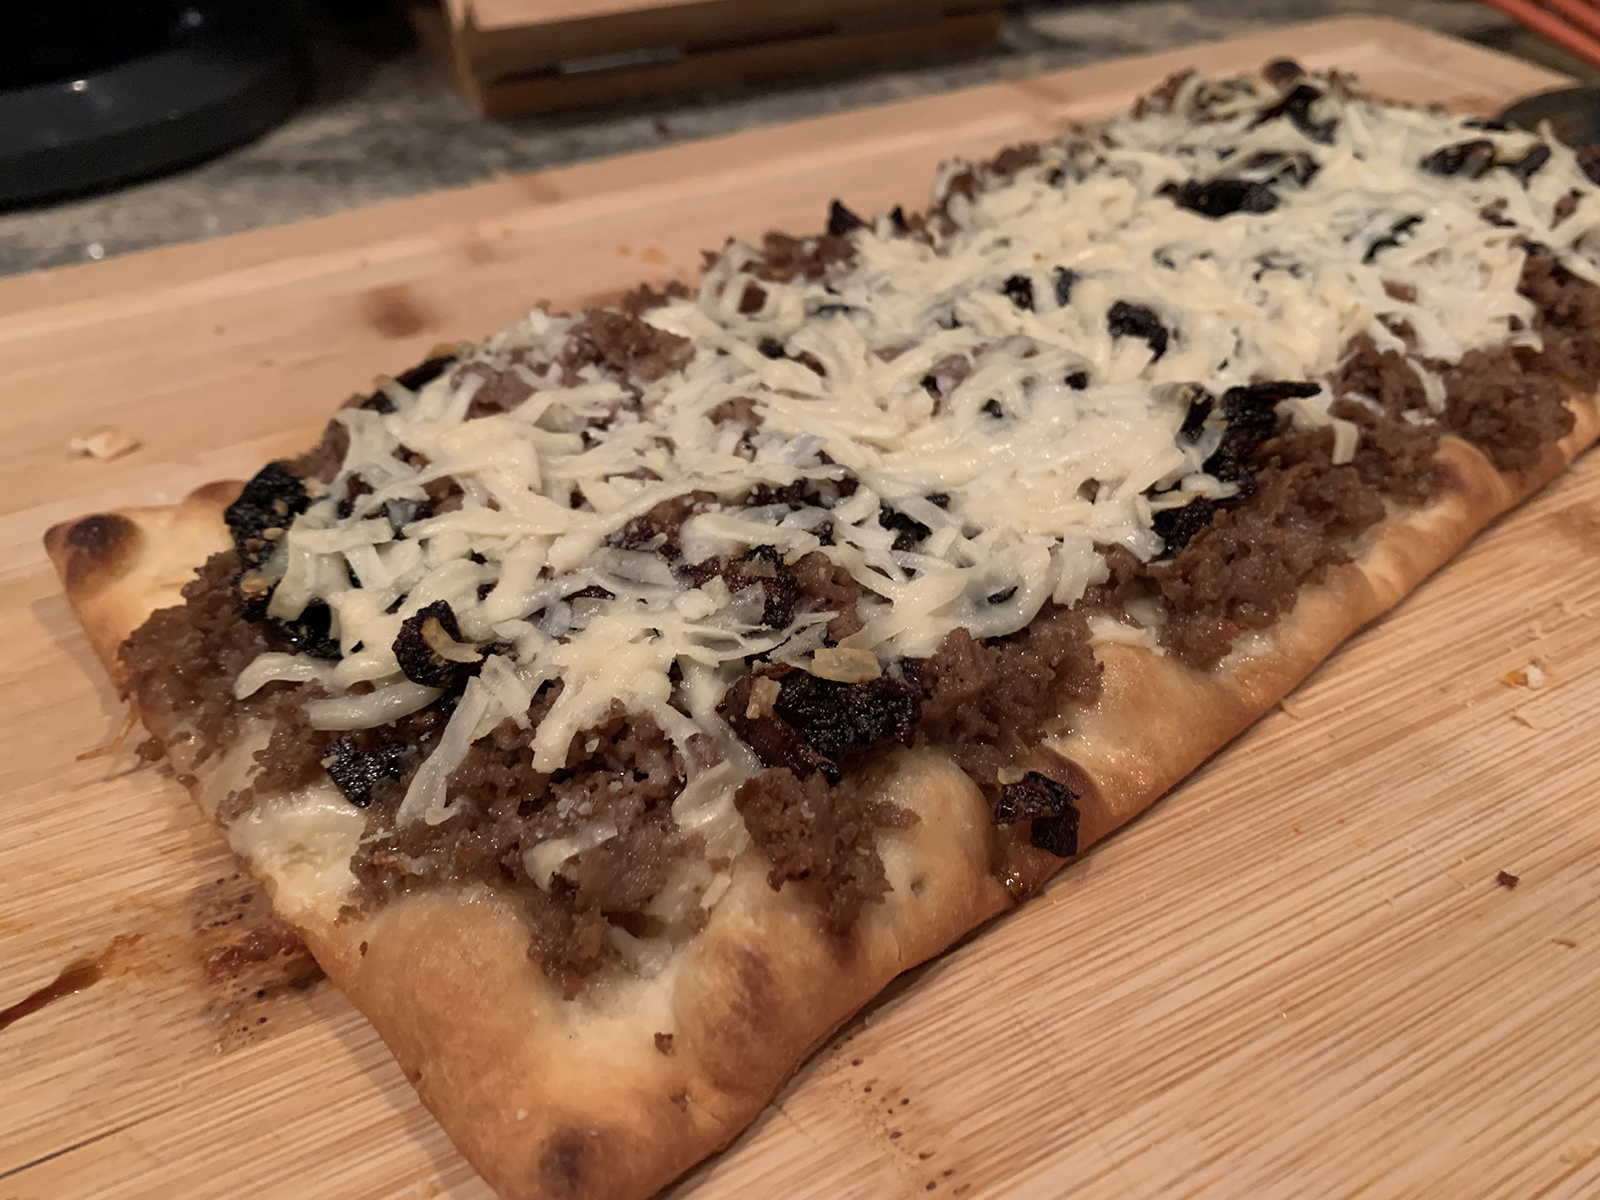
1 cup (4 ounces) shredded reduced-fat pizza blend cheese
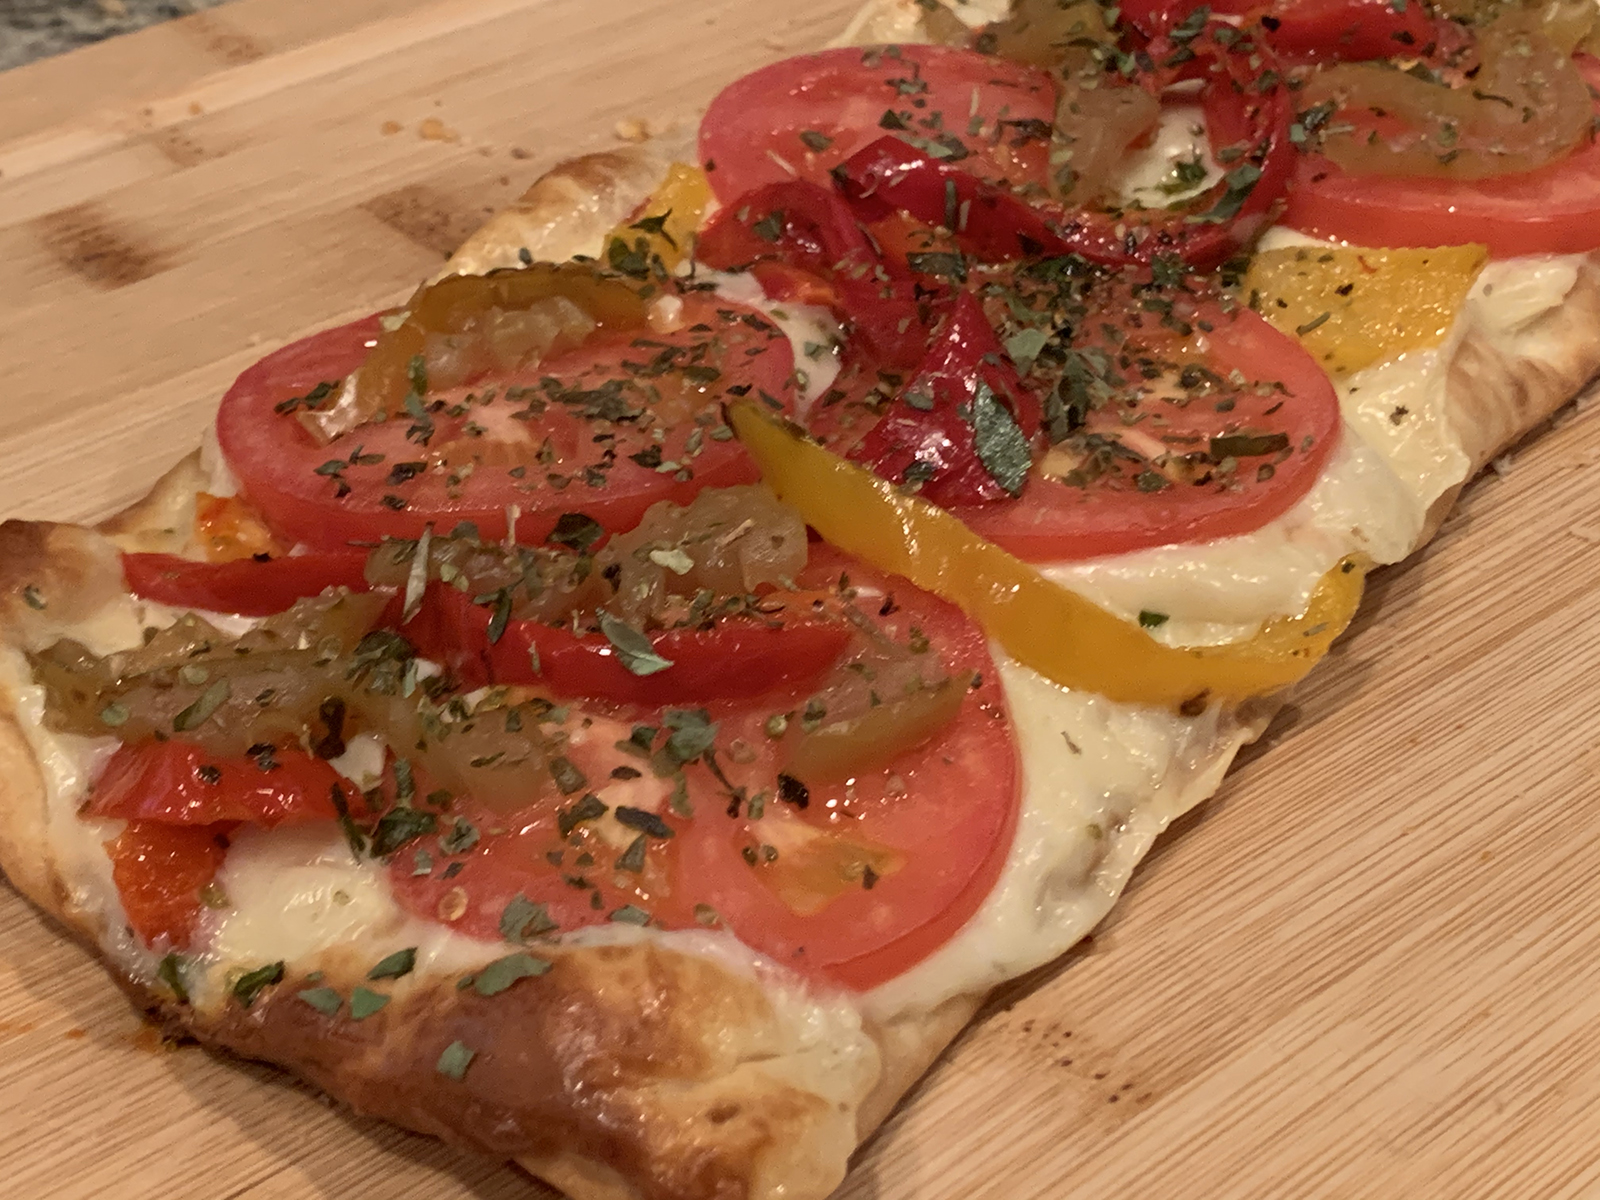
3 plum tomatoes, cut into 1/4-inch thick slices

**1 cup sliced mushrooms

***4 garlic cloves, minced
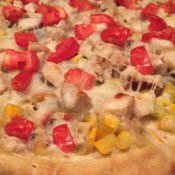
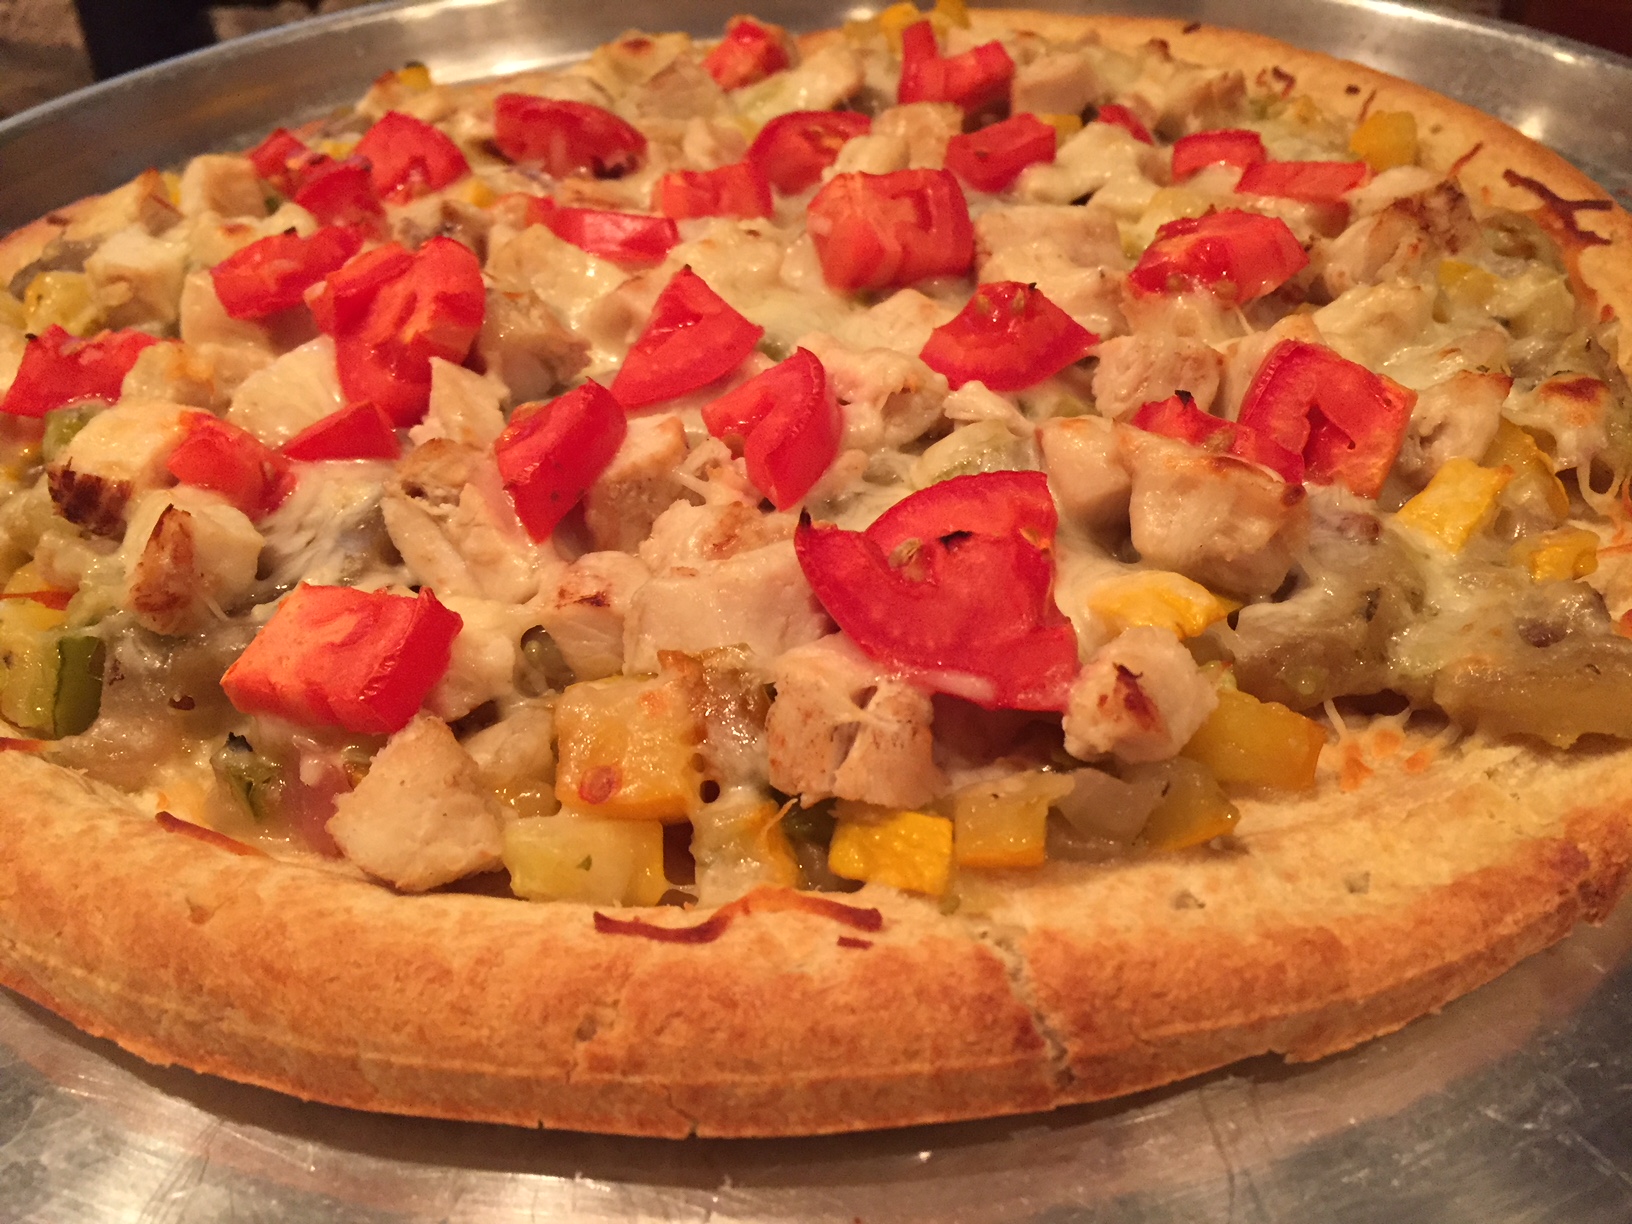
1 cup chopped skinless, boneless rotisserie cooked chicken breast (about 6 ounces)

****1 (10-ounce) Italian thin crispy pizza (such as Boboli)

Preheat oven to 375˚.

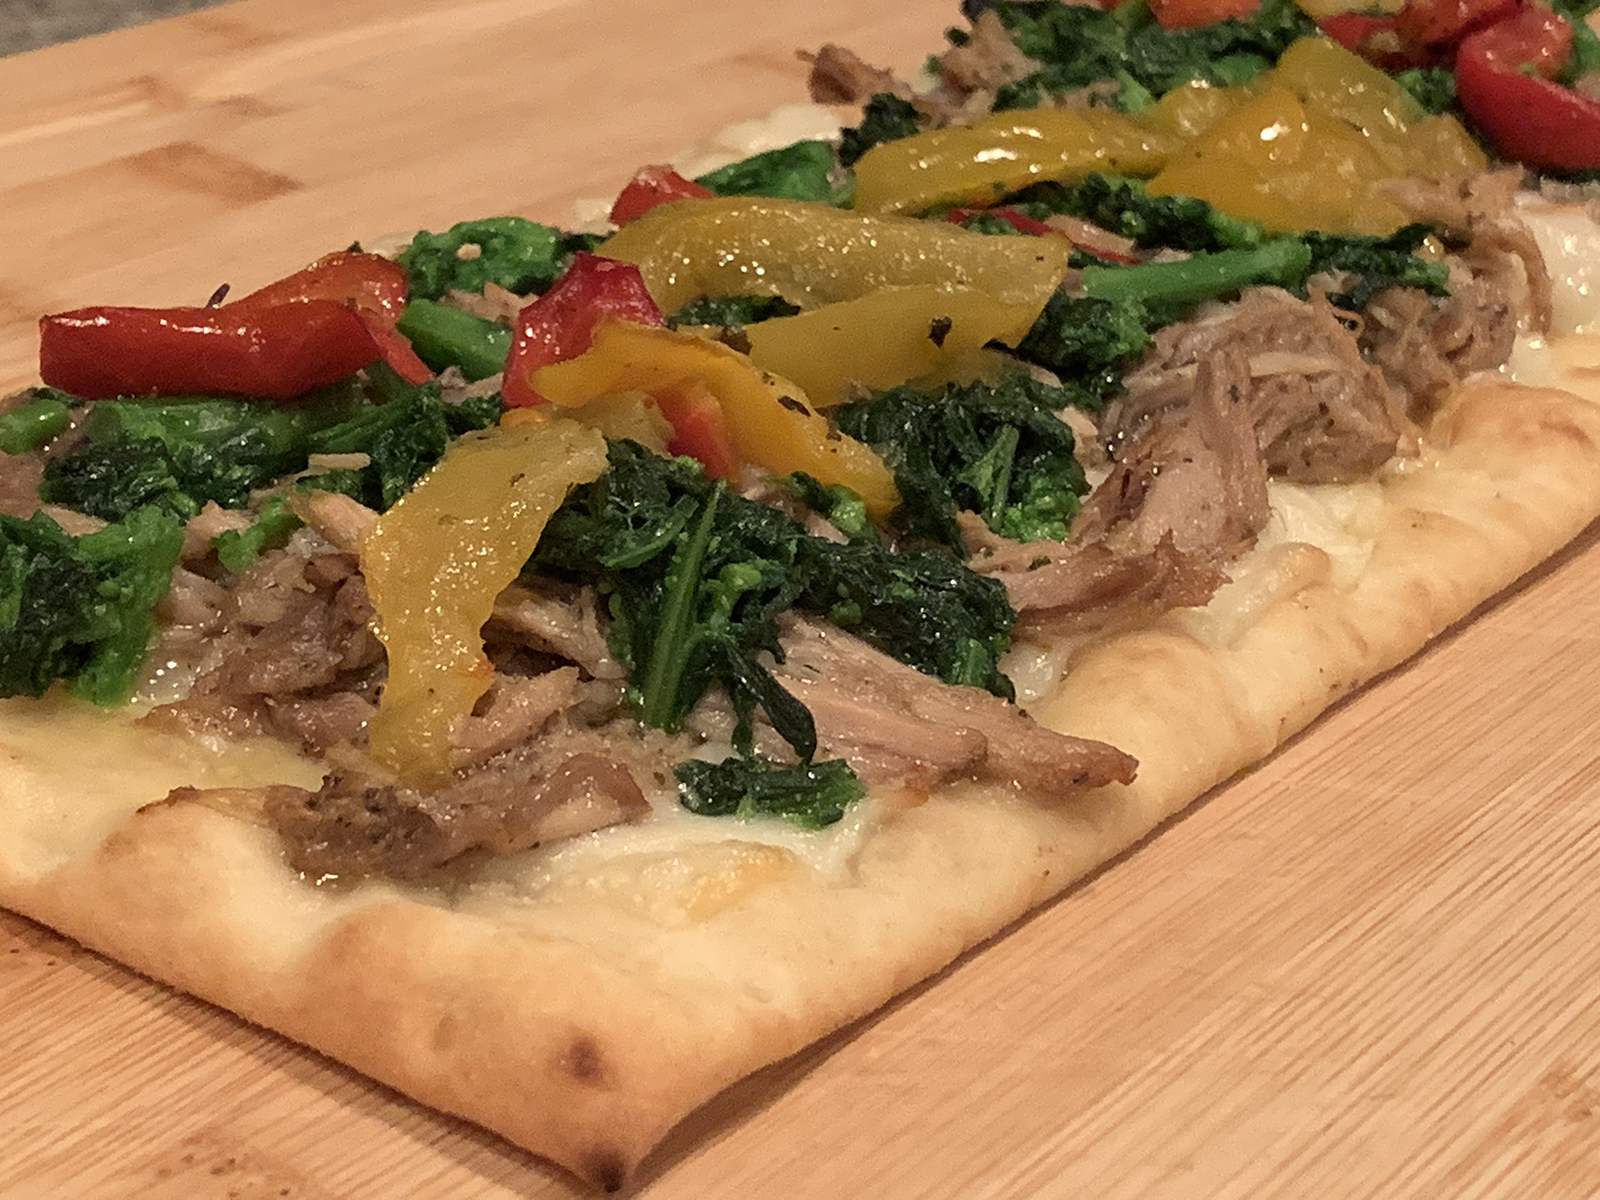
Heat a large nonstick skillet over medium-high heat. Add oil to pan. Add eggplant, bell pepper and onion; sauté 3 minutes or until eggplant begins to soften. Reduce heat to medium. Add mushrooms; cook 3 minutes, stirring frequently. Add Italian seasoning, salt and garlic; cook 1 minute, stirring mixture constantly. Remove from heat.

Place crust on a baking sheet or a pizza stone (pizza stone is recommended). Spread vegetable mixture evenly over crust, leaving a 1/2-inch border. Arrange chicken over vegetable mixture; sprinkle evenly with cheese. Arrange tomato slices over cheese, and lightly coat with cooking spray. Bake at 375˚ for 25 minutes or until cheese is bubbly and tomatoes are softened.

Slice, serve and enjoy!


Mike and Dom’s Adjustments

*  Because Mike is following both the gluten-free and AIP diet, he has slowly had to work on reintroducing eggplant and tomatoes – which are two key food sources that can cause inflammation – back into his diet. He is also watching his dairy intake. If you are currently adjusting to an AIP diet, the eggplant and tomatoes can be left out without making this pizza taste any less flavorful or satisfying. There are still plenty of tasty ingredients, so the absence of the eggplant, tomatoes and cheese make for a minimal change.

** Dom is not a fan of mushrooms, so he replaced the mushrooms with diced yellow squash. This made for a great substitute, and could be added along with the mushrooms if you prefer both.

*** Dom really likes garlic. Mike LOVES garlic. While Dom went with four healthy size garlic cloves, Mike went all in and kicked it up to five cloves. Adjust the garlic to your taste and preference.

For the chicken, Dom went with cubed and Mike went with shredded. Apparently both were off the hook!

**** The pizza crust is open to your taste and preference. While a store bought shell will do the trick, feel free to use your own home made crust recipe. However, be sure not to go too thin while rolling out the crust, as the toppings are a bit heavy. If you are looking for a gluten-free option, you can find fresh or frozen gluten-free crusts from Smart Flour Foods, Udi’s or Mama Mary’s. Frozen cauliflower crusts are also available, or you can even experiment with making your own cauliflower crust or home made gluten-free pizza dough using  cassava flour (various recipes are available online).

Share

A Little of This and Some of That: Thinking Outside the (Pizza) Box

February 4, 2016 Entrees, Menu No Comments

The big game is quickly approaching…it’s Super Bowl weekend, and I’m sure that many of you are already planning your game day party. No doubt that one of the signature foods that appears at big game parties, or any type of party or get together, is pizza. In today’s podcast I want to share with you some of my ideas and suggestions on how to put your personal touch on a home made pizza party, with a variety of ingredients and cooking methods…so today, we are thinking outside of the box…the pizza box, that is! Game on!


Share

Pesto Bread Twists

December 30, 2015 Appetizer, Menu No Comments

The big New Year’s Eve party is just hours away…and you’re still trying to figure out what appetizer to bring or serve? This easy recipe is a quick and perfect solution. Before I get into the steps, yes you can use your own pizza dough recipe or your own pesto recipe if you wish.  But for a quick time-saving solution, a jarred pesto and pre-made pizza dough will definitely do the trick.

Assuming we’re going the quick route, you’ll need one tube of thin crust square pizza dough, or your favorite pizza dough rolled into a thin square, one jar of pesto and one egg. And that’s it. Seriously! Simply pre-heat your oven to 425˚, follow the steps below, and in under 15 minutes you will have a tasty and zesty appetizer that will be sure to please.


Step 1: roll out the dough, making sure to keep it thin.

Step 1: roll out the dough, making sure to keep it thin.


Step 2: Cut the dough in half, length-wise.

Step 2: Cut the dough in half, length-wise.


Step 3: Top one of the halves with pesto, leaving at least 1/2"border on all four sides.

Step 3: Top one of the halves with pesto, leaving at least 1/2″border on all four sides.


Step 4. Place the second half of the dough on top of the pesto-coated piece.

Step 4. Place the second half of the dough on top of the pesto-coated piece.


Step 5: Cut the layered dough into 1-1/2" wide strips.

Step 5: Cut the layered dough into 1-1/2″ wide strips.


Step 6: Twist the slices, place them onto a greased baking sheet, and brush with an egg wash.

Step 6: Twist the slices, place them onto a greased baking sheet, and brush with an egg wash.


Step 7: Bake in 425˚ oven for 8-12 minutes, or until the tops start to brown. Serve and enjoy!

Step 7: Bake in 425˚ oven for 8-12 minutes, or until the tops start to brown. Serve and enjoy!


pestotwist10


Share

Recent Comments

Archives

powered by
Socialbar