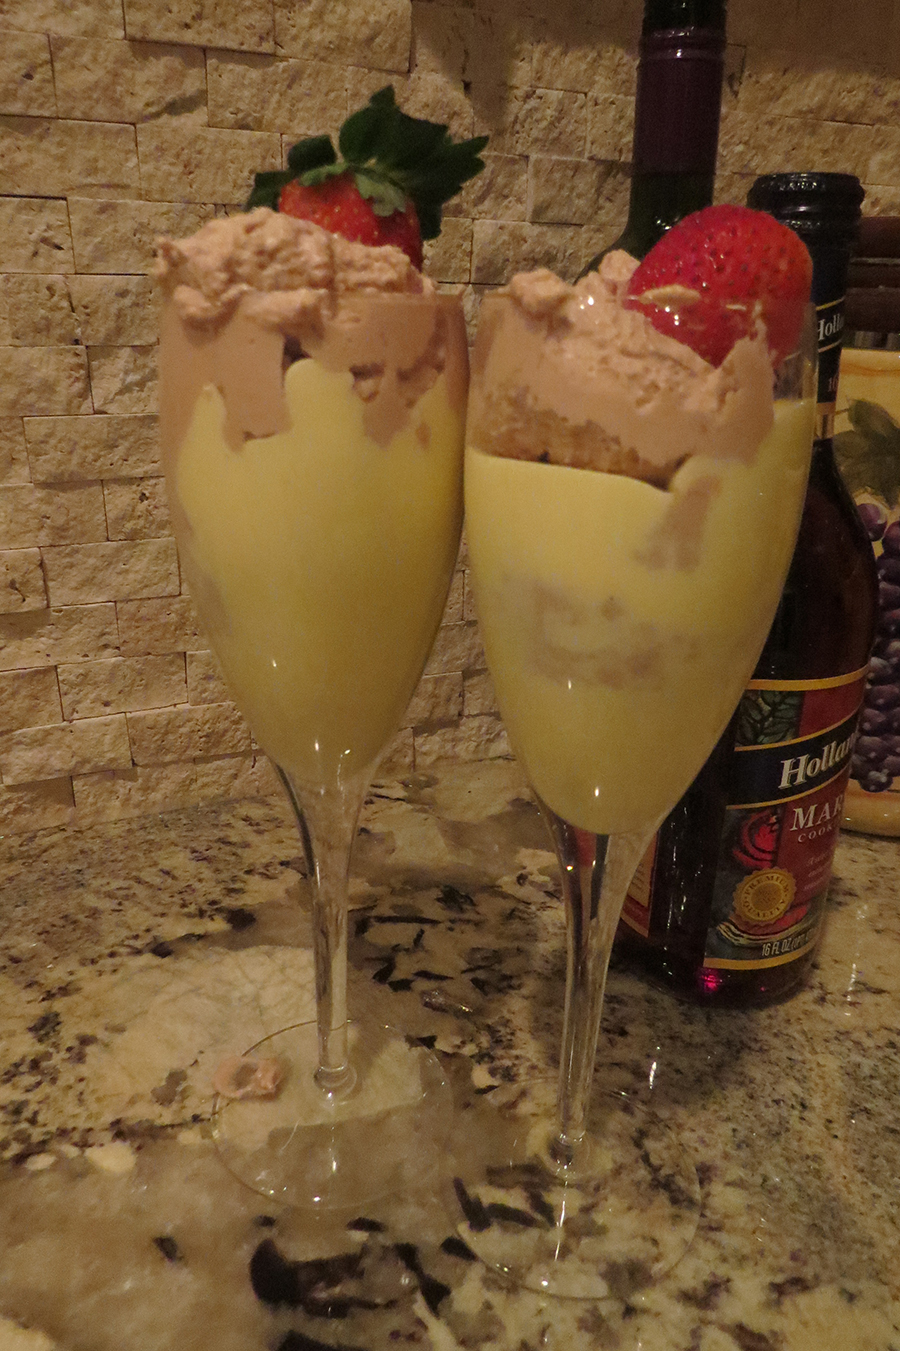
Zabaglione with Nutella Whipped Cream

Last week I shared with you a video on how to easily separate an egg by using a plastic water bottle to remove the yolk without having it break apart. There was a method to my madness while making this video – I was preparing to make zabaglione (pronounced sah-bah-yone) for my wife and I. For those of you who are not familiar with zabaglione, it is an Italian custard-like dessert that is made up of three ingredients: egg yolks, sugar and Marsala wine. While the ingredients may be simple and basic, this delicate dessert follows the same strategic cooking methods that are needed for polenta and risotto. Lots of patience, lots of stirring and lots of attention, with the end result being a beautiful, classic and elegant dish that is to be savored with each spoonful. I also decided to make a home made nutella whipped cream to add as a decadent topping.
To make zabaglione, you will need to cook it in a bain-marie (water bath) also known as a double boiler, which is a cooking method used to gently heat without scorching. You don’t need any fancy equipment to do this, just a medium to large size pot with a bit of simmering water in it, and a smaller pot or stainless steel bowl that can sit on top of the pot but not come in contact with the water. You can click here for further instructions on how to prepare a bain-marie. You place the ingredients into the smaller pot, you sit the smaller pot onto the larger pot to let the heat of the simmering water warm the mixture, and you whisk…and whisk….aaannnddd whisk. You keep doing this until the egg mixture thickens and increases in volume. The trick to this is to not let the eggs get too warmed up, otherwise they will curdle and you will end up with scrambled eggs. The idea is to keep the batter in motion while it heats from the steam. To assure avoiding curdles, remove the smaller pot from the large pot occasionally, while continuing to stir. Once the batter is thick and warm – but not hot – you have zabaglione! Remember that patience makes perfect with this dish. It took me a few attempts to get the consistency right. Stick with it, and keep stirring, and you will be able to enjoy a true Italian classic.
Zabaglione with Nutella Whipped Cream
Serves 2
Zabaglione:
3 egg yolks
3 tbspn granulated sugar
3 tbspn Marsala wine
Prepare a double boiler by using a large pot filled about half way with water, and a smaller pot or stainless steel bowl that will sit in or on top of the pot. Bring large pot to a simmer. Place all ingredients into the smaller pot/bowl, and mix with a hand mixer until foamy. Place the smaller bowl over the simmering pot, making sure that the bottom of the smaller bowl does not come in direct contact with the simmering water. You want the steam to heat up the mixture. Continue to whisk the mixture until it thickens and increases in volume into a creamy pudding-like texture. This may take a few minutes. If the mixture feels like it is getting hot, or if it starts to curdle, remove the bowl from the heat, continuing to whisk. You want to keep the mixture warm and creamy. Once thickened, it is ready to be served. Top with Nutella Whipped Cream.
Nutella Whipped Cream:
1 cup heavy whipping cream
1 tbspn granulated sugar
1/2 tspn vanilla extract
1-3 tspn Nutella
Chill the clean bowl of a stand mixer and the whisk attachment in the freezer for 10 minutes (you can also use a hand whisk and a large chilled bowl). Add the cream, sugar and vanilla to the bowl and whisk on high speed until medium peaks form – about 1 minute with a stand mixer, or about 2-3 minutes with a hand mixer. Fold in the Nutella, one teaspoon at a time. I find that two teaspoons is the perfect amount, but give it a taste after each teaspoon that you add, and adjust to your liking!