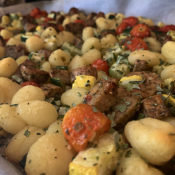
Home » Entrees » Recent Articles:

Sheet Pan Gnocchi

August 22, 2021 Entrees, Menu No Comments

Every so often, a fun and trendy recipe will pop up and will grab my attention. Not only do I get caught up in the creative ingredients, steps and its beautiful imagery, I also get caught up in thinking about how I can tweak the recipe into my own unique version. This most recently happened when I came across a recipe for Sheet Pan Gnocchi in Bon Apetit magazine. This is an incredibly easy recipe that only requires you to bake the seasoned ingredients (onions, tomatoes, garlic and gnocchi) on a sheet pan for 25-30 minutes. Yes, even the gnocchi! Their version also has you tossing in fresh arugula and shaved Parmesan after the baking is done to make for a very creative and interesting pasta dish (you can view the original recipe by clicking here).

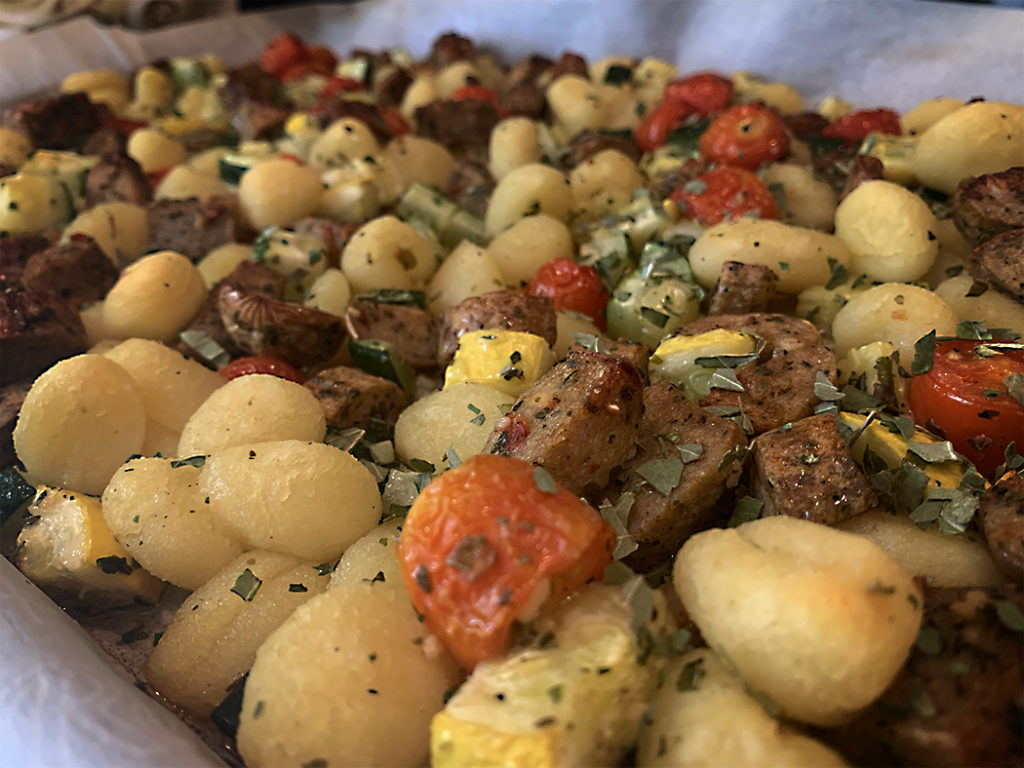
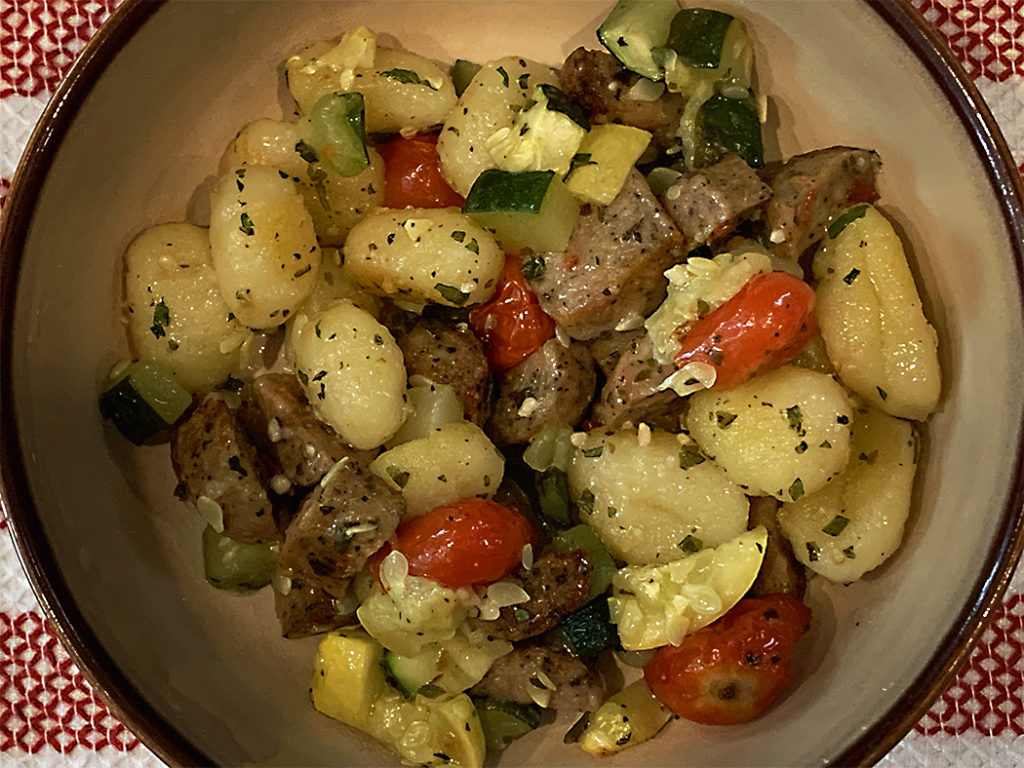
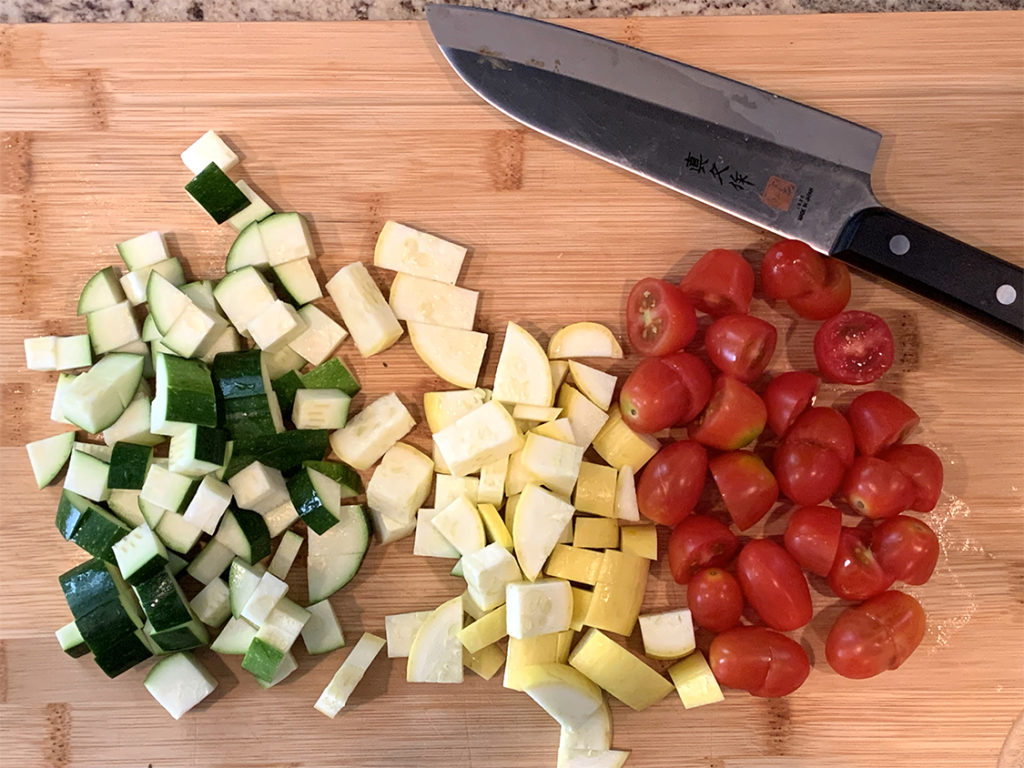
I absolutely love gnocchi, and will jump at the chance to do something fun and creative with it. The description of the gnocchi itself (crispy and caramelized on the outside, soft and fluffy on the inside) had me sold on wanting to try this recipe. While the addition of the arugula did sound intriguing, it also got me thinking that my baked ratatouille would also work very well with this recipe. Instead of the onion and arugula, my version would include chopped cherry tomatoes, zucchini and yellow squash, seasoned and mixed with the gnocchi. To add some additional flavor and ‘oomph’, I also added chopped pre-cooked chicken sausage.

Not only did this dish taste amazing, it has also become part of our regular rotation. Ten minutes of prep, 25-30 minutes in the oven, and boom! A perfect week day (or any day) pasta dish! Before I share the recipe, there are a couple of things that I would like to review:

  1. What type of gnocchi should I use? It is recommended that you use shelf-stable (air tight packaged and found in the pasta aisle) or refrigerated gnocchi. I would imagine that home made gnocchi would also work, if you have the time to make it. I would avoid using frozen gnocchi.
  2. Why a sheet pan and not a baking dish? Sheet pans are better conductors of heat and allow for crispier browning when baking, which is what you are looking for with this dish. The ingredients could end up more soft and mushy, and less crispy in a glass baking dish.
  3. What other ingredients can you add? The beauty of this dish is that it is very versatile. You can add a number of ingredients to make it your own! Anything from shrimp and chicken to peppers, artichoke hearts and fennel will all work well here! In fact, I am planning to put together an autumn version of this recipe with butternut squash and savory seasonings…stay tuned for that post!

Sheet Pan Gnocchi

1 pint grape tomatoes, halved
1 zucchini, diced
1 yellow squash, diced
1 16 ounce package shelf-stable or refrigerated gnocchi
1 12 ounce package pre-cooked chicken sausage, chopped
1 garlic clove, minced
1 tablespoon Italian seasoning
1-1/2 teaspoon kosher salt
ground black pepper
1/3 cup extra virgin olive oil, plus more for drizzling
1/4 cup grated Parmesan cheese

Pre-heat oven to 425 degrees. Mix together 1/3 cup olive oil, garlic, Italian seasoning, kosher salt and ground black pepper. In a large bowl, combine tomatoes, zucchini, yellow squash, gnocchi and sausage. Toss with olive oil mixture until well coated. Add additional olive oil if necessary to coat, without having the ingredients soaking in oil.

Pour the ingredients on a rimmed baking sheet. Place on middle rack, bake for 25-30 minutes, stirring once. Remove from oven once gnocchi turn golden and start to crisp. Transfer the baked ingredients to a serving bowl. Mix with Parmesan cheese and additional olive oil if necessary. Serve and enjoy!

Share

Apple Bacon Arancini

January 15, 2021 Appetizer, Entrees No Comments

Featured in the Winter 2021 Food/Family/Traditions issue of RowHome Magazine

Risotto has always been a favorite dish in our home. Arancini (which is a recipe that incorporates risotto rolled into a ball, stuffed with various ingredients, then breaded and fried) has become one of our new favorite dishes to make as of late. Unlike risotto, which involves a lot of patience and stirring…stirring…and more stirring…this recipe is not quite as hands on throughout the entire cooking process. You allow the arborio rice to simmer in broth for a good 20-25 minus with just an occasional stir of the pot. There are also various steps, like shaping the risotto into balls and rolling them in breadcrumbs, that allow us to each take part in the preparation without being in each other’s way. And unlike traditional arancini recipes, where you would stuff the rice ball with ingredients such as cheese, peas or even shrimp, I prefer mixing all of the ingredients into the cooked rice before rolling the rice into balls. This method allows you to get a taste of all the ingredients in every bite instead of waiting until you get to the center of the arancini. Not only do my daughters and I enjoy spending the quality time together making this dish, it is also a meal that we enjoy for special occasions, such as birthday and holiday dinners.

To give this recipe a bit more flavor, I’ve added bacon pieces, apples and sage to the ingredients. For a more traditional arancini, you can leave these ingredients out of the mix, while adding 1/4 teaspoon of kosher salt the boiling broth.

Apple Bacon Arancini

2 Granny Smith or Golden Delicious apples, peeled and diced into small pieces
4 strips thick-cut bacon
3 cups low-sodium chicken broth
1 cup arborio rice
1 cup shredded Italian blend cheese
1/2 cup grated parmesan cheese
2 large eggs
2 tablespoons chopped fresh parsley
1 tablespoon thinly sliced fresh sage
Dash of allspice
1-1/2 cups breadcrumbs
Vegetable oil, for frying

Place the bacon in a medium sauce pan and cook over medium heat, flipping until crispy and done. Remove the bacon from pan and place on a paper towel covered plate. Break the bacon strips into small pieces and set aside. Drain and discard the oil from the pan. 

Add the broth to the pan and bring to a boil over medium-high heat. Stir in the rice, reduce the heat to low and simmer until tender, about 20-25 minutes, stirring occasionally. Spread the rice on a parchment-lined baking sheet and let cool completely.

Combine the cooled rice, bacon pieces, diced apples, shredded cheese, parmesan cheese, eggs, parsley, sage, allspice and one cup of breadcrumbs. Mix well and shape the mixture into 1-1/2 inch balls. You should get about 20 or so out of the mixture.

Pour the remaining breadcrumbs into a bowl. Roll the balls in the breadcrumbs and place on a parchment-lined baking sheet. Loosely cover and refrigerate for at least one hour. You can refrigerate overnight.

Heat 1/2 inch vegetable oil in a large saucepan over medium heat until a deep-fry thermometer registers 350 degrees F. Fry the rice balls in small batches of 6 to 8 at a time, turning, until golden brown on all sides. Carefully remove the fried balls with a slotted spoon and drain on paper towels. Serve and enjoy!

Share

Broiled Turkey Burger Sliders

January 8, 2021 Entrees, Menu Comments Off on Broiled Turkey Burger Sliders

When I first started making turkey burgers years back, I would often overcompensate with ingredients to make up for the bland, dry taste of the ground turkey. Everything from Italian salad dressing, liquid smoke, ketchup and mustard, seasoned bread crumbs, onion and garlic powder, salt and pepper and other seasonings went into my burger mix at one time or another. The results were often good, but the burger taste just wasn’t there.

Nowadays I’m following the ‘less is more’ method. My turkey burgers are very simple and have a juicy and flavorful ‘real’ burger taste. I make sure to use the 85/15 ground turkey mixture whenever possible (meaning 15% fat). The 93/7 mixture will also work, but may not be as juicy. I would not recommend the 99/1 ground turkey mixture. The secret ingredient that I found to work best is a packet of onion soup mix. Aside from the onion itself, there is also enough seasoning in the soup mix to cover all of your bases. I don’t even add salt and pepper any longer. Just the soup mix and a teaspoon of Worcestershire sauce, and I’m good to go!

Lately, I’ve been serving up my turkey burgers on slider buns. They’re smaller and more manageable..and they’re cute! One pound of ground turkey will give you six slider size burgers. If you prefer a normal size burger, you will get four burgers out of the this recipe.

The burgers cook up very quickly in the broiler, giving a nice outer crust while retaining a juicy and flavorful center. Cooking time is also very quick, about 15-20 minutes start to finish, which makes this recipe an excellent go-to for a quick – and fun – weeknight meal!

BROILED TURKEY BURGER SLIDERS

1 lb ground turkey (85/15 mixture is preferred, 93/7 mixture will also work)
1 1-ounce packet of onion soup mix
1 teaspoon Worcestershire sauce

Preheat the broiler on high. Place the cooking rack about 6 inches below the heating element. Mix the onion soup mix and the Worcestershire sauce with the ground turkey. Using a 1/3 measuring cup, scoop the turkey mixture into six even size scoops. Shape the scoops into patties. Place the patties onto a very lightly oiled baking sheet. Broil for six minutes. Flip the burgers, broil for another six minutes. If you are adding cheese, place the cheese topped burgers back into the broiler for another 30 seconds. Serve on a lightly toasted slider bun.

Share

‘Tis the Season, Part 2: Smoked Paprika

September 10, 2020 Entrees, Menu, Pasta, Soup No Comments

In my previous post, I shared with you one of my favorite go-to seasonings, Everything Bagel Spice. Many of you offered up a lot of great tips and suggestions on the Dom’s Kitchen social media pages, and I thank you all for the comments! For today’s post, we’re going a little bit deeper into the flavor profile as I share with you another favorite seasoning of mine, smoked paprika.

Before we get into my recipe suggestions using smoked paprika, I’ll quickly explain the difference between smoked and traditional paprika. Paprika is a spice made of ground chili peppers, which has a bit of a ‘sweet-heat’ taste to it. Specialty spice shops offer different varieties of paprika, some being more sweet, and some bringing more heat. If you purchase paprika at a supermarket, it’s going to be a mild heat, semi-sweet version. It is a perfect accent to a variety of foods, such as soups, stews, poultry, fish, vegetables and sauces. It is a nice addition to dried rubs, and is often used as a garnish, sprinkled over potato salad and deviled eggs.

Smoked paprika is made with chili peppers that have been smoked before being ground. Smoked paprika offers up a bold and more outdoorsy flavor, reminiscent of a campfire. There is a lot more depth and flavor in smoked paprika, which also allows it to work well in recipes similar to the ones I mentioned above for traditional paprika…only on a more bold level. Make no mistake, there is a lot of difference between smoked and traditional paprika, and one should never be substituted for the other without expecting a different result in taste. Fore more in-depth reading on the comparisons between traditional and smoked paprika, visit www.pepperscale.com.

A lot of times when I use smoked paprika in a recipe, it is often a last minute decision. I’ll give my recipe a taste, and it’ll hit me that “oh yeah, smoked paprika will boost this up nicely!” However, two of my stand-by recipes that I used smoked paprika with are breakfast hash brown potatoes and Ground Turkey Sloppy Joes. We’ll start with the hash browns. 

Seasoned Hash Brown Potatoes

Whenever I make hash brown potatoes (I prefer the Ore-Ida frozen diced hash browns), I go with four basic seasonings – salt, pepper, onion powder and smoked paprika. The salt and pepper I add to taste, but I load up on the onion powder and smoked paprika. Sounds simple enough, right? But here’s the trick that I learned to really get the flavor cooked into the potato. I start by heating up a few tablespoons of canola oil in a pan (vegetable oil will work as well). Before I add the potatoes, I sprinkle some onion powder and smoked paprika onto the oil. As the oil heats up, it becomes infused with the flavors of the onion powder and smoked paprika. Once you add the potatoes, the flavor starts to cook into the potatoes immediately. I then add more seasoning to the top of the potatoes and let it cook over medium heat for a good 6-8 minutes, until the bottom starts to brown. As you flip the potatoes, the flavor will be well incorporated . You can adjust the seasoning to your liking until the potatoes are crips and golden brown.

Ground Turkey Sloppy Joes

If you cook with ground turkey, you know that it usually needs a little help in the flavor department. Even if you go with 93/7 mixture (meaning 93% lean and 7% fat), flavor enhancements are usually necessary. Not only does this recipe incorporate smoked paprika to help boost the flavor, it also includes fresh peppers, onions and garlic, along with some additional seasonings and spices. While I do enjoy a little bit of spice, my kids have a low heat tolerance. My workaround is to simply spice up my own serving with a few dashes of hot sauce. As always, I encourage you to adjust the flavor to your liking. Although it may be traditional to serve Sloppy Joes as a sandwich, we actually enjoy this meal topped with shredded cheddar, a dollop of sour cream, and a plate full of tortilla chips for dipping!

1lb ground turkey (93/7 mixture)
2 tablespoons olive oil
1 small onion, diced
1 clove garlic, minced
1 bell pepper (red or green), finely chopped (you can also use a hotter variety of pepper if you like)
salt and pepper to taste 
1/4 teaspoon ground cumin
1/4 teaspoon ground chili pepper (my preference is ancho chili pepper)
1 teaspoon smoked paprika
1 8-ounce can tomato sauce
1/4 cup barbecue sauce
(you can add additional seasonings or flavoring of your choice) 

Heat oil over medium heat in a large pan. Add the diced onion, sauté until onions start to soften. Add garlic and chopped bell pepper, stir together. Once the mixture starts to become fragrant, add the ground turkey. Stir together, let cook until the ground turkey browns. Drain liquid from the pan. Season to taste with salt and pepper.

Next, add the ground cumin, ground chili pepper and smoked paprika. Add the tomato sauce, stir together. Once the sauce starts to heat, stir in the barbecue sauce. Let simmer for about 10 minutes, until the sauce starts to thicken.

You can serve it as a sandwich, as a dip with tortilla chips, or even over pasta!

Share

Archives

powered by
Socialbar