Home » Appetizer » Recent Articles:

Kale Caesar with Lime
October 2, 2020 Appetizer, Menu, Salads No Comments

Inspiration has always been the main drive behind my food blog. It could be a meal that I have tried at a family or friend’s house, a new dish that I have ordered at a restaurant, or a recipe that I found in a magazine, online or on a cooking show. This is almost always the backbone to getting my creative juices flowing and wanting to add my own flavorful spin to a recipe. As with many of you, I have also found a lot of original and interesting recipes on Instagram. This is where my latest source of inspiration has come from, especially at a time when I really needed a little extra push to get back to following through with my passion for cooking.

Chef Joanna Barajas is a wellness chef and author, and online coking educator who I find to be one of the most influential and accessible online chefs today. My friend Mike (aka the Gluten-Free Paisan) directed me to her Instagram and website, and I have been following her daily posts and videos ever since. Aside from sharing recipes that include fresh and healthy ingredients, she also shares practical tips and tricks that will help steer even the most basic home cook to a better kitchen experience. As she says on her own website, “I’m about enjoying the process of cooking – not rushing it. I care about wellness. I care about living the best quality of life into my old age. I love good food, but also want to have a long, healthy life.” This has always been my own goal with cooking, so you can understand why I have an appreciation for Chef Joanna’s talents.

If you follow my social media pages, you’ll know that I recently followed Chef Joanna’s Mindful Morning Breakfast Challenge, while sharing pictures of the meals that I made. Every recipe was tasty, healthy, filling and easy to follow, and you can find those recipes, along with many of her instructional videos on her website and Instagram pages highlighted below. 

This past week, Chef Joanna shared a recipe for a Kale Caesar Salad with a lime flavored, Greek yogurt based dressing. The Greek yogurt is used in placed of raw egg, which is often used in Caesar dressing. Being a Caesar salad fan, this recipe quickly caught my attention. It was super easy to make, and everything about it worked so well. The kale and romaine blend, the zesty lime flavor, and the Greek yogurt substitute all worked harmoniously! Chef Joanna graciously allowed me to share her recipe here on my blog. Being that the recipe made a bit more dressing that I needed for my salad, I got a little creative myself by using the remaining dressing to sauté shrimp. You can find that portion of recipe further below.

Be sure to check out Chef Joanna at chefjoannas.com and at simplecookingcookingshow.com.

You can also follow Chef Joanna’s Instagram page @chefjoannas

Kale Caesar with Lime

Traditional Caesar dressing scares me because it uses raw eggs and I don’t feel comfortable serving it to everyone. But the secret here is the Greek yogurt which results in a creamy delicious dressing that tastes very close to Caesar. It’s safe so you don’t have to worry. Enjoy! (It’s all about adding more Parmesan cheese!)
– Chef Joanna

Kale Caesar

4 cups chopped fresh kale
4 cups chopped romaine lettuce
2 cups croutons
¾ cup grated Paremsan cheese

Lime Caesar Dressing

½ cup plain Greek yogurt
½ cup freshly grated parmesan cheese
3-4 Tbsp. fresh lime juice
1 tbsp. Extra-virgin olive oil
4-5 anchovies, minced 
2 tsp. Worcestershire sauce
1 clove garlic, minced
1 tsp. Dijon mustard
¼ tsp. Salt
Pinch of black pepper
3-4 tbsp. Milk

Whisk all dressing ingredients in a small bowl. Add milk only if needed. 

Use right away, or store dressing in the fridge for 3 days. 

To make croutons, place 1 T olive oil, 1 T butter, 1 tsp minced garlic and 1-2 bread rolls cut up into cubes in a large frying pan. Heat everything and toss for a couple minutes or until bread starts to turn golden brown. Set aside until you toss the salad. 

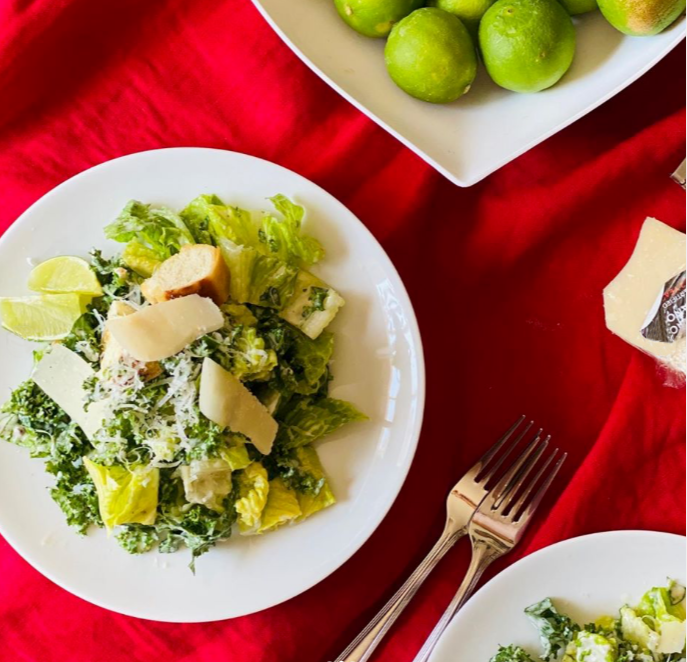
Toss salad greens with dressing, croutons and extra Parmesan cheese. Garnish with lime wedges and a few crunchy croutons on top. 

(Can use parmesan crisps instead of croutons for keto. Bake Parmesan cheese on parchment at 350 F for 4-6 minutes or until crispy)
Dom’s Caesar Sautéed Shrimp

As I mentioned above, I am a huge fan of Caesar Salad, especially when there is some grilled or blackened chicken or shrimp added to the mix. While I was making Chef Joanna’s Kale Caesar, I decided to sauté about a dozen shrimp to add to the salad.

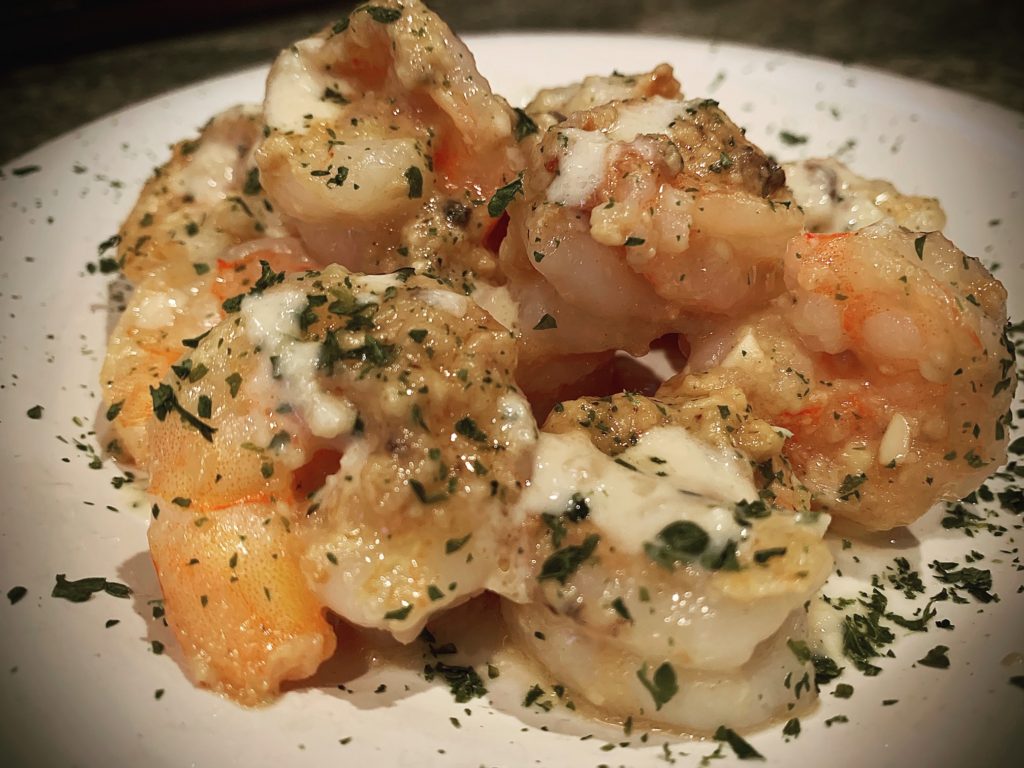
Because I knew that I had some additional dressing that needed to be used soon, I thought it would be fun to add a bit of the dressing to the shrimp as it cooked. There is a lot of flavor happening with the dressing, so I didn’t use any other seasonings for the shrimp. I wasn’t sure if the dressing would burn off during the cooking process, so instead of tossing the shrimp in the dressing prior to cooking them, I chose to play it safe and added two tablespoons of the dressing to the pan during the final few minutes of cooking, making sure that all of the shrimp were evenly coated. The dressing actually formed a bit of a crunchy coating on the shrimp, so timing was perfect. The shrimp looked and smelled so good, that I decided to just serve them on the side instead of adding them to the salad. I drizzled some of the remaining dressing onto the plated sautéed shrimp for extra flavor. Thanks to Chef Joanna’s inspiration, I was able to make an impromptu, tasty new recipe!

1 dozen shrimp, peeled and deveined
2 tbsp canola or vegetable oil
3-4 tbsp Caesar dressing
*optional chopped flat leaf parsley for garnish
(normally I would sauté shrimp in garlic with lemon and seasonings, but there is enough flavor in the dressing so I felt that no additional ingredients were necessary)

Heat oil in a large skillet over medium heat. Add the shrimp, cook until shrimp start to turn pink, about two minutes. Flip the shrimp, add two tablespoons of the Caesar dressing. Stir to evenly coat. Continue to cook until shrimp are fully cooked, about 2-3 minutes. Remove shrimp from pan, sprinkle with chopped parsley and drizzle with remaining dressing.
Share

‘Tis the Season, Part 1: Everything Bagel Seasoning

July 3, 2020 Appetizer, Menu, Salads No Comments

During the recent COVID-19 quarantine, I was looking forward to having the opportunity to be creative in the kitchen and come up with some fun and interesting recipes to share with you. Unfortunately, like with most of you, reality had gotten in the way and grocery shopping became a strategic challenge, often leaving us with minimal ingredients available to purchase and work with. But as the old saying goes, when you have lemons, you make lemonade! 

Although this post does not feature a lemonade recipe, I would like to share with you some of my favorite seasonings that I have put to use quite often over the past months to add a little extra creative zing to some of the most basic dishes you could think of. While the seasonings that I’m about to share with you were purchased from Trader Joe’s, there are variations available in most grocery stores. But if you do find yourself at a Trader Joe’s, I highly suggest you seek out these seasoning favorites!

Because I have come up with a list of recipe suggestions, I though it would be best to break them up over two separate posts. For today’s post, I will be sharing recipes using Everything Bagel seasoning. As I mentioned above, this seasoning is available in a number brands. My favorite is Trader Joe’s Everything But the Bagel seasoning, because it has sea salt in the mix, whereas the Spice Hunter’s Everything Bagel Crunch seasoning that I also have on hand is salt-free. The remaining ingredients are the same: sesame seeds, garlic, black sesame seeds, onion and poppy seeds. Of course, adding your own sea salt is an easy adjustment to make if the salt-free brand is the only one that you can find.

When I purchased this seasoning, my first thought was, “well, I guess I’ll have to learn how to make bagels now.” But the truth is, this seasoning is very versatile and very flavorful. The seedy taste and texture can really bring out interesting new dimensions in many different dishes. 

For my first attempt at using it, I decided to stick with the dough/bread concept by adding it to the crust of a stromboli. My home made stromboli has been one of my staples for decades, so I don’t tamper with the recipe. After rolling up the dough, I give it a light hit with cooking spray and then sprinkle with Italian seasoning. The addition of  the bagel seasoning sprinkled on top really gave a nice flavor to the dough. The taste really comes into play when added to a spinach stromboli. Garlic is a great flavor booster to spinach, so the taste of the everything bagel seasoning makes for a really nice combination.

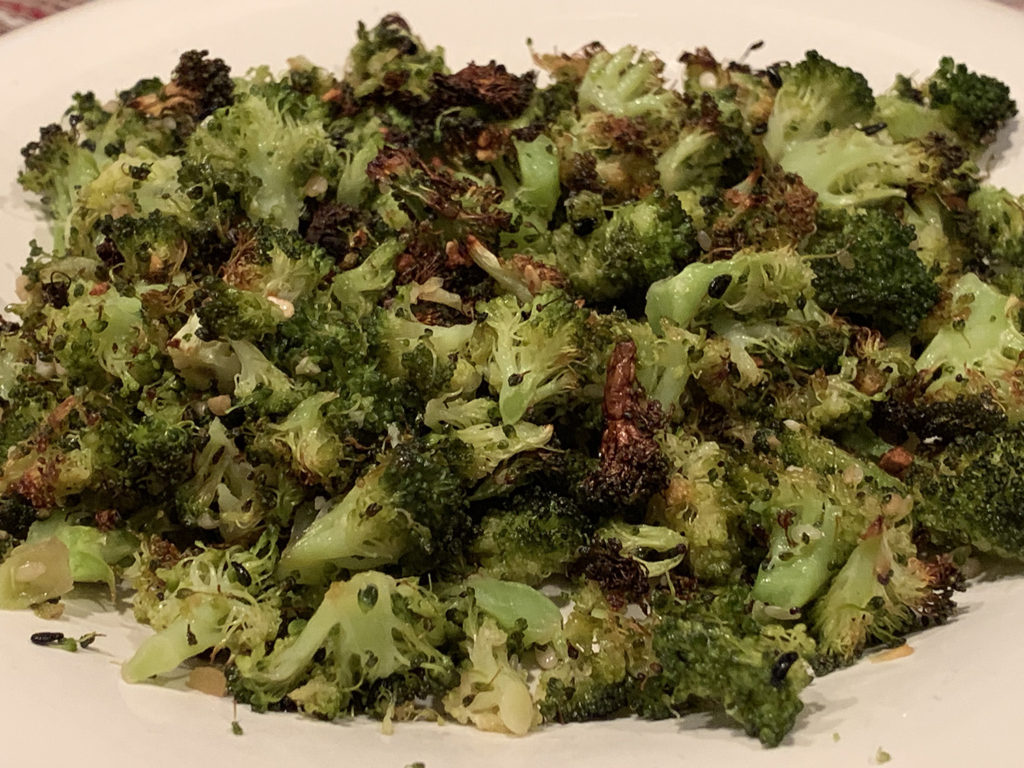
My next attempt at using the everything bagel seasoning was with oven roasted broccoli. Broccoli has always been one of our regular go-to vegetables. Instead of the usual steaming or sautéing, I wanted to give oven roasting a try. Oven roasting broccoli works best with fresh chopped broccoli. Frozen broccoli that is steamed or defrosted carries a lot of moisture, which slows down the roasting process. If you only have frozen broccoli on hand, you can defrost or steam cook it ahead of time to make it soft, but be sure to pat it dry with a paper towel before roasting. Once your broccoli is chopped and ready for the oven, simply toss it with just a bit of olive oil (enough to lightly coat all of the pieces) and sprinkle with the everything bagel seasoning. Place it on a parchment lined baking sheet and bake at 400 degrees for 20 minutes, until the broccoli tips start to brown. Of course, you can sprinkle the seasoning on steamed or sautéed broccoli as well. But the roasting method brings out a nice nutty flavor to the broccoli. The seasoning boosts this nutty flavor all the more. Honestly, my kids have asked for second helpings when broccoli is prepared this way. Win-win!

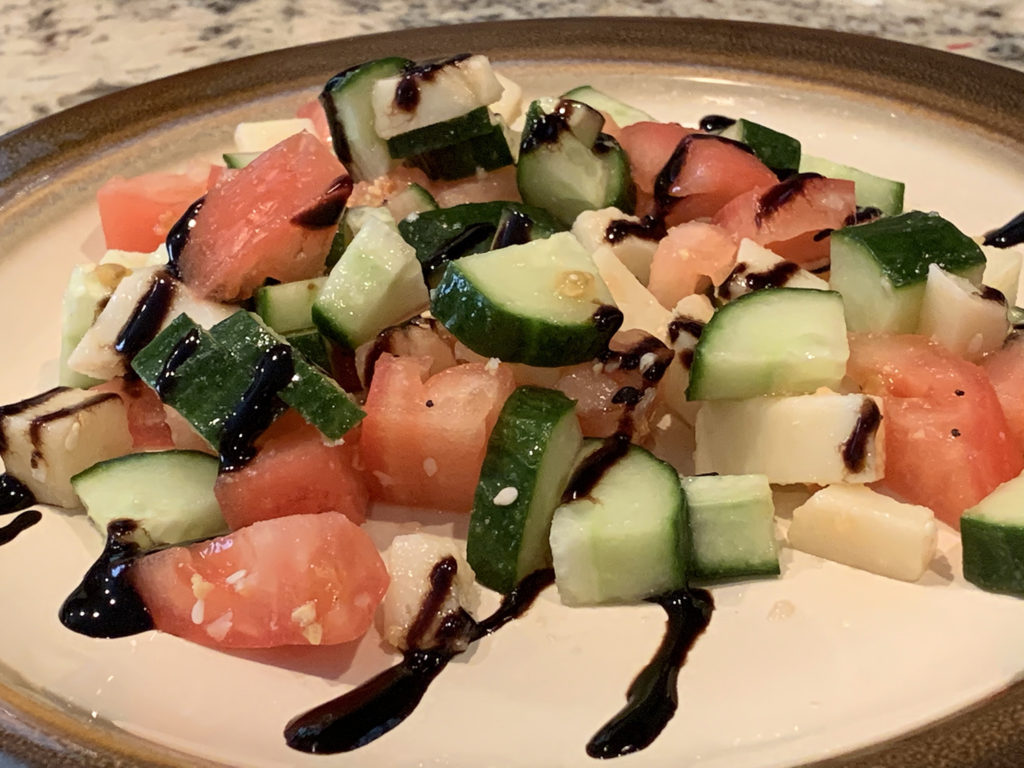
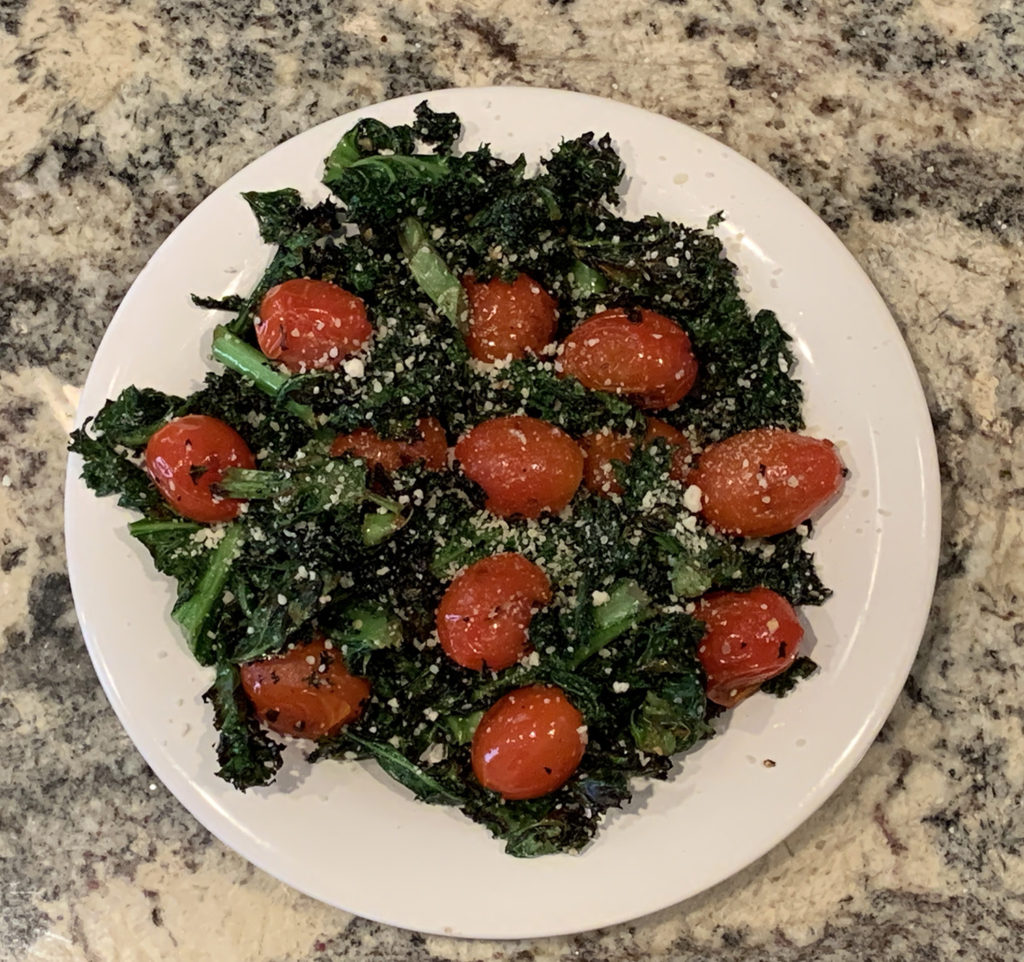
My third favorite way to put the everything bagel seasoning to use is as a salad topper. I’ve added it to a fresh cucumber, tomato and cheese salad (feta or provolone are my two cheese suggestions), and I’ve used it as a seasoning with a grilled kale and tomato salad. Simply add the seasoning to either of these salads as you combine all ingredients and gently toss with some olive oil to evenly coat. The seasoning adds a zesty flavor to an already light and lively cucumber tomato salad drizzled with balsamic (or even better, a balsamic glaze). If you are using it for the roasted kale and tomato salad, the heat intensifies the flavor as the seeds gently roast onto the kale. My favorite method of doing this is using a grill basket, letting the seasoned kale and tomatoes roast over a medium flame until the kale starts to char. Once done, I like to add a bit more olive oil and a sprinkle of parmesan cheese. It’s a summer grill-out staple in my house!

That’s where I’ve gotten so far with this fun and versatile seasoning, but I am looking forward to experimenting more with pastas, marinades and bread coatings. As I do, I will be sure to share my adventures with you.

Next week, I will be sharing more of my favorite seasoning suggestions and recipes! 

Share

Pesto Bacon Parmesan Pinwheels

December 28, 2019 Appetizer, Menu No Comments

Pinwheel appetizers are a party classic for just about any celebration during any time of the year. Whether you choose to serve them cold in a tortilla or warm in a baked and flaky pastry crust, pinwheels are the perfect appetizer…quick to assemble and easy to serve. Combinations are endless. Buffalo Chicken, Turkey BLT, Spinach Artichoke, Pepperoni Pizza and Italian Hoagie, just name a few. There is a guaranteed pinwheel variety for all crowds.

For this post, instead of trying to reinvent the wheel (see what I did there?), I’m offering up one of my favorite flavor combinations in a baked crescent crust. The zesty combination of pesto and shredded parmesan are a good balance to the salty goodness of the bacon. The warm and flaky crescent roll holds it all together, giving you a heavenly taste with each bite.

Be sure to use shredded parmesan, as opposed to grated. If you find a pack of 6 cheese Italian blend, all the better! There is also no need to worry about making a batch of homemade pesto. While homemade is always a great choice, a small jar of store bought pesto will do the trick.

Pesto Bacon Parmesan Pinwheels

Measurements are approximate. You can use more or less to your preference.
1 8-ounce can refrigerated crescent rolls
1/4 cup or one small jar of pesto
1/2 cup cooked bacon pieces
1 cup shredded parmesan cheese (or 6 blend Italian cheese)

Step 1: Separate the crescent dough into four rectangles. Pinch the perforated diagonal lines together to prevent the rectangles from breaking into triangular pieces. Spread a layer of pesto onto each rectangle, leaving about a 1/4 inch edge. Sprinkle the parmesan cheese on top of the pesto, then sprinkle with the cooked bacon pieces.
Step 2: Roll the dough starting from the far right side to the left side. Gently pinch the dough closed to avoid it from splitting or separating.
Step 3: Place the four rolls into the freezer for about 45 minutes. This will allow the rolls to slice easier.
Step 4: Using a serrated knife, slice each roll into six pinwheel pieces. Place the pinwheel pieces on a non-greased cookie sheet. Bake at 350 degrees for 15 minutes or until the pinwheels start to turn a golden brown.
Step 5: Remove from oven. Serve warm and enjoy!
Share

Mini Stuffed Potatoes

June 21, 2019 Appetizer No Comments

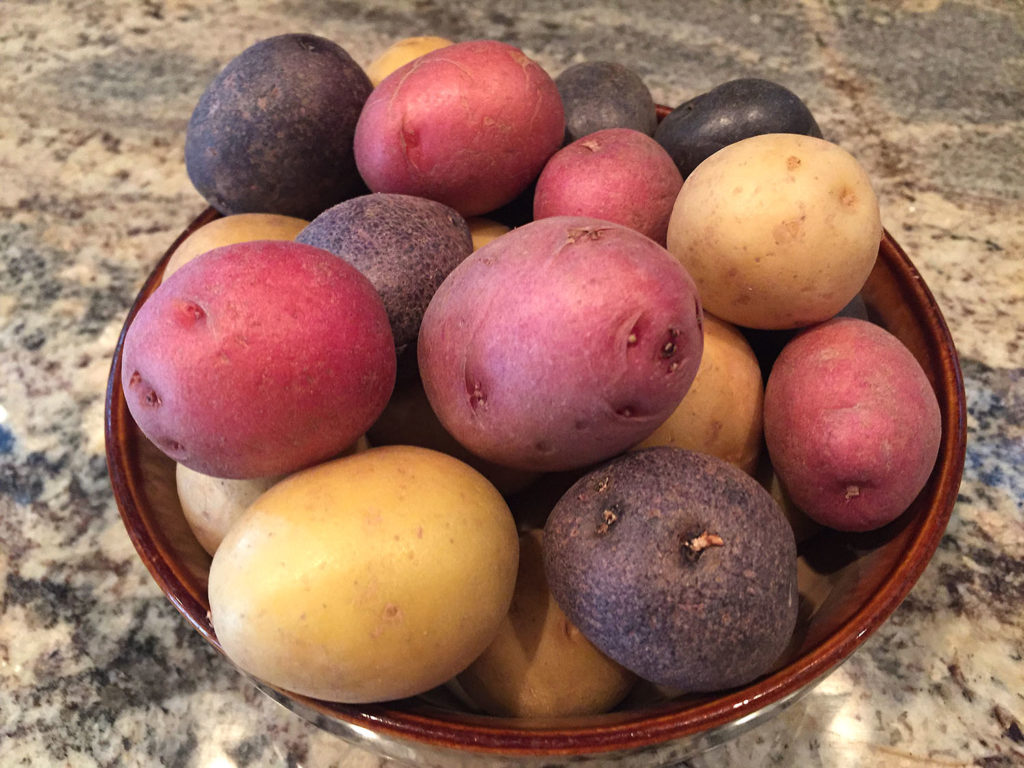
Mini potatoes have always been a bit of a guilty pleasure for me. While they may not be the best choice for practical, everyday use (a five pound bag of russet potatoes often costs less than a bag of minis), they are a great choice when the timing is right. Mini potatoes are very versatile. They are easy to prep, easy to cook, tasty, and they come in a variety of colors. Really, what’s not to like about them?

This particular recipe is a perfect example of how well their miniature size comes in to play. I put this recipe together as an appetizer for a recent get together with friends. The dish is very similar to stuffed mini button mushrooms, only we are using the mini potatoes in place of the mushrooms. Being that I’m not so much of a mushroom fan, this recipe is a good alternative for me.

You can adjust the serving amount to your need, so I decided to make enough to use with two different fillings: a traditional bacon and cheddar filling, and Trader Joe’s Artichoke Antipasto, which happens to be one of my favorite condiments. A pepperoni pizza filling would be a fun option, and a crab filling that you would use with stuffed mushrooms would also work really well with this recipe – and I plan on giving both a try some day. I also chose the multi-color mini potatoes for a bit of variety. You can also go with all red or all white…whatever you prefer. Because this recipe can be adjusted according to how many you need and what filling you would like to use, I am only going to share the basic steps. You can easily adjust measurements and ingredients according to how much you prefer to make. I encourage you to get as creative as you like!

1. The first step is to slightly soften the potatoes so that they can be easily sliced in half and the filling scooped out, leaving a thin layer of potato in tact (in other words, do not scoop it out all the way to the skin). Start by poking the potatoes with a fork a few times. Place the potatoes on a microwave-safe dish, and microwave for 2 minutes. Move the potatoes around a bit, and microwave for another 2 minutes. Remove the potatoes, slice in half and scoop out most of the filling.

The mini potatoes…cut, scraped, brushed with olive oil and seasoned with salt and pepper.

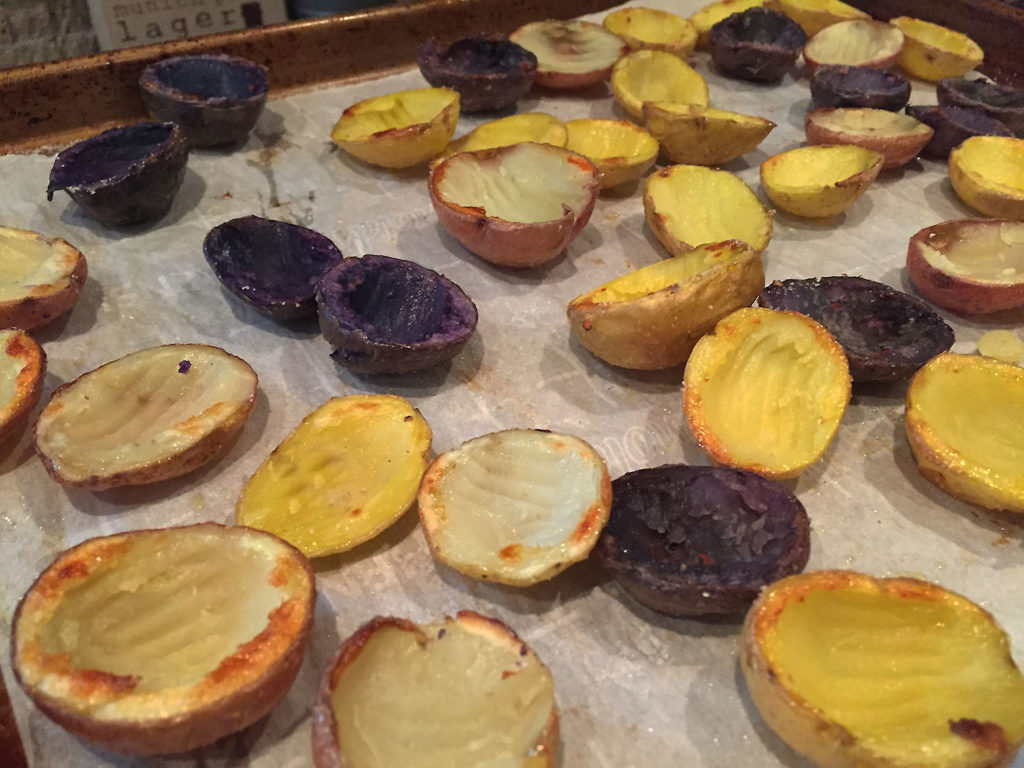
2. Place the potatoes cut side down on a baking sheet lined with parchment paper. Lightly brush the potato skins with olive oil, then sprinkle with a pinch of salt. Bake at 450 degrees for 10 minutes or until the skin starts to brown. Remove from oven and carefully flip the potatoes so they are cut side up.

The potatoes have been baked and flipped, and are now ready to be stuffed.

3. You are now going to add your filling to the potatoes. As mentioned earlier, I chose to sprinkle some shredded cheddar topped with bacon pieces, and I also used a dollop of Trader Joe’s Artichoke Antipasto. Whatever filling you prefer will work well. Place the stuffed potatoes back into the oven for another 8-10 minutes, until your fillings are heated and melted to your liking. Carefully remove from oven, plate, serve and enjoy!

Traditional cheddar and bacon stuffed potatoes.
Artichoke Antipasto stuffed potatoes.
Share

Recent Comments

Archives

powered by
Socialbar