Home » Appetizer » Recent Articles:

Mini Stuffed Potatoes

June 21, 2019 Appetizer No Comments

Mini potatoes have always been a bit of a guilty pleasure for me. While they may not be the best choice for practical, everyday use (a five pound bag of russet potatoes often costs less than a bag of minis), they are a great choice when the timing is right. Mini potatoes are very versatile. They are easy to prep, easy to cook, tasty, and they come in a variety of colors. Really, what’s not to like about them?

This particular recipe is a perfect example of how well their miniature size comes in to play. I put this recipe together as an appetizer for a recent get together with friends. The dish is very similar to stuffed mini button mushrooms, only we are using the mini potatoes in place of the mushrooms. Being that I’m not so much of a mushroom fan, this recipe is a good alternative for me.

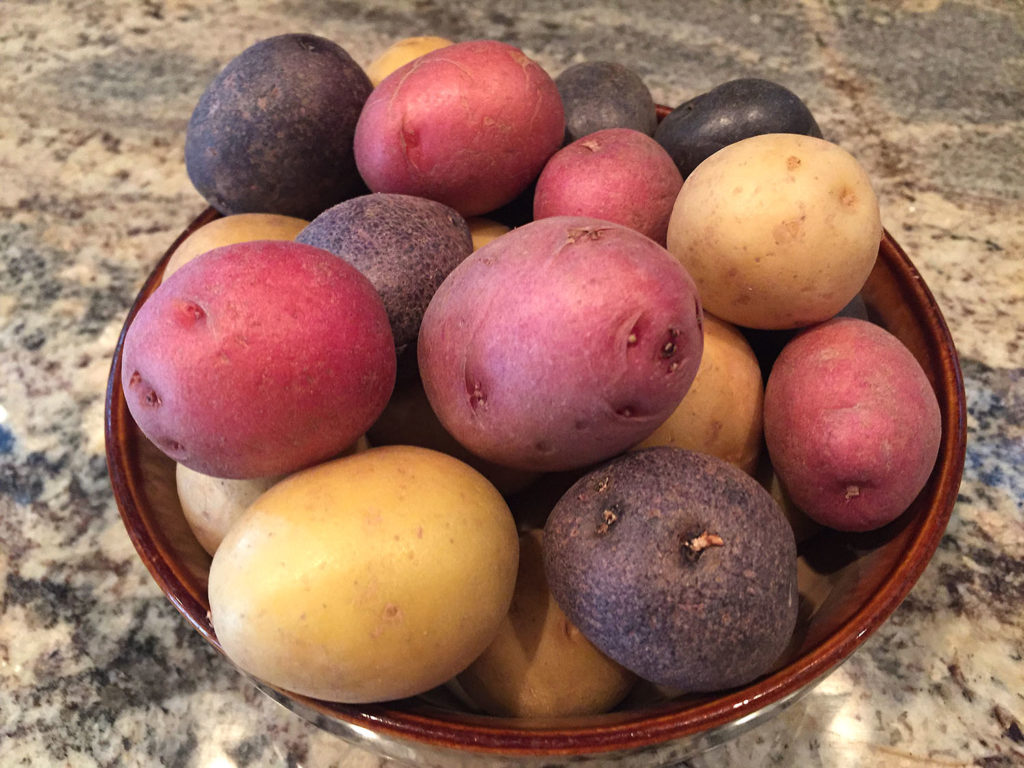
You can adjust the serving amount to your need, so I decided to make enough to use with two different fillings: a traditional bacon and cheddar filling, and Trader Joe’s Artichoke Antipasto, which happens to be one of my favorite condiments. A pepperoni pizza filling would be a fun option, and a crab filling that you would use with stuffed mushrooms would also work really well with this recipe – and I plan on giving both a try some day. I also chose the multi-color mini potatoes for a bit of variety. You can also go with all red or all white…whatever you prefer. Because this recipe can be adjusted according to how many you need and what filling you would like to use, I am only going to share the basic steps. You can easily adjust measurements and ingredients according to how much you prefer to make. I encourage you to get as creative as you like!

1. The first step is to slightly soften the potatoes so that they can be easily sliced in half and the filling scooped out, leaving a thin layer of potato in tact (in other words, do not scoop it out all the way to the skin). Start by poking the potatoes with a fork a few times. Place the potatoes on a microwave-safe dish, and microwave for 2 minutes. Move the potatoes around a bit, and microwave for another 2 minutes. Remove the potatoes, slice in half and scoop out most of the filling.

The mini potatoes…cut, scraped, brushed with olive oil and seasoned with salt and pepper.

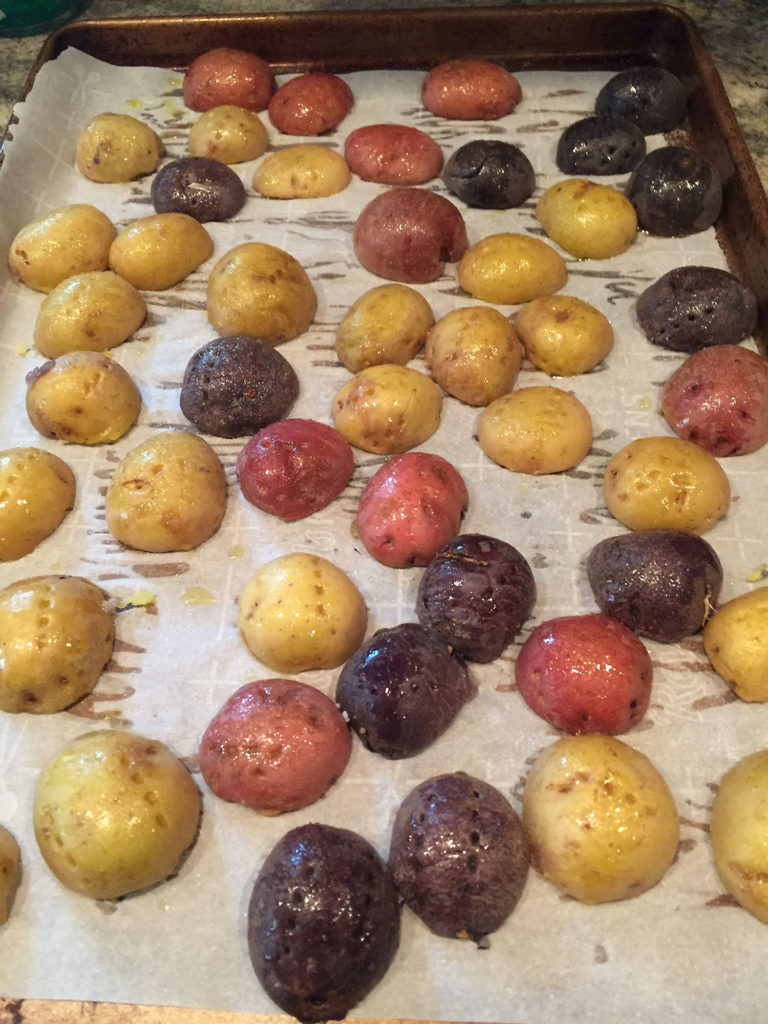
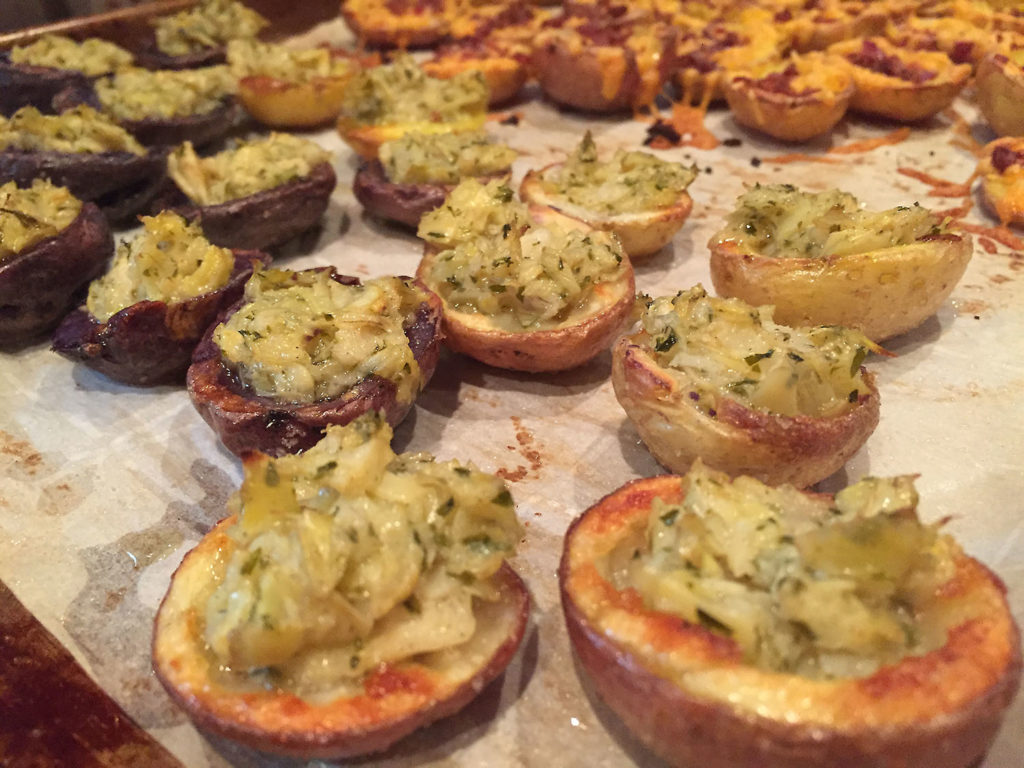
2. Place the potatoes cut side down on a baking sheet lined with parchment paper. Lightly brush the potato skins with olive oil, then sprinkle with a pinch of salt. Bake at 450 degrees for 10 minutes or until the skin starts to brown. Remove from oven and carefully flip the potatoes so they are cut side up.

The potatoes have been baked and flipped, and are now ready to be stuffed.

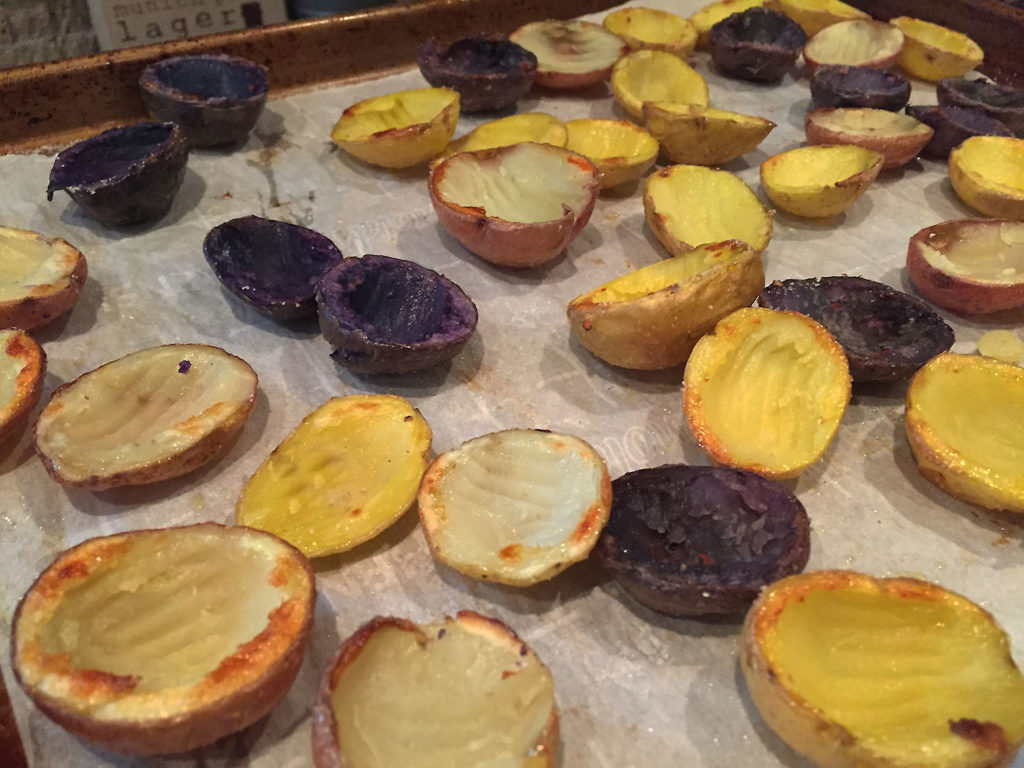
3. You are now going to add your filling to the potatoes. As mentioned earlier, I chose to sprinkle some shredded cheddar topped with bacon pieces, and I also used a dollop of Trader Joe’s Artichoke Antipasto. Whatever filling you prefer will work well. Place the stuffed potatoes back into the oven for another 8-10 minutes, until your fillings are heated and melted to your liking. Carefully remove from oven, plate, serve and enjoy!

Traditional cheddar and bacon stuffed potatoes.
Artichoke Antipasto stuffed potatoes.
Share

Escarole-Wrapped Chicken Meatballs

November 13, 2018 Appetizer, Menu, Soup No Comments

Growing up in an Italian-American family meant that most major holiday dinners would start off with a soup course. The soup of choice was most likely escarole soup, which is a chicken broth based soup containing carrots, mini meatballs and escarole, sometimes with the addition of acini di pepe pasta. You may also know this soup as Italian Wedding Soup, Italian Holiday Soup, or if you grew up in my old neighborhood you would simply call it S’cadole.

A few years back, when we started our mid-year Memorial Day Friendsgiving dinner tradition with our friends Chrissy, Carl and Lucas, I thought it would be fun to somehow incorporate the spirit and flavor of escarole soup into our menu without actually serving a bowl of piping hot soup on a seasonally warm early summer day. My solution to this was to compact all of the ingredients of the soup – sautéed carrots, celery and onions, chicken, meatballs, broth and escarole – and make a chicken meatball that was seasoned with the carrots, celery and onions, wrapped in boiled escarole leaves. This reimagined version of escarole soup was the perfect compromise for representing a traditional holiday dish during a not-so-traditional time of year.

Of course, this recipe is by no means intended to take the place of a holiday dish that is as traditional and enjoyable as escarole soup. Some traditions are just not meant to be tampered with. However, if you are looking for an alternative to a soup course – especially one that works well as an appetizer and also has the flavors of this traditional and classic soup – then this recipe is one that would work well for your holiday meal!


Escarole-Wrapped Chicken Meatballs
Serves 4-6

1 lb ground chicken
1 carrot, finely chopped
1 small onion, finely chopped
2 celery sticks, finely chopped
2 tablespoons olive oil
1/2 cup breadcrumbs
1/4 cup grated parmesan cheese
1 egg
salt and pepper
1 head escarole
1-1/2 cups chicken broth

Preheat oven to 375 degrees. Pour olive oil into a large sauté pan over medium heat. Add the chopped carrot, onion and celery. Sauté for 10-15 minutes, until soft.

Mix the ground chicken, breadcrumbs, parmesan cheese, egg and salt and pepper with the sautéed vegetables. Roll the mixture into meatballs.

Place the meatballs on a sprayed 9’x12” baking dish. Bake in the oven for 35-40 minutes, or until the meatballs start to turn a golden brown.

While the meatballs are baking, you will prepare the escarole. Start by thoroughly washing the escarole. Chop off and discard the bottom portion of the escarole head, keeping the loose leaves. Place the leaves in a pot of boiling water, and boil them for 10-15 minutes. You want to soften the leaves to make them pliable enough to wrap around the meatballs.

Once the meatballs are done baking, let them cool long enough for you to be able to wrap them with the escarole. Carefully wrap a few leaves around each of the meatballs, placing the meatballs back into the baking dish. Pour the chicken broth over the chicken meatballs, then return the baking dish into the oven. Bake for an additional 30 minutes. 

Remove from the oven. Plate the meatballs and drizzle the broth over the meatballs before serving.

Share

Beans and Greens Stuffed Peppers

October 11, 2018 Appetizer, Entrees, Menu, Salads No Comments

Stuffed peppers are a very popular and hearty dish that could be prepared in a number of tasty ways. On this food blog alone, you could find quite a few stuffed pepper recipes from previous posts, including ground turkey and rice stuffed peppers, crab-stuffed bell peppers, stuffed peppers and eggs, grilled Mediterranean stuffed peppers, and Aunt Tina’s stuffed peppers recipe, which uses an old world bread style stuffing that may be my favorite stuffing recipe of all time (links to all of these recipes can be found at the end of this post).

Because I have been experimenting lately with recipes that are heart healthy, yet still bursting with flavor, I decided to use a modified version of a beans and greens recipe as pepper stuffing. Beans and greens – which is another rustic and flavorful classic – could also be prepared in a number of ways, using various ingredients. Just the greens alone could take you in a number of directions. Spinach, escarole, mustard greens, Swiss chard and broccoli rabe will all work well. I’ve selected kale as my green for this go-around, but you could substitute it with any of the above mentioned, or any other favorite leafy green of your choice. For the beans, I’m using canned garbanzo beans. Cannellinni beans (or white kidney beans) would be my second choice for this dish. If you are up to the task, you could purchase and prepare fresh garbanzo or cannellini beans, but you’ll need to set aside some time to have them ready to roll for this dish. You can check out various methods on how to prepare fresh beans by clicking here.

What I really like about this recipe is that it starts off very basic, and is accommodating to many diets. Just a few spices and seasonings are enough to give it real taste and flavor. I added some cooked quinoa to the fold, and I’ve also decided to kick things up a bit by adding some bacon to the mix and sautéeing the beans and greens in a bit of the bacon grease for some real flavor. Of course, you could eliminate the bacon portion if you do not want to add meat to the recipe. But if you are looking for some knock-down flavor, I suggest you give it a try. Shrimp would also be a nice addition if you wish.

Instead of removing the cap of the bell pepper and stuffing it from the top, I went with halving the peppers length-wise, so that the peppers could sit flat on the dish. Not only does it make for nice presentation, it also makes stuffing the pepper a bit easier…and less messy to eat!

No Peppers? No Worries!

If you are not a fan of peppers, or maybe just don’t have any on hand, I suggest you still give this stuffing recipe a try. It would work fabulously served over pasta, or even just served on its own as a warm salad.

Whichever ingredients you decide to incorporate, or whichever method you decide to serve it, I can guarantee you that this recipe will leave you stuffed and satisfied.


Beans and Greens Stuffed Peppers

4 bell peppers (your choice of color), cut in half length-wise with membrane and seeds removed
*4 oz pancetta, diced, or 4 slices of thick cut bacon, cut into small pieces
1 small onion, diced
1 15 oz can cannellini or garbanzo beans
8 ounces of kale (or your preference of leafy green)
olive oil (if needed)
1/4 to 1/2 cup chicken broth (if needed)
salt and pepper
shredded cheese for topping (optional)

* If you prefer not to use pancetta or bacon in this recipe, simply start by sautéeing the onion in olive oil. Other additional ingredients that would work well with this filling are cooked quinoa, rice or other grains (approximately 1/2 cup cooked). You could also sauté shrimp before adding the beans and greens to the mix.

Also, you could prepare the filling ahead of time. Simply refrigerate until ready to use.

Preheat oven to 400˚.

Sauté pancetta or bacon pieces in a large pan over medium heat until crispy and fat is rendered, about 7-10 minutes. Remove pancetta or bacon and set aside.

Add onion to rendered fat in the pan (or start with olive oil if you are not using pancetta or bacon grease), sauté until onions are soft and translucent (add additional olive oil if needed). Add beans, stir together, cook until heated.

Add the kale, stir together. You can add 1/4 to 1/2 cup of chick broth if needed, to help cook down the kale. Season with salt and pepper to taste. If you are using the pancetta or bacon, you will not need to add much additional salt for taste.

Once the kale is cooked down, add the pancetta or bacon back to the pan.

While the stuffing is heating up, prepare your peppers by slicing them in half lenght-wise and scooping out and discarding the seeds and membrane. Place the peppers in a baking dish (open side up), and carefully stuff each of the peppers with the stuffing. Cover with foil and bake for 30 minutes.

Carefully remove foil, top the peppers with some shredded cheese (optional), and place back into the oven uncovered for an additional 15 minutes.

Serve and enjoy!

The beans and greens, heated up and ready to be used as a stuffing, a topping on pasta, or as a warm side salad.

The peppers….stuffed, baked and ready to be enjoyed.

Previously featured Stuffed Pepper recipes:

Ground Turkey and Rice Stuffed Peppers
Crab-stuffed Bell Peppers
Stuffed Peppers and Eggs
 
Grilled Mediterranean Stuffed Peppers

Aunt Tina’s Stuffed Peppers

Share

Grilled Zucchini Caprese Bites

July 13, 2018 Appetizer, Menu No Comments

There is nothing quite as satisfying as a simple recipe that uses basic and fresh ingredients, which then produces an amazingly enjoyable dish. The recipe that I’m sharing with you today fits perfectly into this category. Because it can easily be prepared on the grill, it also qualifies as a summer must-have!

One of my all time favorite dishes is the classic Caprese Salad. How the fresh basil, slices of tomato and fresh mozzarella complement each other is pure mouth-watering bliss. One of my favorite vegetables, especially during the summer grilling season, is the zucchini. With just a splash of olive oil, salt and pepper, and maybe a dash of garlic powder, you have a tasty and healthy vegetable dish that works well with just about any meal served up on the grill. By combining the ingredients of a Caprese Salad with sliced zucchini, you end up with a four-star appetizer that just about anyone will enjoy. You could almost pass it off as a healthier version of a mini bagel bite…now who in their right mind would turn THAT down?!?

Now, before we go any further, I do highly suggest that you use either a grill mat or a grill tray for this recipe. Flipping zucchini slices on a traditional grill grate is always a bit of a gamble, and I would hate to have you drop a few slices between the grate openings into the fiery pit below…and yes, it will happen.

The ingredients are very simple, and can easily be adjusted to accommodate additional servings.
We are going to start with the following:

  • 1 large zucchini, cut into 1/2″ slices (you should get about 15 or so slices)
  • 12-15 cherry tomatoes, sliced (you may need to use more than one slice of tomato per zucchini slice, depending on the size of the zucchini slices)
  • fresh mozzarella, cut into small pieces that will fit on top of the zucchini slice (a container of mini mozzarella pearls found in the gourmet cheese section of your grocery store work well)
  • 15-20 fresh basil leaves (depending on how many zucchini slices you have)
  • olive oil
  • salt and pepper
  • garlic powder

Warm your grill to medium-high, and prepare to cook over direct heat. Again, although it is not mandatory, I highly suggest that you use a grill tray or a grill mat instead of cooking the zucchini slices directly on the grill grates. You could also use a sheet of aluminum foil. Whatever surface you are using, be sure that the surface is lightly sprayed or oiled to avoid the zucchini from sticking.

Lightly brush each of the zucchini slices with olive oil, then season each slice with a bit of salt, pepper and garlic powder. Place the zucchini slices, seasoned side up, on the prepared grill area. Let the zucchini cook for about 5-7 minutes, or until the bottom of the slices start to brown, adjusting the flame as needed.

Carefully flip the zucchini slices, making sure that none drop through the grill grates. Top the zucchini slices with a piece of basil, a slice or two of tomato, and a piece of fresh mozzarella.

Let the zucchini cook for another 5-7 minutes, or until the cheese starts to melt.

Carefully remove the zucchini slices. Season with additional salt if necessary. Serve and enjoy!


Oven-baked Version

You can easily prepare this dish in the oven as well. Pre-heat your oven to 400˚. Place the zucchini slices on a lightly sprayed or parchment lines cookie sheet. Bake for 5-7 minutes (no need to flip the zucchini when baking in the oven). Top with the basil, sliced tomato and fresh mozzarella. Bake for another 7-10 minutes, or until the mozzarella starts to melt. You can also go with a more traditional pizza-inspired taste by using sauce, shredded mozzarella, oregano and sliced pepperoni as your topping.

Share

Archives

powered by
Socialbar