Recent Articles:

Amatriciana Sauce

This week I’m highlighting a fantastic post from my favorite fellow food blogger, Una Mamma Italiana. It’s been a while since I’ve had the pleasure to share one of Una Mamma’s recipes with you. What better way to welcome her back to my blog that with a delicious rustic sauce that incorporates pancetta! Check it out and enjoy! And be sure to visit the Una Mamma Italiana for many more amazing recipes!
– Dom

Since I started blogging at Una Mamma Italiana over 3 years ago, I’ve noticed that readers really love the sauce recipes. Whether its my family recipe for Sunday Gravy, Vodka Sauce or Arrabiatta Sauce – these sauces are classics that can usually be made with minimal effort and a big wow factor.

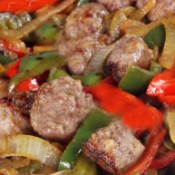
Here is another classic Italian sauce recipe that boasts the amazing flavor of Pancetta! It gets its name from the town of its origin, Amatrice (a super small town in Northern Lazio. We’re talking central Italy, here – the countryside that literally divides the North from the South.) It is a very rustic style sauce.

Pancetta is Italian bacon that is cured with all kinds of salt and yummy spices. It is most often used in recipes for the flavor you get from the fat (who doesn’t love cooking in a good fat!?) on the meat. Some “Med-E-Gones substitute regular bacon in recipes such as these. I guess you could do the same, but then you run the risk of breaking my heart (and the hearts of Italians everywhere).

AMATRICIANA SAUCE
3 TB e.v.o.o.
2 oz. pancetta, finely cubed
1 med onion, minced
1 TB minced garlic
pinch of dried oregano
1 can whole peeled tomatoes, chopped or hand crushed
1/2 tsp (to start) curshed red pepper flakes (adjust to your liking)
1 TB julienned fresh basil leaves
salt & pepper to taste

Start with only 2 TB of the olive oil. Use it to brown the pancetta. Once browned, add the onions and garlic, saute over medium heat until soft. Stir in the oregano, hot pepper flakes, and the tomatoes. Bring it to a boil. Simmer until sauce has thickened a bit (around 30 minutes)

At the end, stir in the basil leaves and add more hot pepper/salt/pepper as needed. Stir in the remaining TB of olive oil until emulsified.

Toss with your favorite pasta and top with lots of yummy grated pecorino romano cheese! (my fav) And MANGIA!!

Share

Baked Sausage and Peppers

November 5, 2011 Entrees, Menu No Comments

Of all the different dishes that I’ve made over the years, it’s the the traditional, simple comfort foods that I still enjoy making the most. Italian soul food – as my good friend Lorraine Ranalli fondly calls it – has been the staple to many Italian-American households for generations. Hearty dishes like pasta and peas, potato and eggs, peppers and eggs, [fill in the blank] and eggs, giambotta…they all bring a smile to my face and a craving to my belly.

This week, I’m sharing a recipe for one of the most famous and versatile Italian comfort foods, Sausage and Peppers. Traditionally, this is a dish that is cooked on the stove top in a frying pan. Although Italian sweet or hot sausage are the most common sausage used, any kind of sausage that you prefer will work well. One of my favorites to use is a chicken sausage  from Tori’s butcher shop. The BEST! Just fry up the sausage links (whole or sliced), add some chopped onions and peppers to the mix halfway through cooking, and voila, peppers and sausage.

I’m gonna put a slightly different spin on this classic dish by baking it in the oven. I prefer the baking method because it’s less oil (pork sausage will create some very tasty juices in the oven), and it frees up some time for you. Because you want the sausage cooked throughout (no pink inside), you’re looking at a good hour of baking in the oven, especially if you’re using a pork sausage. You’re also combining all ingredients at once, so all of the flavors marry together and there is no stirring or mixing needed.

You’re going to have a decent amount of juice in the baking dish once it’s done, and you have a few options on what to do with the juices:
• you can serve the sausage and peppers it in its juices;
• you can drain or extract the juice with a baster;
• you can let the dish bake uncovered for a few extra minutes to allow it to dry out a bit;
• or as I like to do, you can add some Italian seasoning and a few tablespoons of sauce/gravy, mix it in and let it heat for a few minutes.

Once done, you can serve it as a side dish, as a topping on pasta, or my personal favorite…..on a crispy Italian roll with provolone cheese and greens.

Whichever method you prefer, it’ll be a guaranteed delicious and enjoyable meal.

BAKED SAUSAGE AND PEPPERS

1lb sausage, cut into pieces
4 bell peppers (red and green work best, you can mix them up)
1 large white onion, chopped

(optional ingredients)
1 tbspn Italian seasoning
2-3 tbspn red sauce/gravy

Preheat oven to 400˚. Place sausage, peppers and onions in a baking dish, mix, cover with aluminum foil. Bake for 60-65 minutes, until sausage is completely cooked. You can serve in its juices, drain the juices, or add the optional ingredients and allow to cook for another 5-10 minutes.

Serve as a side dish, on top of pasta or in a crispy Italian roll topped with provolone cheese and greens.

Share

Pumpkin Recipes Part 2: Coffee Can Pumpkin Bread

October 23, 2011 Menu 1 Comment

One of my favorite projects that I remember doing when I was kid (aside from restoring an old bike and building monster models, that is), was making pumpkin bread in a coffee can. We did this as a Campfire project, and sold the loaves at our school’s Christmas Bazaar. I remember finding this to be so much fun because not only did I love pumpkin bread, but we got to make it in a way that didn’t seem ‘cutesy’ or ‘girly’. Normally, my friends and I would just use a coffee can to kick around the street and chuck pennies into. But now, we were allowed to crack eggs, mix it into a goopy batter, pout it into the cans and load ’em into this big, monstrous industrial oven in the school hall’s kitchen. We were like 8-year old mad scientists!!!

Pumpkin bread can be very versatile. Dry, moist, raisins, nuts, chocolate chips or coconut shavings….the choices are endless! While doing research for this post (and every variety that just mentioned was easily found), I came across a great recipe for coffee can pumpkin bread at a nice food blog called The Dutch Bakers Daughter. Cathy, the owner of the blog, not only allowed me to share her recipe, but was also gracious enough to allow me to use her coffee can photos as well. Thank you, Cathy!

Although coffee can pumpkin bread tastes almost the same as a traditional loaf, the coffee can method does offer is a really nice presentation. You get a perfectly rounded loaf with neat little grooves around the sides (this was the big selling point at the Christmas bazaar – the perfectly round loaves of bread). The coffee cans also make for great storage…just pop the lid back onto the can and you can store them in the freezer for future usage! It’s also a fun and nostalgic project to do with your kids this time of year.

If you do decide to give coffee can pumpkin bread a try, there are a few precautions that you should be aware of:

1. Use the proper type of coffee can
You want to make sure that you are using a steel coffee can. Years ago, when baking bread in coffee cans was more common, the cans were made of steel. Some of today’s cans are made of aluminum, and may have a coating on them that is not healthy to digest. And of course the plastic containers will melt in the oven. Steel cans are the way to go.

2. Prepare the can
In order for the baked bread to slide out of the can, there has to be no lip on top of the can. If there is, you can use a can opener to remove it. Once you are done doing that, smooth out the edges with a brillo pad. Then make sure to thoroughly wash out the cans and let them dry. Be sure to flour and grease the cans before adding the batter. Fill the cans no more than 2/3 full, to assure that there is no overflow when baking. You can also check out the following video on how to prepare the coffee cans for baking: http://www.youtube.com/watch?v=4nA8fVAGWoU

3. Don’t forget oven mits!
Just like a traditional pan, the coffee can will be hot when done baking. Be careful when removing it and let it sit until completely cooled. Do not place the lid back onto the hot can until it is cooled.


COFFEE CAN PUMPKIN BREAD
Recipe and photos courtesy of The Dutch Baker’s Daughter
(click here for the original post)

Ingredients
1 1/2 cups brown sugar
1 1/2 cups granulated sugar
4 eggs
1 (16 oz) can pumpkin
1 cup oil
1/2 teaspoon cloves
4 teaspoons cinnamon
1/4 teaspoon ginger
2 teaspoons nutmeg
1/4 teaspoon mace
1 1/2 teaspoons salt
2 teaspoons baking soda
2/3 cup water
3 1/2 cups flour

Directions
Preheat oven to 350 degrees F.
Grease and flour 4 (1 lb) coffee cans (may substitute 3 loaf pans or 6 mini-loaf pans)
Mix all ingredients in a large bowl until well blended.
Divide the batter between the 4 coffee cans.
Bake for 1 hour or until the tops spring back when touched.
Allow bread to cool for 10 minutes before removing from cans.


Share

Pumpkin Recipes Part 1: Pumpkin Ravioli & Penne with Pumpkin Cream Sauce

October 9, 2011 Menu No Comments

Now’s the time for all things pumpkin to make its way into my kitchen. Everything from pumpkin coffee, bread, muffins, pies, spices, soup, ice cream, and of course beer….you name it and I’m a sucker for it. Over the next few weeks I’m going to share some pumpkin recipes that are fantastic for this time of year, starting this week with two pasta dishes!

One of the most popular dishes that you’ll often find in restaurants this time of year is pumpkin ravioli. If you have a pasta machine at home, ravioli is fairly easy to make (see instructions below). Last week I decided to make pumpkin ravioli with a pumpkin cream sauce. I researched and made a really good ravioli filling, and then put together a delicious pumpkin cream sauce that was just what I had in mind.

Everything was cooked and ready to go, which led to my sad discovery….yes, Virginia, there is such a thing as too much pumpkin. It wasn’t that the pumpkin taste was too overwhelming. The problem was that I couldn’t tell where the sauce ended and the ravioli began! Your pasta and sauce should compliment each other, while at the same time allowing each one’s character to shine through just enough to appreciate them on their own. Unfortunately, while both the ravioli and sauce tasted fantastic on their own, their tastes were too similar and it was too much of a battle for center stage when served together.

The good news is that there is also such a thing as happy mistakes, and this could very well be my happiest. The pumpkin cream sauce was absolutely delicious, and while it may have been too much for the ravioli, it works beautifully served over penne! If you are looking for a good pumpkin pasta dish, my first recommendation is the penne with pumpkin cream sauce. The ingredients are simple, and there’s not much time or effort needed to prepare this meal. If you do have more time on your hands and are in the mood to roll and stuff your own ravioli, then you can’t go wrong with the pumpkin ravioli. I suggest serving it with Mario Batalli’s Brown Butter and Sage Sauce.

So there you have it, folks….two delicious pumpkin pasta recipes.  Next week, I’ll be sharing a classic pumpkin treat, Coffee Can Pumpkin Bread! You can also check out my Pumpkin Amaretto Risotto recipe that I posted last year, and is now part of our annual pumpkin rotation.

 PENNE WITH PUMPKIN CREAM SAUCE

2 tbsp butter
2-3 tspn flour
1/4 tspn cinnamon
dash of nutmeg
1/4 tspn salt
*3/4 cup milk
1/4 cup pumpkin puree
1 tblspn parmesan cheese

*Note – this recipe calls for milk. No whipping cream necessary. I actually had good results with vanilla soy too!

Melt butter in a small saucepan over medium heat. Add 2 tsp flour to melted butter and stir to make a liquidy roux. Stir in cinnamon, nutmeg, and salt. Cook for 30-60 seconds.

Turn heat to low and whisk in milk, whisking until there are no lumps. Stir in pumpkin puree and parmesan cheese until well-incorporated. Cook on low stirring frequently for 5-8 minutes or until thickened to desired consistency. Yo can add the additional tspn of flour to thicken up if needed. Be sure to whisk in until all lumps are gone.

Drizzle over 1/2 lb cooked penne, making sure not to oversaturate the pasta with the sauce. Top with a sprinkle of nutmeg.


PUMPKIN RAVIOLI

Filling
1 cup pumpkin puree
1 tsp cinnamon
1/2 tsp nutmeg
1/8 tsp ground ginger
Pinch of sea salt
1/4 cup ricotta cheese

Basic pasta dough recipe
(click here for recipe)

Prepare and roll out pasta dough according to directions in above link. After rolling out pasta dough, combine and mix all filling ingredients in a bowl.

When pasta is rolled out, place one sheet of dough on piece of wax paper.

Mark the dough where you will be making the ravioli cuts. Place 1 tablespoon of filling in the center of each expected cut. Place a second sheet of dough on top (you may need to lightly brush the second sheet with an egg wash if the dough has dried out to help the sheets stick together). Press out the ravioli with a ravioli cutter. Continue to do this until all sheets are used. Dust the prepared ravioli with flour to avoid sticking. Bring a large pot of salted water to a boil. Gently add the ravioli to the water and cook 4-5 minutes.

Serve with Mario Batalli’s Brown Butter and Sage Sauce.

Share

Archives

powered by
Socialbar