Recent Articles:

Spicing It Up With Tajín!

March 23, 2018 Menu No Comments

I’ll admit that when it comes to cooking with herbs, spices and seasonings, I am not very adventurous. Because my cooking forte is Italian American, I tend to stick with the basics: basil, oregano, parsley, sage, rosemary and thyme – using fresh herbs whenever possible, or Litehouse freeze-dried herbs (which are available in the produce section…and which I highly recommend) when fresh herbs are not available. When it comes to adding a little heat to a recipe, I’ll add a pinch of crushed red pepper flakes, a light sprinkle of cayenne, or even a dash of Frank’s Hot Sauce (which I personally prefer over the more trendy Sriracha sauce). It’s not so much of a spice tolerance issue, I just always felt that adding too much heat would masquerade the flavor of the recipe itself, not allowing me to enjoy the dish for what it is.

Recently, however, I came across a spicy seasoning that added just enough heat, with an additional zesty kick. I found it to be both interesting and pleasing to my palate, it has since found a place in our kitchen spice rack, and has been put to use quite often. Ironically, this spice has no direct link to Italian American cooking. But, with a little creativity and versatility, this spices has added a fresh and vibrant accent to many of our favorite dishes.

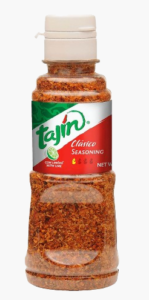
Tajín (pronounced ta-heen) Clásico Seasoning is a blend of roasted red chile, salt and dehydrated lime juice. It is a popular Mexican seasoning powder, that is also known in Spanish as salsa en polvo, which translates to salsa powder, The taste, as you could probably imagine, is a combination of spice, tang and citrusy zest. Think of it as a combination of paprika and the flavoring on a lime tortilla chip. In its native country, the spice is sprinkled liberally over fruits and vegetables to enhance their flavor to a whole new level.

The spice was introduced to my wife and I through our good friend John, whose mother is of Mexican descent. He used the Clásico Seasoning as an accent on grilled corn on the cob. The spice added such a nice zip…it was like sprinkling a little bit of magic on the corn! My mission right away was to find my own jar of this zesty spice. Unfortunately, it is not commonly available in your regular grocery store. However, you can find it in specialty shops, and it is available on Amazon, which is where I made my purchase. We use it not only on corn, but also as a seasoning for potatoes, fish, chicken, fresh cut melon, cucumbers, and eggs.

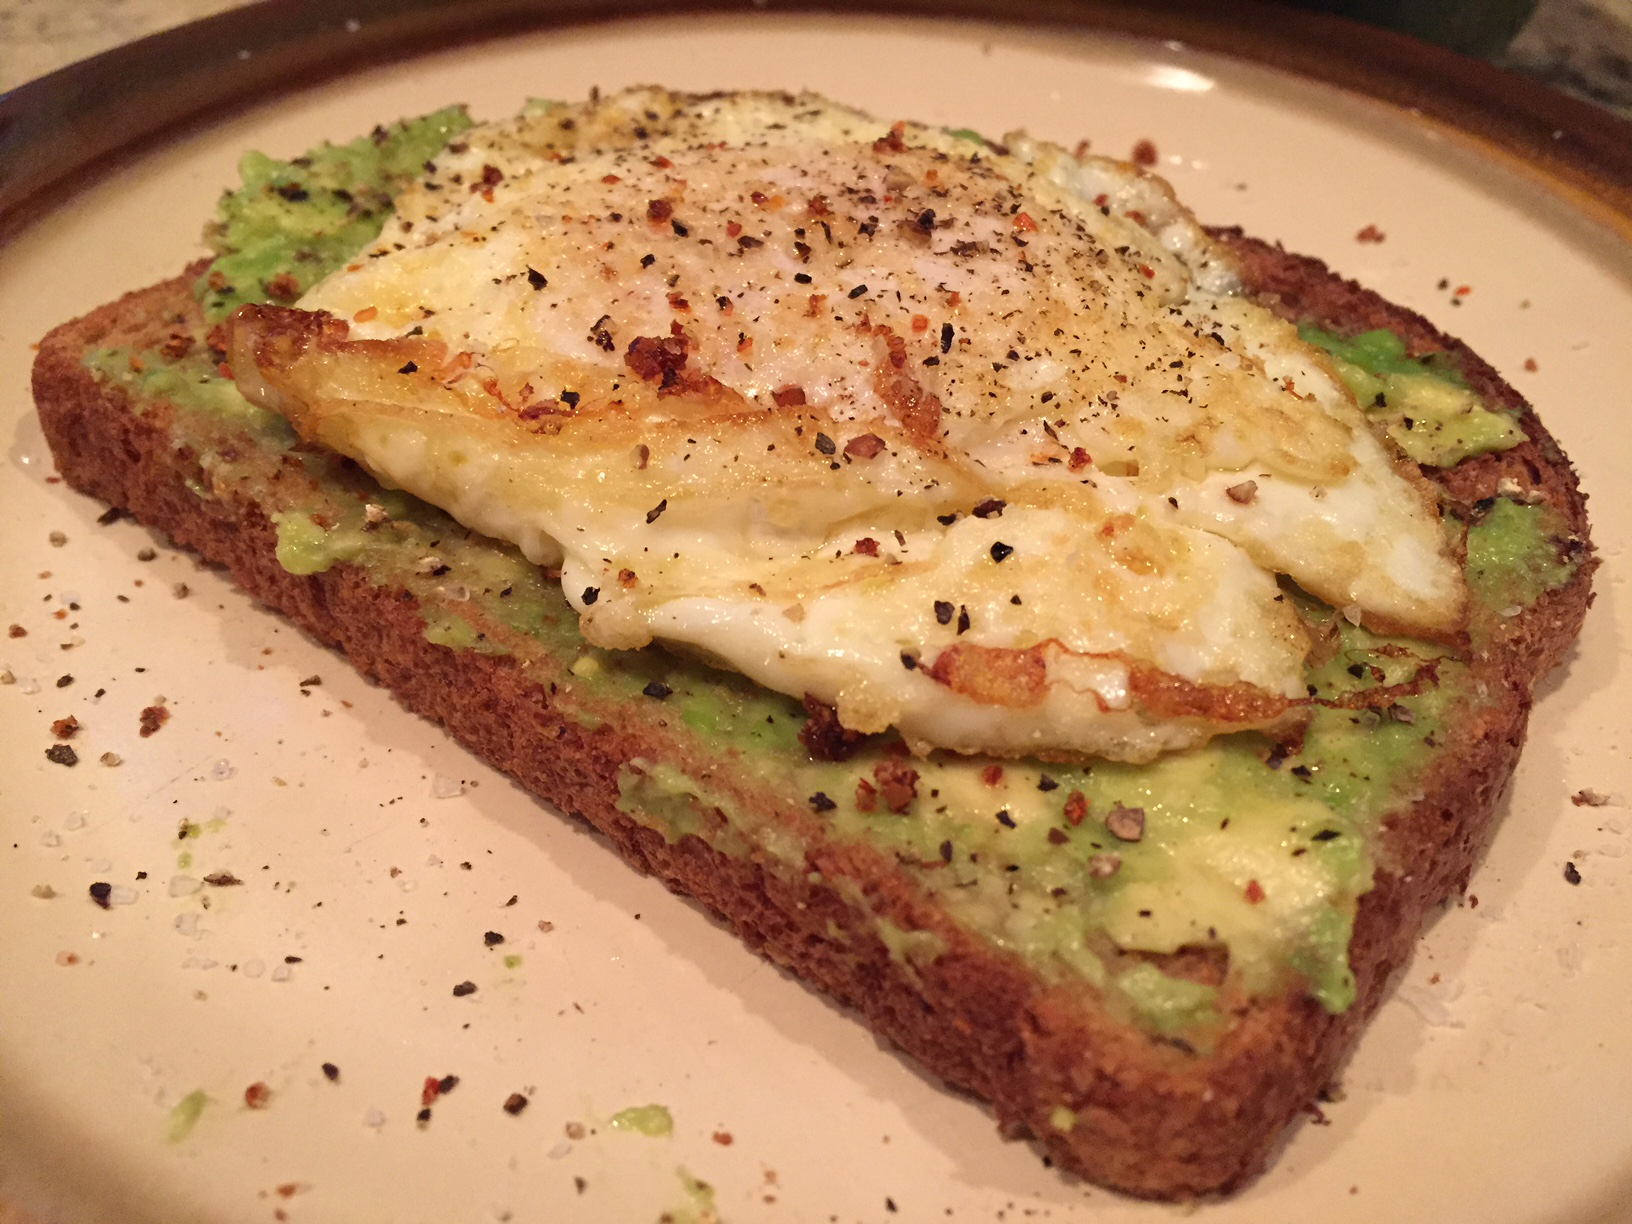
Below is my recipe for Spiced Fried Egg and Avocado Toast, which has become a breakfast staple in our household. Avocado Toast on its own is a tremendous breakfast treat. The addition of the fried egg and the Clásico Seasoning elevates it to a level of pure bliss. Even if you want to leave the egg out, just a dash of this miracle spice on Avocado Toast makes for a perfect start to the day!

To order your jar of Tajín Clásico Seasoning, click here!

To check out the variety of Litehouse freeze-dried herbs (available in your grocery store’s produce section), click here!


Spiced Fried Egg and Avocado Toast

1 slice of bread (wheat or white preferred)
1/2 ripe avocado
1 egg
olive oil
sea salt and fresh ground pepper
Tajín Clásico Seasoning

Step 1: Preparing the Egg
Drizzle one tablespoon of olive oil into a heated medium size non-stick skillet, until the oil starts to shimmer. Add the egg to the pan, let it cook until the edges are golden brown. Slightly tilt the pan, and carefully spoon the hot oil over the egg whites. Let the egg cook for an additional minute or so. The longer the egg cooks, the harder the egg yolk will be…however, I personally prefer having the yolk just a bit runny for this dish. You could also flip the egg if you prefer it to be sunny-side down.

Step 2: Preparing the Toast
While your egg is cooking, toast up the slice of bread until golden brown. Spread the avocado on the toast, then lightly drizzle with olive oil, and season with sea salt, pepper and Tajín Clásico Seasoning.

Remove the egg from the pan, slide it on top of the avocado toast. Season the egg with additional salt, pepper and Tajín Clásico Seasoning.

Share

Nutella and Mascarpone Stuffed French Toast

March 7, 2018 Entrees No Comments

Another Nor’easter in the Philadelphia area…another day spent indoors, figuring out what to eat next. If you’re stocked up on the snowstorm essentials (bread, eggs and milk), try giving this decadent recipe a shot. With just a few additional ingredients (sliced fruit of your choice, and my two favorite Italian spreads, Nutella and Mascarpone), this breakfast beauty will be sure to add a little sunshine to yet another dreary winter’s day!


Nutella and Mascarpone Stuffed French Toast

Makes 3 stuffed sandwiches
6 slices of bread (white or wheat are preferable)
sliced fruit (my personal choices are banana and strawberries)
Nutella (any other brand of hazelnut spread will work)
Mascarpone cheese (you can also use cream cheese)
1 egg
1 teaspoon vanilla extract
1/2 teaspoon ground cinnamon
1/4 cup milk

Start by lightly toasting the bread (it helps hold the sandwich together). Spread one piece of the toast with Nutella, spread another piece with Mascarpone cheese. Add the fresh sliced fruit to the two pieces of bread to make a sandwich. Repeat with the other four slices of bread and remaining fruit.

Mix together the egg, vanilla extract, cinnamon and milk. Dip the sandwiches into the egg batter.

Cook the sandwiches on a lightly greased medium hot skillet or griddle until golden brown on both sides. Top with powdered sugar and serve with syrup on the side.

Share

The Kitchen’s Yogurt Pesto Dip

February 22, 2018 Appetizer, Menu No Comments

I always find it fun and exciting when inspiration for a new recipe comes my way while watching one of my many favorite food television programs. Most times, the recipes that I gravitate towards are ones that grab my attention for their simplistic ingredients and the flexibility of shaping them into my own little creations. However, a recent recipe that I saw on The Food Network’s The Kitchen had me both intrigued and perplexed.

Dapper-dressed tv chef and co-host Geoffrey Zakarian was mixing up a low-calorie, low-fat, low-cholesterol, heart-healthy party dip that called for only two ingredients….pesto and Greek yogurt. While I am a huge fan of both ingredients when used separately, the mere suggestion of the two distinctive tastes coming together as one had me stumped. Co-host Sunny Anderson’s reaction seemed just as confused as mine, but she quickly agreed that the combined ingredients made for a great, tasty dip. There was no turning back for me at this point.

Yogurt Pesto Dip: Take 1

The ingredients, as I mentioned earlier, are very simple: 1 cup plain Greek yogurt and 1/4 cup pesto (store bought is fine, home made is even better), with a bit of Kosher salt and fresh ground black pepper for taste. Geoffrey’s suggestion was to use full fat Greek yogurt. I understand that the full fat variety would offer more texture and richness to the recipe, however finding a single serving cup of full fat Greek yogurt can be a challenge. Usually you would have to buy the full fat plain variety in a large quart size container. Whenever I eat Greek yogurt, I opt for the fat-free variety. To avoid having a container of leftover full fat Greek yogurt on hand, I decided to give the recipe a try by using the fat-free variety. The dip was very good. The balance of the zesty pesto and creaminess of the yogurt made for a nice, refreshingly tasty dip with a tart zip to it. But, as predicted, the texture was a bit thin. Adding some olive oil for additional flavor only made the texture even thinner.

Yogurt Pesto Dip: Take 2

Still not wanting to give in to the purchase of a full fat container, I decided to give the recipe a try with a 7-oz single serving container of 2% Greek yogurt. There was definitely a difference in texture. Much thicker and creamier, and again with the addition of a drizzle of olive oil and some Kosher salt and fresh ground black pepper…mmmm mmmm, good!!!

What I really like about this dip is its versatility. Not only are there lots of health benefits to it – the fresh herbs and healthy olive oil benefits in the pesto, and the proteins, calcium and probiotics found in the yogurt – there are also a number of ways that you can serve the dip. Sure, it serves well with chips and fresh cut vegetables. But it also worked amazingly well with baked potatoes, chicken and salmon. I’m sure it would even complement a nice steak…I just haven’t gotten to that yet.

So, if you are looking for a recommendation for a versatile, tasty and healthy dip…and if you are a fan of pesto and Greek yogurt…this is the one you have to try!


Yogurt Pesto Dip

Adapted from The Kitchen’s Yogurt Pesto Dip recipe

1 7-oz single serving container of 2% plain Greek yogurt
1/4 cup pesto (store bought or home made)
Kosher salt and fresh ground black pepper
1 tablespoon olive oil

Add the yogurt and pesto to a medium bowl and stir until fully combined. Drizzle in the olive oil. Add the salt and pepper to taste. Stir and serve.

Share

Game Day Taquitos

January 19, 2018 Appetizer, Entrees, Menu No Comments

Game time is here, and football fever is running rampant! Even if your beloved team didn’t make it to the playoffs, chances are that you will still be joining family and friends for fun food at a game day party.

As I’ve discussed in previous game day posts, the key to a successful party dish is to make it a quick hitter that is fun, tasty and easy to eat. The recipe that I’m sharing with you today tackles all of those requirements!

Taquitos are a Mexican dish that consists of rolled-up flour tortillas stuffed with a filling, and is crisp-fried. Think of it as a rolled-up taco. During one of our recent holiday gatherings, I decided to make my own version of taquitos, coming up with a few different filling options and choosing to bake the taquitos instead of frying them. Not only were they a big hit, they were also enjoyed by both adults and kids. Prep time (for the most part) was minimal, and the ingredients were tasty. Although the taquitos were served as a picky appetizer, they were filling enough and tasty enough to keep everyone satisfied and coming back for more. Hence, the perfect game day food!

The best part about taquitos is that you can get as creative as you wish with the fillings. While traditional fried taquitos use a flour tortilla, I found that the baked version works just as well with both flour and wheat tortilla shells. I’ve used both types of tortilla shells for my taquitos and and was happy with both versions. Listed below are a few of the fillings that I prepared, along with a few other filling suggestions that I think would work well. As always, I encourage you to get as creative as you wish.


STEP 1: THE FILLING

The key to a good taquito is the filling. So far, I have made two different types of taquito fillings: sautéed vegetables and chicken, cheddar and bacon. Both were able to be prepared ahead of time, and both worked well and were enjoyed by everyone.

For the sautéed vegetable filling, you will need the following:

2 tablespoons olive oil
1/2 cup chopped onion
1 clove garlic, minced
1 zucchini, finely chopped
1 yellow squash, finely chopped
1 red pepper, finely chopped
1 tablespoon chopped Italian parsley
1 teaspoon oregano
1 teaspoon dill weed
salt and pepper to taste
shredded mozzarella or cheddar cheese

Heat oil in medium skillet or wok over medium-high heat until hot. Add bell pepper, onion and garlic; cook and stir 2-3 minutes or until crisp-tender.

Stir in zucchini and squash; cook and stir 5-7 minutes or until tender.

Stir in herbs, cook until thoroughly heated. Season with salt and pepper to taste. Set aside to cool slightly. You will top the vegetables with the shredded cheese when you assemble the taquitos.


For the chicken, cheddar and bacon filling, you will need the following:

1/2 lb cooked and seasoned chicken breast, chopped (Perdue Short Cuts works well for this)

8-ounce package of shredded cheddar cheese

4-6 slices of cooked bacon, cut into small pieces


Other filling suggestions:

• steak, peppers and provolone

• meatballs and mozzarella

• seasoned chicken with blue cheese

• pulled pork, roasted red peppers and broccoli rabe

• marinated shrimp and scallops

….honestly, you can go any number of directions!

Regardless of what filling you prefer to try, one suggestion that I would make is to not make your fillings too wet. If you think that your fillings would go well with a sauce (say a marinara or a barbecue sauce), I would suggest that you serve those sauces as a side for dipping. Incorporating the sauces into the filling may make the tortilla shells soft and mushy, and they may not bake properly.


STEP 2: THE ASSEMBLY

Preheat your oven to 400˚.

As I mentioned earlier, I have used both flour and whole wheat tortilla shells and was very happy with the results of both.

To assemble your taquitos, lay a tortilla shell out flat, and place a 1″ strip of your filling down the middle. Tightly roll up the tortilla shell, as if you were rolling up a cigar.

Place the rolled tortilla shells seam side down into a lightly sprayed 9″ x 12″ baking dish. Medium-sized tortilla shells will work the best with a 9″ x 12″ baking dish. If you have larger sized tortilla shells, you can trim the rolled shells to fit into the pan. You will fit about 8 rolled shells into the pan.

Lightly spray the top of the shells. Place the dish, uncovered, into the oven. Bake for 20-25 minutes, or until the shells start to brown and crisp. Remove from oven, let cool for a few minutes. Remove from baking dish and cut the baked taquitos in half. Serve and enjoy!

Share

Archives

powered by
Socialbar