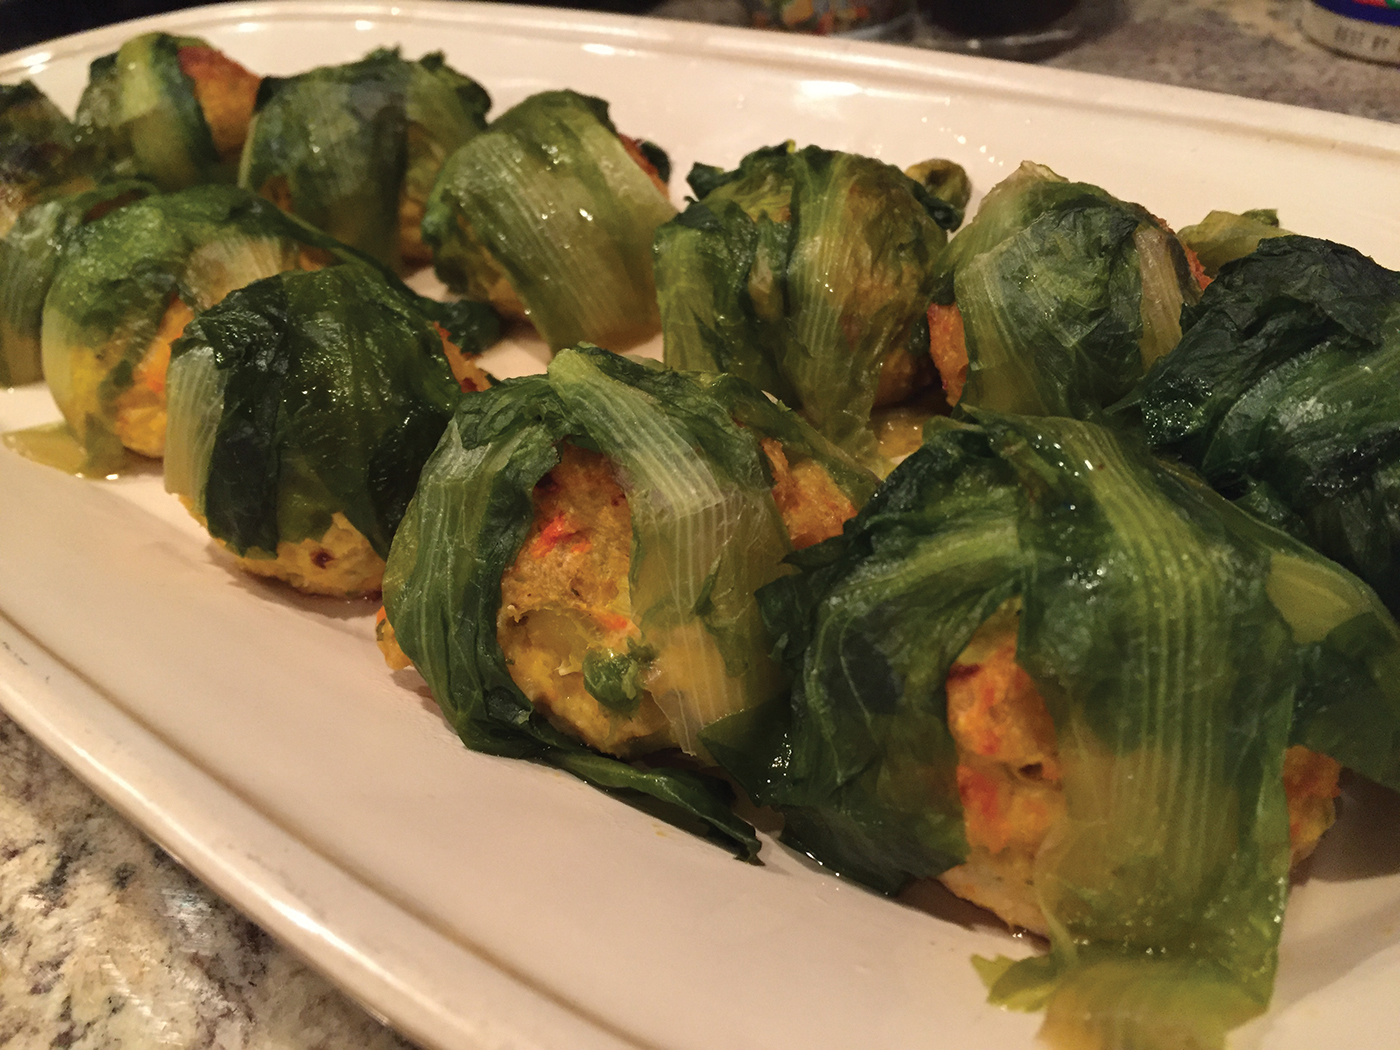
Escarole-Wrapped Chicken Meatballs

Growing up in an Italian-American family meant that most major holiday dinners would start off with a soup course. The soup of choice was most likely escarole soup, which is a chicken broth based soup containing carrots, mini meatballs and escarole, sometimes with the addition of acini di pepe pasta. You may also know this soup as Italian Wedding Soup, Italian Holiday Soup, or if you grew up in my old neighborhood you would simply call it S’cadole.
A few years back, when we started our mid-year Memorial Day Friendsgiving dinner tradition with our friends Chrissy, Carl and Lucas, I thought it would be fun to somehow incorporate the spirit and flavor of escarole soup into our menu without actually serving a bowl of piping hot soup on a seasonally warm early summer day. My solution to this was to compact all of the ingredients of the soup – sautéed carrots, celery and onions, chicken, meatballs, broth and escarole – and make a chicken meatball that was seasoned with the carrots, celery and onions, wrapped in boiled escarole leaves. This reimagined version of escarole soup was the perfect compromise for representing a traditional holiday dish during a not-so-traditional time of year.
Of course, this recipe is by no means intended to take the place of a holiday dish that is as traditional and enjoyable as escarole soup. Some traditions are just not meant to be tampered with. However, if you are looking for an alternative to a soup course – especially one that works well as an appetizer and also has the flavors of this traditional and classic soup – then this recipe is one that would work well for your holiday meal!
Escarole-Wrapped Chicken Meatballs
Serves 4-6
1 lb ground chicken
1 carrot, finely chopped
1 small onion, finely chopped
2 celery sticks, finely chopped
2 tablespoons olive oil
1/2 cup breadcrumbs
1/4 cup grated parmesan cheese
1 egg
salt and pepper
1 head escarole
1-1/2 cups chicken broth
Preheat oven to 375 degrees. Pour olive oil into a large sauté pan over medium heat. Add the chopped carrot, onion and celery. Sauté for 10-15 minutes, until soft.
Mix the ground chicken, breadcrumbs, parmesan cheese, egg and salt and pepper with the sautéed vegetables. Roll the mixture into meatballs.
Place the meatballs on a sprayed 9’x12” baking dish. Bake in the oven for 35-40 minutes, or until the meatballs start to turn a golden brown.
While the meatballs are baking, you will prepare the escarole. Start by thoroughly washing the escarole. Chop off and discard the bottom portion of the escarole head, keeping the loose leaves. Place the leaves in a pot of boiling water, and boil them for 10-15 minutes. You want to soften the leaves to make them pliable enough to wrap around the meatballs.
Once the meatballs are done baking, let them cool long enough for you to be able to wrap them with the escarole. Carefully wrap a few leaves around each of the meatballs, placing the meatballs back into the baking dish. Pour the chicken broth over the chicken meatballs, then return the baking dish into the oven. Bake for an additional 30 minutes.
Remove from the oven. Plate the meatballs and drizzle the broth over the meatballs before serving.