Home » ricotta » Recent Articles:

Baked Ricotta

February 13, 2022 Appetizer, Menu No Comments

If you are a fan of spreadable baked cheese appetizers, like a baked brie, then you must give baked ricotta a try! It’s a very simple recipe with just a few basic ingredients. The key to really making this recipe special is fresh herbs. The herbs that I prefer using are fresh thyme and oregano, along with grated parmesan for that slight nutty flavor, and salt and pepper to taste. This alone would work well as nice appetizer spread over crostini or used as a dip for crackers. But the real fun happens when you start to incorporate some toppings. Ricotta is a versatile cheese, compatible with fruits and vegetables, drizzles of honey or glazed balsamic, or additional fresh herbs. Anything from apples and strawberries, to tomatoes, sage and rosemary would all work beautifully. My personal favorites are crisped prosciutto, sun dried tomatoes and drizzled honey.

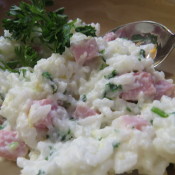
You can bake the ricotta in either one baking dish, or separate into three to four ramekin dishes. I’ve done it both ways and both work well. The baking dish may work better as a party appetizer, where your guests could help themselves. The ramekins offer more of a personalized touch that you can place out for two to three people to share at a time. Yo could also refrigerate any unused ramekins and reheat it when ready. For this post I am using three ramekins, but the recipe measurements will also work well in a small sized baking dish.

Baked Ricotta

1 16 ounce container whole milk ricotta
1 large egg
1/4 cup grated parmesan cheese, plus 1 tablespoon for topping
1 teaspoon fresh chopped oregano (or 1/2 teaspoon dried oregano)
1 teaspoon fresh thyme (or 1/2 teaspoon dried thyme)
1 tablespoon olive oil
Salt and pepper to taste

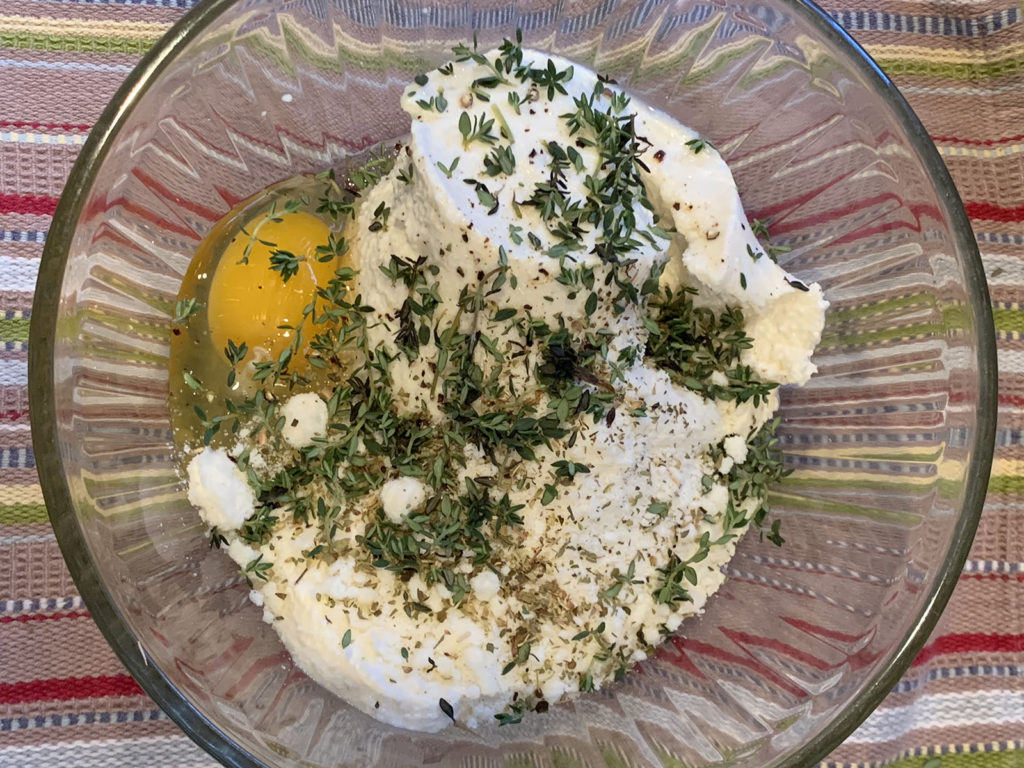
Preheat oven to 400 degrees. In a medium bowl, mix the egg, ricotta, 1/4 cup parmesan cheese, herbs and salt and pepper. Mix well.

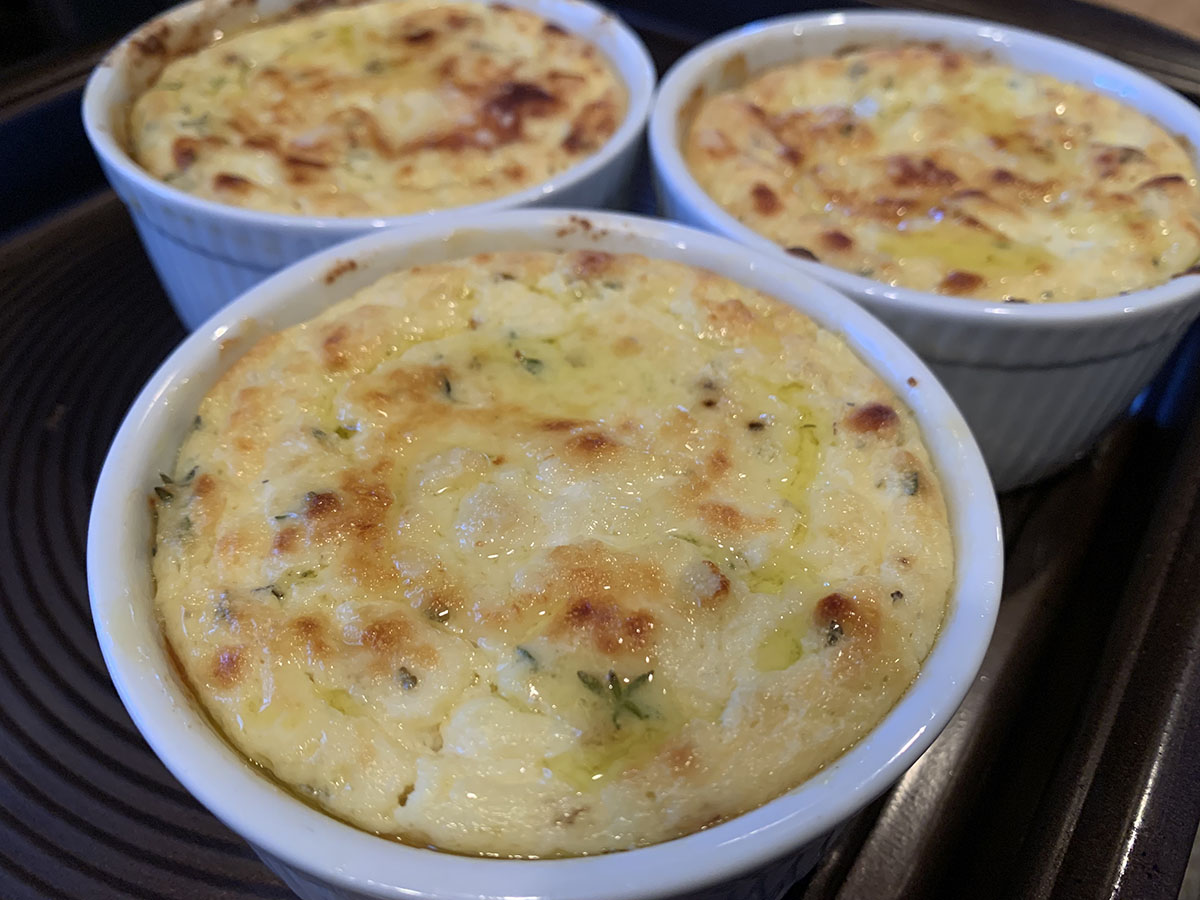
Divide the mixture between three to four ramekin dishes, or spoon it all into one baking dish. Sprinkle the top with the remaining 1 tablespoon of parmesan cheese. Bake for 30 minutes or until golden brown. Remove from oven and drizzle the top with olive oil. Serve warm with toasted crostini (see below) or crackers.

Toasted Crostini

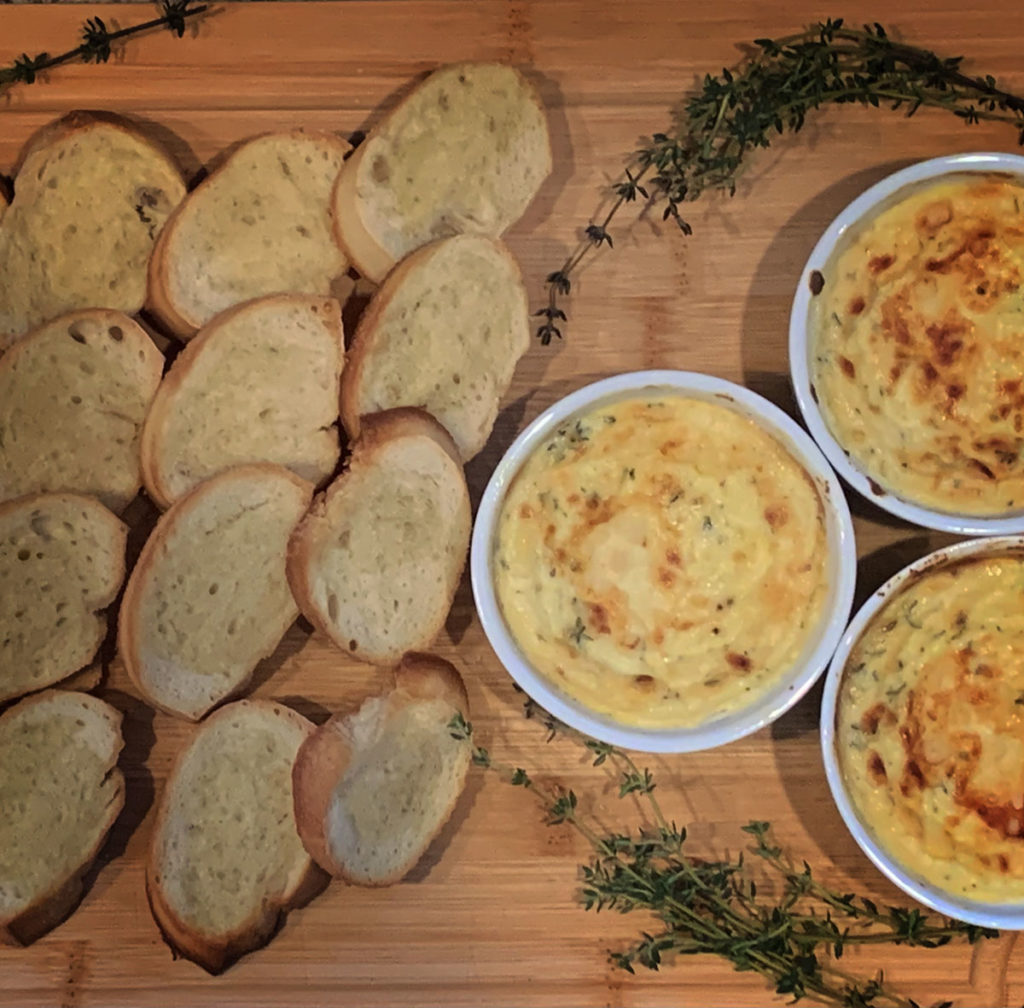
To prepare toasted crostini, slice a French baguette into 1/4 to 1/2 inch slices. Place the sliced bread on a baking sheet and lightly drizzle with olive oil. Place the tray in the oven during the last 15 minutes that the ricotta is baking. Remove when golden brown, making sure the crostini doesn’t burn. You can either plate the crostini loose, allowing everyone to add the baked ricotta spread themselves, or you can top the crostini with the ricotta before serving.

Crisped Prosciutto

One of my favorite toppings for baked ricotta is crisped prosciutto. Tear about 4-6 slices of prosciutto into pieces. Place the pieces onto a small baking sheet and place in the oven during the last 10 minutes that the ricotta is baking. Crisp it up to your liking, making sure it doesn’t burn. Spread the crostini with the baked ricotta, then top with a piece of prosciutto, or whatever other toppings you prefer! Pictured below are my favorite varieties: crisped prosciutto, sun dried tomatoes and drizzled honey.

Share

Home Made Ricotta Ice Cream

October 27, 2019 Menu No Comments

When I first came across this recipe, what immediately stood out me was the use of ricotta. Any recipe that uses ricotta is a winner in my book, and if it’s a dessert, I am all in! I was also intrigued by the fact that making this ice cream recipe was a no churn process (more on that in a bit). But let’s be honest, it was mainly the ricotta that inspired me.

Before we get into the recipe itself, let me explain to you the difference between this ice cream, which is a no churn ice cream, and a traditional home churned ice cream. Churned ice cream is made with an ice cream maker. The ingredients are mixed in a chilled bowl with a slow motorized whipping paddle, which helps create a creamy, light textured home made ice cream. We have an older ice cream maker in our house and use it every once in a while. It’s not difficult to use and makes a good ice cream, but the bowl has to be chilled in the freezer for a minimum of 12 hours prior to making the ice cream. The mixed batter then has to be frozen for a minimum of 6-8 hours before serving. Serious advanced planning is involved. I don’t have much information on newer ice cream machine models, so there may not be as much ‘hurry up and wait’ involved.

This recipe that I’m sharing is for a non churn ice cream, meaning there is no need to use an ice cream maker. An electric mixer or a hand mixer is the only appliance that you need. Sweetened condensed milk is also a key ingredient in no churn ice creams, which helps create the sweet, creamy texture. No churn ice creams will be thicker and more dense, but creamy and tasty nonetheless. There is also a quicker freezing time, approximately 5-6 hours. You will most likely have to let the frozen ice cream sit out for a few minutes before scooping because it will harden up more than the airier churned ice cream, but it will be worth the wait. Now that we took care of the scientific facts, let’s get on to the recipe.

I’ve read up on quite a few no churn recipes, and the one that I have decided to follow for the base ricotta ice cream recipe could be found at howsweeteats.com. The ingredients for this recipe are very simple: heavy cream, whole milk ricotta, sweetened condensed milk, vanilla extract and a pinch of salt to help with the freezing process. We also added chocolate chips to our batter for extra goodness. The ingredients get whipped up using a stand up mixer or a hand mixer. The batter gets poured into a freezer safe container (a non-stick loaf pan works well for this), and then 5-6 hours later you have a rich, creamy and decadent home made dessert that will impress all of your family and friends!

The basic ingredients for no churn ricotta ice cream.

If you are curious about how ricotta ice cream tastes, as I was before we made it, I would say that it is kinda-sorta in the cookie dough/cake batter class of ice creams, only not as sweet. You know those delicious Italian ricotta cookies, which are often served around the holidays with the light glaze and candied sprinkles on top? This is the ice cream version of those cookies.

The girls are hard at work mixing up the batter.

Home Made No Churn Ricotta Ice Cream

8 ounces cold heavy cream
16 ounces (2 cups) whole milk ricotta cheese
14 ounces sweetened condensed milk
2 tablespoons vanilla extract
1/2 teaspoon salt

Pour heavy cream into a mixing bowl and mix with hand mixer or electric mixer until stiff peaks start to form.

In a separate bowl, mix together the remaining ingredients until well combined. If you only have one mixing bowl to work with, remove the whipped cream and set it aside, reusing the bowl for the remaining ingredients.

Once all ingredients are well mixed, fold in the whipped cream. Pour the combined batter into a freezer-safe container. A loaf pan works well, or you can purchase ice cream containers online or at your favorite kitchenware store.

Freeze for 5-6 hours. If the ice cream is too hard to scoop, let it sit out at room temperature for a few minutes before serving. Scoop and enjoy!

Cannoli Ice Cream

To give this ice cream a cannoli flair, add a teaspoon of powdered sugar and a dash of cinnamon to the whipped cream, then add a half cup of mini chocolate chips, half cup of chopped pistachios and a half cup of crushed cannoli shells to the batter before freezing. If you cannot find cannoli shells, you can use crushed graham crackers or crushed sugar ice cream cones.

Pumpkin Ricotta Ice Cream

There are two approaches that you can take to making Pumpkin Ricotta Ice Cream. You can simply give a pumpkin spice taste to the ice cream by adding either 1 teaspoon of pumpkin pie spice OR one half teaspoon of cinnamon, one quarter teaspoon of nutmeg and one eighth teaspoon of allspice to the batter. Or if you are a pumpkin purist, you can add one half cup of pumpkin puree to the batter along with the spices. Be sure to reduce the ricotta by one half cup to compensate for the addition of the pumpkin puree.


Share

Raspberry Lemon Love Cake

May 18, 2018 Dessert No Comments

NOTE – this is not a light and fluffy cake recipe. The texture of any Love Cake will be a bit heavy and somewhat moist from the ricotta…and it is damn good!

Italian Love Cake has been a part of my Mom’s Easter pie tradition for many years. Made with layers of chocolate cake and ricotta filling with a chocolate whipped topping, this rich and decadent dessert never disappoints. What is really fascinating about this dessert is the assembly. The cake batter is poured into the pan first, then topped with the ricotta filling. As it bakes, the ricotta sinks to the bottom, raising the cake batter to the top, so both layers are accented with each other’s flavor during the transformation process. Pure magic!

Recently, I watched Valerie Bertinelli make a strawberry lemon version of Love Cake, using a strawberry cake, ricotta and mascarpone filling, and a lemon mascarpone whipped topping. With the warmer weather heading our way, this sounded like the perfect dessert for a summer party. However, I decided to give this dessert my own little spin, and with a few ingredient swaps and some additional attention given during the baking process (more on that in a bit), I am happy to say that the cake turned out exactly as I had hoped!

Instead of using Valerie’s strawberry and lemon combination, I opted for raspberry and lemon, which happens to be one of may favorite summer combinations. I started by switching out the strawberry box cake for a lemon box cake (lemon cake has always been a guilty pleasure of mine). I then incorporated 6 ounces of puréed fresh raspberries and some lemon zest into the ricotta and mascarpone filling, which really added a nice, summery flavor. I kept Valerie’s lemon and mascarpone whipped topping as is, because it just sounded so perfect.

Giving a little extra love to the Love Cake (a.k.a. my center runneth over!)

To bake the cake, I followed the same steps as I would with a traditional Love Cake. The prepared lemon cake batter was poured into the tray first, then topped with the raspberry and lemon flavored ricotta and mascarpone filling, and into the oven it went. Before I go any further, I must explain to you the two steps that I took  that may (or may not) have altered things a bit.

  1. The directions say for you to pour the batters into a 9″ x 13″ pan. Because we wanted to bring only a portion of the dessert to my Mom’s house, I decided to pour the batters into two 8″ x 8″ pans, taking one with us and leaving the other at home.
  2. As I mentioned, I decided to add 6 ounces of fresh raspberry purée to the ricotta and mascarpone…which, in turn, is adding an additional 6 ounces of liquid to the recipe.

How did these two steps possibly alter the recipe, you ask?  The direction for the original recipe calls for you to bake the cake for 50-60 minutes, or until the entire cake is set and a skewer piercing comes out clean. After a good 60 minutes in the oven, the centers of both 8″ x 8″ pans were still very loose. My first thought was that splitting the pans wasn’t a good idea. Then I thought that adding the additional 6 ounces of liquid to the mix could have been the culprit. Both suggestions are feasable. But as I went back to the original recipe to see if any steps were missed, I noticed that some of the reviews had the same complaint. Their centers had also runneth over! Now I’m not blaming Valerie for this, as I am a fan of both her cooking show and her recipes, and the cake does contain a fair amount of wet ingredients. Also, not everyone’s oven may be calibrated exactly the same. Really, I just don’t want to upset Valerie!

To ensure that the center would finish baking without having the already baked outer portions burn to a crisp, I removed both pans from the oven, covered the outer edges with aluminum foil so that only the soft center was exposed, and popped them back into the oven for an additional half hour. Success!!!

Long story short, a little extra love may be needed for this recipe…but oh, it’s worth it!


Raspberry Lemon Love Cake

Adapted from Valerie Bertinelli’s Strawberry Lemon Love Cake

Preheat the oven to 350 degrees. Spray a 9-by-13-inch baking pan (or two 8″ x 8″ baking pans) with cooking spray.

Prepare the cake batter according to the package directions and pour it into the prepared pan(s). Set aside.

Combine the ricotta, sugar, vanilla, eggs and 4 ounces (1/2 cup) of the mascarpone in the bowl of a stand mixer fitted with a paddle attachment. Beat on medium speed until smooth, scraping down the sides of the bowl with a rubber spatula as needed. Fold in the puréed raspberries and lemon zest. Gently scoop the filling onto the cake batter, covering it completely.

Bake until a skewer inserted in the center of the cake comes out clean and the lemon cake layer has risen to the top, 50 to 60 minutes.

*NOTE – if the center of the cake is not fully set after 60 minutes, remove the pan(s) from the oven and  cover the outer edges with aluminum foil. Return the pan(s) to the oven for an additional 20-30 minutes, or until the center is fully set. 

Cool completely on a rack.

Beat the remaining 12 ounces mascarpone in a medium bowl with an electric mixer on medium speed until smooth. Gradually add the milk, beating until smooth. Add the pudding mix and beat until smooth. Let stand until thickened, about 5 minutes. Spread the frosting over the cooled cake(s).

Refrigerate until ready to serve. You can top the cakes with additional raspberries and lemon zest to really impress!

Share

Ricotta and Rice with Ham and Asparagus

April 15, 2015 Entrees, Menu 1 Comment

As I was enjoying my last few bites of the Easter ham and rice pies last week, I came to the sad yet expected realization that it will be another year before I get to savor the seasonal treats. And as usual, I always say to myself that it’s a shame that we can’t celebrate and enjoy these dishes more than once a year. Of course if we did, they wouldn’t quite taste so special. But this did get me thinking on how I could spin a variation of these annual treats into a new dish that could be enjoyed all year round. But how exactly would I do this? Thanks to celebrity chef Nadia G of Bitchin’ Kitchen, I found my answer.

In a recent episode of her eclectic cooking show, Nadia G put together a dish that she called Riso con la Ricotta, which was a decadent combination of white rice, ricotta cheese, pancetta, Vidalia onion, sweet peas and pecorino cheese. Everything abut the dish screamed ‘hearty’ and ‘stick to your ribs’. I gave the recipe a try, and it was everything that I imagined it to be. It was good. REALLY good! It also included two of the key ingredients in my Easter rice pie…ricotta and, of course, white rice.

I decided to use Nadia G’s recipe as a starting point, and build up the key ingredients to make a dish that was similar to the Easter pies. I substituted the pancetta with cubed ham (which is of course the star ingredient in the ham pie), replaced the peas with asparagus (the peas would have worked well, but asparagus is always on our family’s table for Easter dinner), added some lemon juice and zest (which give the citrus flavor to the rice pie) and a bit of fresh parsley. After seasoning the dish with a little salt and pepper to taste, the mission was complete. I had created a hearty and filling dish that had the taste and character of the traditional Easter pies, but could be enjoyed pretty much any time of the year!

You can find Nadia G’s version by clicking here. I suggest that you try both versions. Again, her’s was outstanding. But for a lighter, more spring-like taste, I’m sure you’ll enjoy my modified version. And if Nadia G happens to come across this post…reach out me at info@domskitchen.com. I’d love to spend a day comparing notes in the Bitchin’ Kitchen!!!

Ricotta and Rice with Ham and Asparagus
Inspired by Nadia G’s Riso con la Ricotta

1 cup (1-inch) sliced asparagus (about 1/2 pound)
1 cup white rice
1/2 cup ricotta cheese
1 8-oz boneless cooked ham steak, cut into 1-inch cubes
Sea salt
Freshly ground pepper
1/4 cup pecorino cheese, finely grated
2 tbspn fresh chopped parsley
zest plus juice of 1 lemon

Cook the asparagus in boiling water 3 minutes or until crisp-tender. Drain and set aside.

Put the rice in a pot with 2 cups water. Bring to a boil and cook until done, 15 to 20 minutes.

Transfer the rice to a large mixing bowl and stir in the asparagus and ham. Stir in the ricotta cheese and pecorino cheese, then add the lemon juice and zest, parsley and salt and pepper to taste.

Serve and enjoy!

ricotta rice


Share

Recent Comments

Archives

powered by
Socialbar