Home » Dessert » Recent Articles:

Grilled S’mores Sandwiches

June 22, 2012 Dessert, Menu No Comments

Now that we are officially into the summer season, and the warm temperatures are quickly kicking in, it’s hard to not think about food that is prepared outdoors on a grill. For this post, my daughter Julianna and I will show you how to grill up one of our favorite summer desserts….grilled s’mores sandwiches! This is a very quick and easy alternative to the popular autumn fire roasted treat, using the same three classic ingredients (chocolate, marshmallows and graham crackers).

Instead of the traditional cooking method of roasting the marshmallows on a stick over an open fire, we are first going to stack all of the ingredients as a sandwich: one piece of chocolate and one marshmallow, sandwiched between two graham crackers. Next, you’ll want to wrap the sandwiches in aluminum foil, so they look like little tin bricks.

All that’s left is to carefully place the wrapped sandwiches on a heated grill for about 3 minutes. Carefully remove the wrapped sandwiches, and let them sit for a minute. Then remove the foil, being careful not to burn yourself with the melted marshmallow or chocolate. You’ll then have the gooiest, tastiest grilled dessert sandwich imaginable.

This works well on either a gas or charcoal grill. You can also do this in the oven any time of the year!

Share

Mothers Day Desserts!

May 11, 2012 Dessert, Menu No Comments


Mothers Day is here again! It’s that beautiful time of year when we honor the ladies in our lives who proudly carry the title of MOM to their names. It’s also probably one of the busiest days of the year to got out to eat. Understandably, there are many fellas out there who prefer a nice meal at a restaurant for the ladies, as opposed to giving a home cooked meal a shot. And that’s perfectly fine. The key is to make sure that the Moms get the day off, one way or another, right? But even if you aren’t the most skilled person in the kitchen, there are still a few ways that you can impress the ladies at the table, specifically for dessert. I’ll sum it up for you in two simple words: Pound Cake.

Now I am not saying that you have to attempt making a home-made pound cake (although that would be one helluva nice surprise). Instead, by using a store bought pound cake as the back bone for a simple dessert, you will be sure to please. Below are a few suggestions on quick desserts using pound cake.

POUND CAKE WITH FRESH BERRIES AND CREAM
 one is very simple and quick. Simply place a slice of of pound cake on a dish, spray some whipped cream, top with fresh cut berries. If you want to get fancy, you can add more whipped cream and some chocolate drizzle to the plate for decoration. You can also get the kids involved with plating this dessert. My kids love any opportunity to spray whipped cream. Having the chance to actually assemble a dessert for Mommy is both fun and memorable for them!

POUND CAKE WITH ICE CREAM AND CARAMEL DRIZZLE
Same basic idea as the fresh berries and whipped cream, except you place a nice scoop of ice cream on the cake, then top with some whipped cream and a drizzle of caramel sauce (or hot fudge sauce if you prefer). Don’t go too cheap on the ice cream, either. Get yourself a good brand, or even try an exotic fruit gelato. It is Mothers Day, after all!

For the caramel sauce, you don’t have to go too far to add a little extra love. Simply place some caramel sauce from a bottle or jar into a microwave-safe bowl, heat for 15 seconds and drizzle with a spoon. For a little extra loving kick, try adding a capful of spiced rum before heating. Stir it in and you’re good to go! Just make sure to leave the rum caramel sauce out of reach from the kids!!!

RICOTTA FILLED POUND CAKE WITH NUTELLA ICING
This trick came to me from my friend, Jessica, who is not only a great Mom herself, but also a lover of all things ricotta. She sent this idea to me a few months back, when I wrote about making your own ricotta. Of course, you don’t have to make your own for this. But if you are ambitious, give the home made recipe a shot.

You take a whole poundcake and slice it length-wise (as if your were slicing open a sandwich roll). You can slice it once or twice, depending on how many layers you want to make. Spread thee ricotta filling* in between each layer, then reassemble the pound cake. Ice the cake with Nutella..and enjoy every bite!

*Ricotta Filling
This is a basic ricotta filling that is used for cannoli. You can either use store bought, or you can make your own ricotta.

1lb ricotta
1/2 cup powdered sugar
1/4 tspn vanilla extract

Drain excess water from ricotta, then place into a bowl. Mix with sugar and vanilla. YOu can also add chocolate chips or dried fruit to the mixture if you wish.


For more Mothers Day meals, please check out my recipes for:

Apple Cinnamon French Toast 

Asian Pot Stickers


Share

Taralli Dolci di Pasqua (Easter Ring Cookies)

Earlier this week, a good friend of mine had asked me for a recipe for Easter cookies that her Mom would make. I knew exactly what kind of cookies they were based on her description, but had no recipe for them. I reached out to Emma, my guest blogger and keeper of many traditional Italian baking secrets. Sure enough, Emma also knew exactly what I was looking for, and she had the recipe on hand! Thanks, Emma for again taking the time to put together this tremendous cookie recipe. I hope you all enjoy!

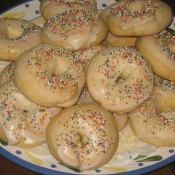
TARALLI DOLCI di PASQUA (EASTER RING COOKIES)
By Emma Caperelli Loerky 

In keeping with Dominic’s traditional Italian Easter food theme, I have decided to share a recipe that is similar to the one my mom always makes during the Easter season. The recipe comes from one of my favorite cookie cookbooks, Cookies Unlimited, by Nick Malgieri. It is a  very easy to make cookie called Easter Ring Cookies or Taralli Dolci di Pasqua. Fancy tools are not required to make them because the dough is mixed by hand, cut into 16 pieces (or, if you prefer smaller cookies, you can divide the dough into up to as many as 40 pieces), rolled between your hands to form a rope, at which point the ends are pinched together to form a circle. After baking and cooling, the cookies are then dipped into a glaze and sprinkled with multicolored nonpareils.

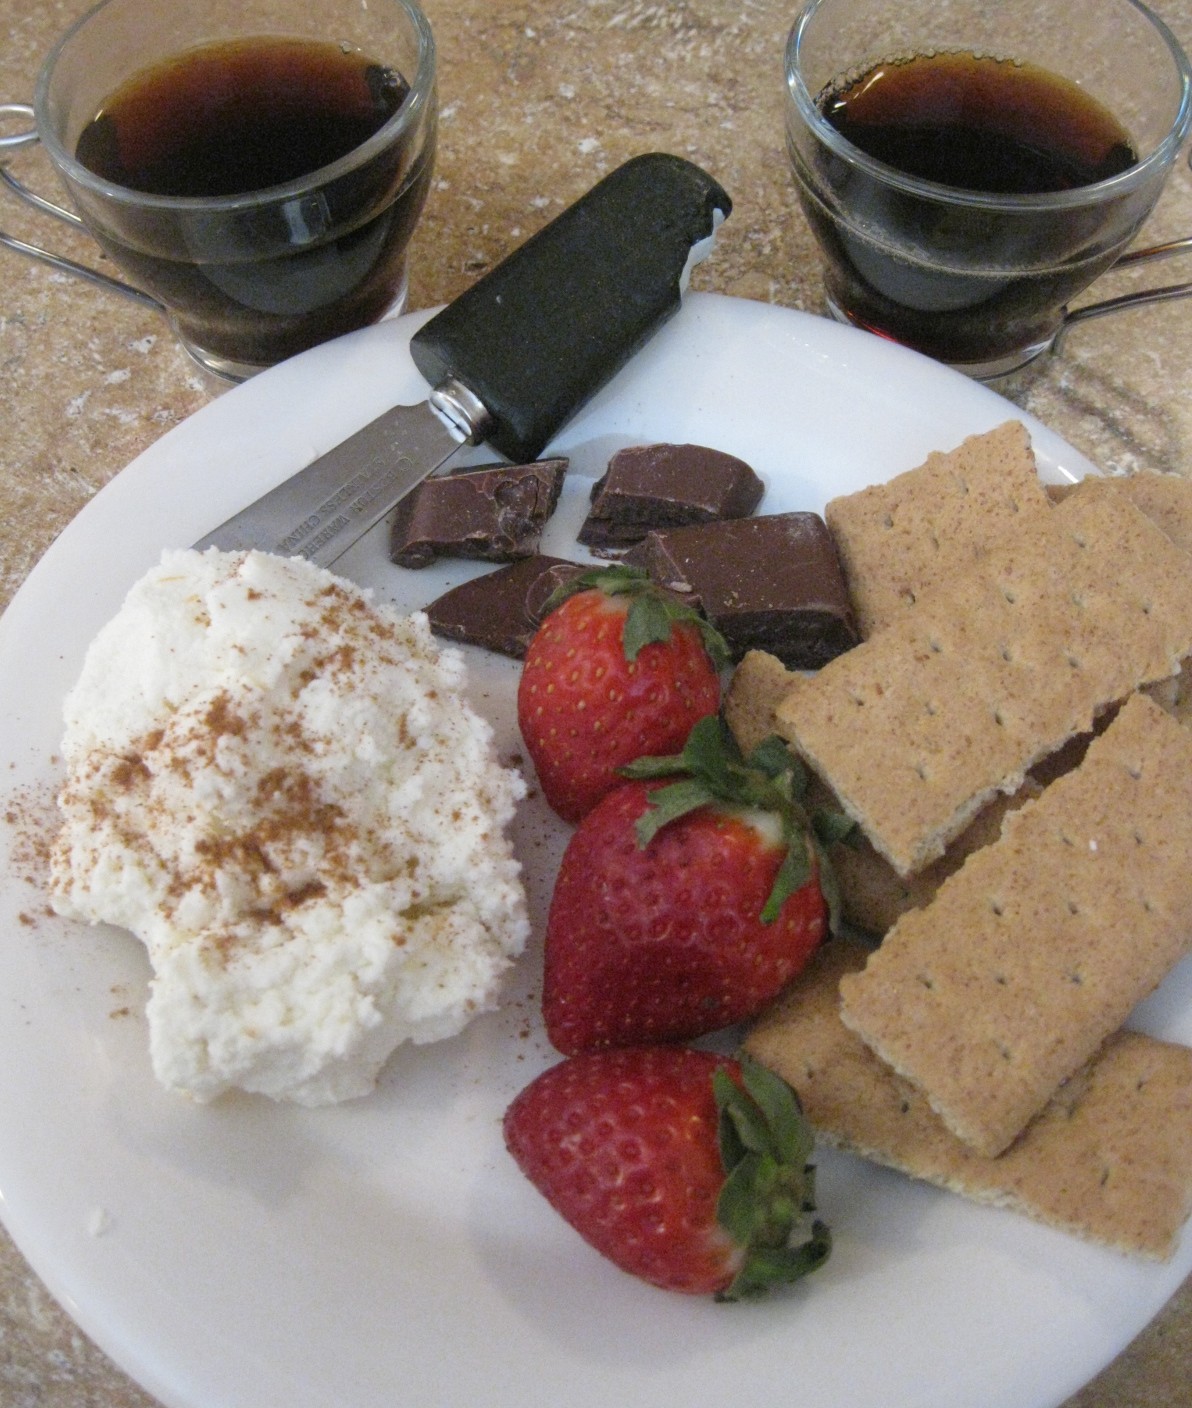
This is a mildly sweet cookie and is meant to be eaten with a cup of coffee or tea (or, as my son prefers to eat them, with a nice, cold glass of milk). These cookies stand up to dunking well, and, in my opinion, that is how they are best eaten.

A few things to make note of when making this cookie:

If you divide the dough into smaller pieces, cooking time will most likely be cut in half. In my oven, I found that the cookies were finished after about 25 minutes, so be sure to check the cookies often during the last 5 – 10 minutes of baking time. And, as with all cookies, halfway through baking I switched the baking sheets from top to bottom and also rotated the pans to ensure even baking. The cookies are done once they turn a light golden brown color.

Also, the icing sets VERY quickly, so make sure you have your nonpareils ready because you will need to sprinkle each individual cookie immediately after dipping it in the icing or the nonpareils will not stick. Don’t say I didn’t warn you. And don’t skimp on the icing, it brings a lot of the sweetness to the cookie. I like to dunk the cookie in the glaze a few times just to make sure the cookie is sufficiently iced.

Which brings me to my next tip – I usually have just enough icing for my cookies without any leftovers to spare. It could be because of my thoroughly dunking each cookie in the glaze several times, but you may want to double it just to be safe. And because the glaze sets so quickly, you will most definitely need to reheat it in between icing the cookies. I found it easier to keep it warm on low heat over the stove, but, should you choose to do this, be careful not to let it burn, or to get it on your skin. I learned the hard way that the icing can get very hot.

Lastly, these cookies spread quite a bit during baking so you don’t want to overcrowd them on the cookie sheet. Depending on the size of your pan, I recommend no more than 6 cookies per cookie sheet for the large cookies. If you choose to make your cookies smaller, leave at least 2 inches between each cookie to allow room for them to spread.

Enjoy and Happy Easter!

Easter Ring Cookies
From Cookies Unlimited by Nick Malgieri

Cookie Dough Ingredients:
5 1/2 cups all-purpose flour
1 1/2 tablespoons baking powder
pinch of salt
6 room temperature eggs
1 cup granulated sugar
12 tablespoons (1 1/2 sticks) unsalted butter, melted
1 1/2 tablespoons vanilla extract

Icing Ingredients:
3 cups confectioners’ sugar
4 tablespoons water
1 tablespoon lemon juice
1 teaspoon vanilla extract
Multicolored nonpareils

Instructions 

For the dough:
Preheat oven to 350 degrees.

In a medium bowl, whisk together flour, salt and baking powder. Break eggs into a large bowl and whisk until broken. Whisk in the sugar in a stream followed by the melted butter then the vanilla, whisking smooth after the addition of each ingredient. Using a rubber spatula, fold the flour mixture into the wet ingredients. Turn the dough onto a lightly floured surface and knead lightly.  Divide the dough into 16 equal pieces (or up to 40 if you prefer smaller cookies). Using your palms, roll each piece of dough into an 8 inch rope. Pinch the ends of the rope together to form a circle. Place the dough on parchment lined cookie sheets at least 2 inches apart. Bake for about 30 minutes, or until puffed and golden, rotating the pans about halfway through baking. Transfer cookies to a wire rack and cool completely before glazing.

For the glaze:
Combine all icing ingredients in a saucepan and heat on low until the mixture is lukewarm, stirring often. Hold one of the cooled cookies by the bottom and dip the top of the cookie into the glaze, letting the excess icing drip back into the pan. Immediately sprinkle with the nonpareils, and place on a wire rack to let the icing set.

Share

Fresh Ricotta!

February 11, 2012 Dessert, Menu 1 Comment

Of the few guilty pleasures that I have in life, cheese would have to be one of my favorites. And the one cheese that I most enjoy to indulge in is ricotta. Whether its used as a filling in a pasta dish or a rolantini, or as a key ingredient in an Easter cheese pie or cannoli, there is no denying that sweet, creamy ricotta is decadent, and sinfully delicious. Imagine my surprise when I found out how easy it is to make your own, homemade ricotta…and you don’t even need to milk you own cow to do so!

Unlike traditional cheese making, ricotta is the product of leftover milk from the production of other cheeses. Actually meaning “recooked”, ricotta comes together when you produce curds from heating and stirring up the leftover milk whey along with an acidic liquid (usually vinegar or lemon juice), then strained through cheesecloth and chilled.

Even if you are not producing your own cheeses at home, you can still make your own ricotta by following this simple recipe below that I found on Epicurious.com. All you need is whole milk, heavy cream, lemon juice, salt, cheese cloth and a few hours, and you will have the most delicious, creamy ricotta ever imagined. It can be used in any recipe that calls for ricotta. I’ve already made a few batches for family and friends, and they all agreed that the fresh ricotta is amazing. Even my friend’s 2 year old daughter, who is a ricotta connoisseur, gave my ricotta a thumbs-up. The only trick to using homemade is that because there are no preservatives, there is not much of a shelf life…only about 3-4 days to be exact. So you want to make sure that you have a purpose in mind when making homemade ricotta.

HOMEMADE RICOTTA
makes about 1 lb fresh ricotta
2 quarts whole milk
1 cup heavy cream
1/2 tspn salt
4 tbspn lemon juice

In a large pot, slowly bring the milk, cream and salt to a rolling boil over moderate heat. Be sure to stir occasionally to prevent scorching. Add lemon juice, then reduce heat to low and simmer, stirring constantly, until the mixture curdles.

Pour the mixture into a sieve, or colander, lined with cheese cloth and let drain for just a few minutes. Once liquid is drained, cover and chill ricotta. Use within a few days.

Now that I’ve (hopefully) convinced you to give homemade ricotta a try, allow me share a quick and delicious recipe that will make for an unforgettable Valentine’s Day dessert. We’re going to make two ricotta dips, one with almond flavoring and one with nutella. Simply cut up some fresh fruit (strawberries, raspberries, blueberries and bananas work well), plate it with the ricotta, some chocolate pieces and cinnamon graham crackers. Spread a bit of the ricotta onto the cracker, top with sliced fruit or chocolate. Try drizzling the almond flavored ricotta with a little honey and a sprinkle of cinnamon. It’s better than just about any cannoli out there!

ALMOND HONEY RICOTTA 
Start by stirring in 1/2 teaspoon almond extract, 1 teaspoon vanilla extract and 1 tspn confectioner’s sugar into home made ricotta. Adjust measurements according to taste.

 NUTELLA RICOTTA
Stir in 1 tspn nutella into ricotta. Add to cracker, top with fresh fruit. Heaven.

Share

Recent Comments

Archives

powered by
Socialbar